Massive Tips to Fix Attempted Write to Readonly Memory Windows 10/11
Question
“Hi there! I've had my system since forever, but about a month ago, I started to get BSOD crashes. The error I get all the time says ATTEMPTED WRITE TO READONLY MEMORY. I think it is related to the RAM, but I'm not entirely sure, so I've uploaded the MEMORY.DMP to be sure if it gets better but no use. I didn't have any minidumps and MSinfo32 as well. I am writing in the hope that someone might help me with this.”
The case you just read is related to the error called attempted write to readonly memory. This error is not common but is most likely to occur. If you are a Windows user and see this problem, then this article is for you. The article will discuss ways to remove the error attempted to write to readonly memory and explain the step-by-step explanation of the methods.
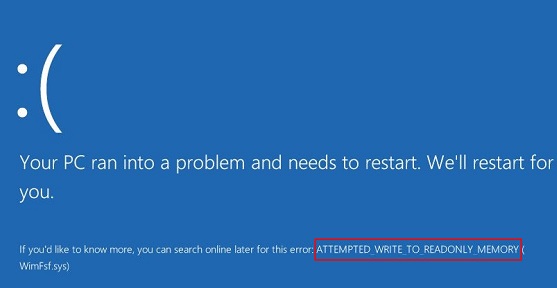
Part 1: What Is "Stop Code Attempted Write to Readonly Memory."
This error is called 0x000000BE and appears on a blue screen of death. When you get redirected to the stop error code "Attempted to Write to Read-Only Memory" at times, a BSOD (Blue Screen of Death) error usually occurs on Windows 7/8/10. When any of the device drivers try to write to a read-only memory segment, you end up with this error "Attempted Write to Read-Only Memory" with the code 0x000000BE, as you can see below screenshot.
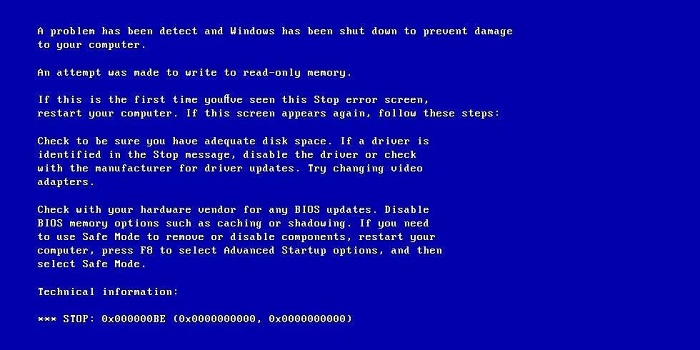
What exactly causes the “Attempted to Write to Read-Only Memory” error? The “Attempted to Write to Read-Only Memory” error can emerge due to multiple reasons of device driver issues.
One of the primary reasons or causes of the attempted Complications in the device driver is mainly dangerous and causes an instant to write to read only memory error. The main reasons causing the error 0x000000BE are:
- The device driver is faulty or corrupt
- Discordant software firmware
- The system services have gone corrupt
Operating system services: an un-updated operating system or any corrupted operating system problems on your Windows can bring the 0x000000BE error.
Firmware or Malware: Recently updated firmware or malware is another liable reason for getting a read-only memory error. It means if Windows file system falls under any virus attack. It will end up with an error message.
Part 2: Tips to Fix Attempted Write to Readonly Memory Windows 11/10/8/7
Before attempt to write to read only memory solutions, the user must boot the PC into safe mode. The reason is the moment you get the stop code, your PC will fail to boot to the desktop.
Tip 1: Run Windows Memory Diagnostic
The first fix for attempt to write to read only memory or 0x000000BE error is to run a memory check.
Open the Run utility OR Press Win + R
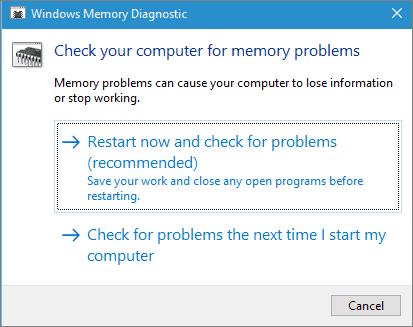
Type mdsched.exe.
Press Enter to open the Windows Memory Diagnostic Tool.
The option "Restart now and check for problems" appears before you, and it is recommended to select it.
notes
It will immediately detect the attempted_write_to_readonly_memory windows 10 trouble in the memory. You should take action to fix issues based on the diagnosis.

Tip 2: Update or Reinstall Drivers in Windows
Attempted_write_to_readonly_memory issues arise when the device drivers are not compatible with the Windows operating system. Outdated or corrupted drivers are also responsible for the same problem. You can choose back to back three options of updating, rolling back, or uninstalling drivers on your computer.
To Update Drivers Follow The Steps:
Click on the start button and choose Device Manager.
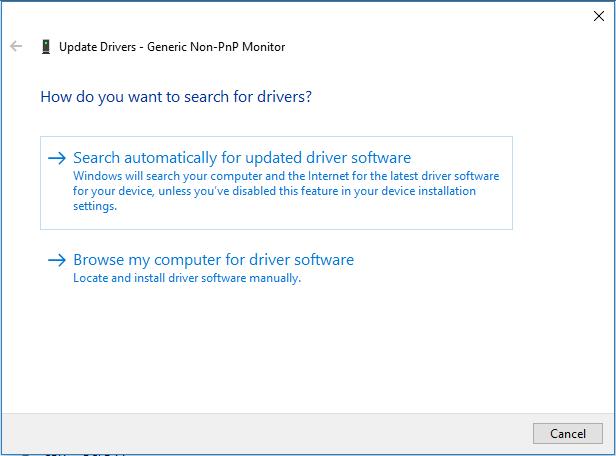
Select each driver by clicking right and choosing Update Driver.
For the safe side, click Search automatically for updated driver software. It will lead you to the manufacturer’s website to download and install a driver for your PC.

To Rollback or Uninstall Drivers Follow The Steps:
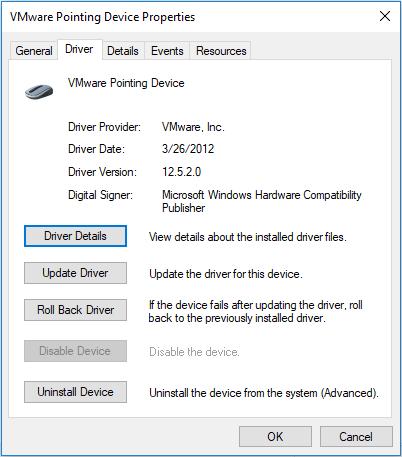
Go to Device Manager.
Double-click each driver one by one; you will see options.
Select Roll Back Driver or Uninstall Device, whatever seems feasible.
Follow the on-screen instructions to finish your operations.

Tip 3: Uninstall Recently Installed Software
If the error occurs when you recently installed new software. It means the installed software is creating a problem. The only method is to uninstall the program and check if it is the cause behind the stop code attempted to write to read only memory.
Follow the steps:
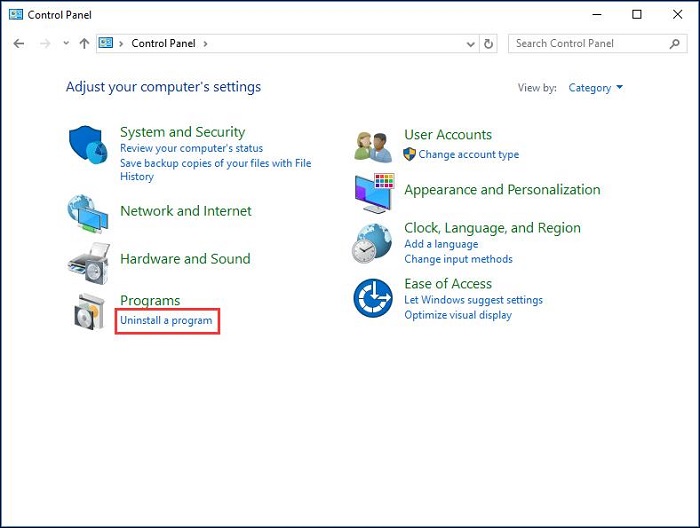
Open Control Panel.
Select the software.
Click Uninstall a program.

Tip 4: Check for Windows Update
Updating Windows is a reasonable key to fix the stop code attempted write to readonly memory.
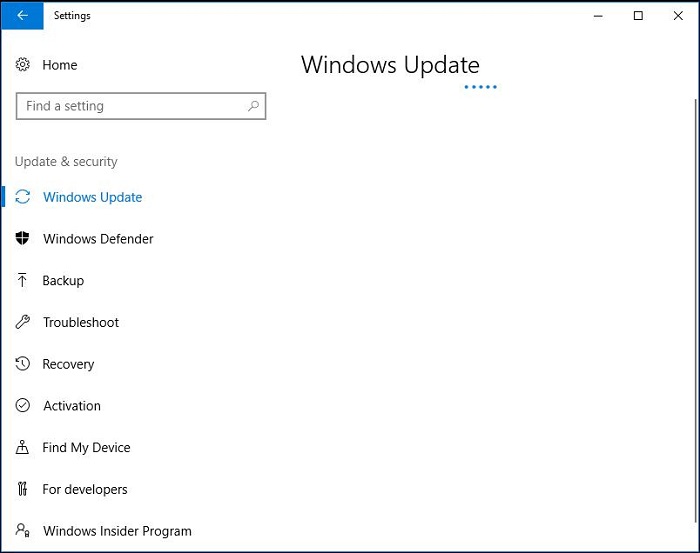
Check for Window Updates.
If it is not updated, boot the PC to the desktop update Windows using blue screen attempted write to readonly memory.
Restart your PC.

Tip 5: Blue Screen Troubleshooter
The last resort to resolve attempted to write readonly memory error is to use the Blue Screen Troubleshooter option. Ensure the Windows 10 is on in safe mode.
Go to Advanced Startup Settings and enter safe mode.
Restart the PC.
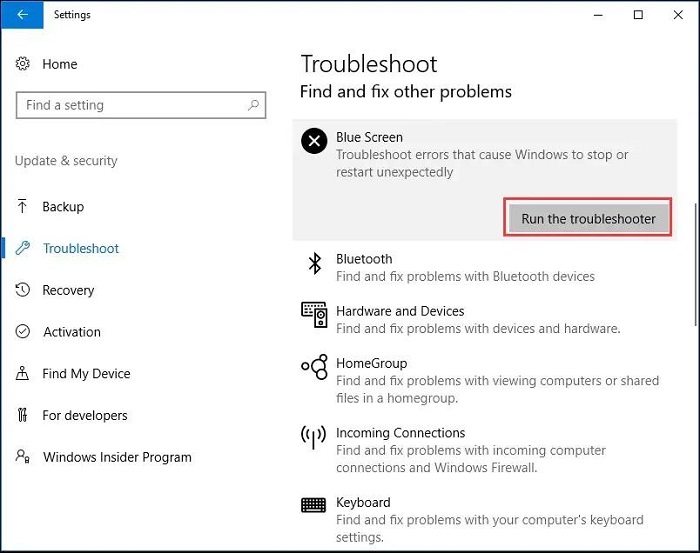
Go to settings and open Update & security.
Select Troubleshoot and then blue screen.
Run the troubleshooter.

Part 3: How to Recover Data from Windows with "Attempted Write to Readonly Memory" Error?
If you are trying the above method, be sure to prepare a backup of your data to avoid errors that could cause data loss. Also, because of the error "attempted write to readonly memory", you may be at risk of losing valuable data. If you are really experiencing this risk and are deeply troubled by data loss, Tenorshare 4DDiG is a good choice. It can help you get back your lost data quickly and effectively. Besides, it has many valuable features that help in data recovery, and these useful features make 4DDiG stand out among other recovery tools. Download Tenorshare 4DDiG and get back your lost data.
To make full use of 4DDiG data recovery software to ensure your successful data recovery, please follow these steps.
- Erased Files Recovery
- Organized Drive Recovery
- Lost Partition Recovery
- External Device Recovery
- Crashed Computer Recovery
- Raw File Recovery
Trustpilot Rating 4.3
100% Secure
-
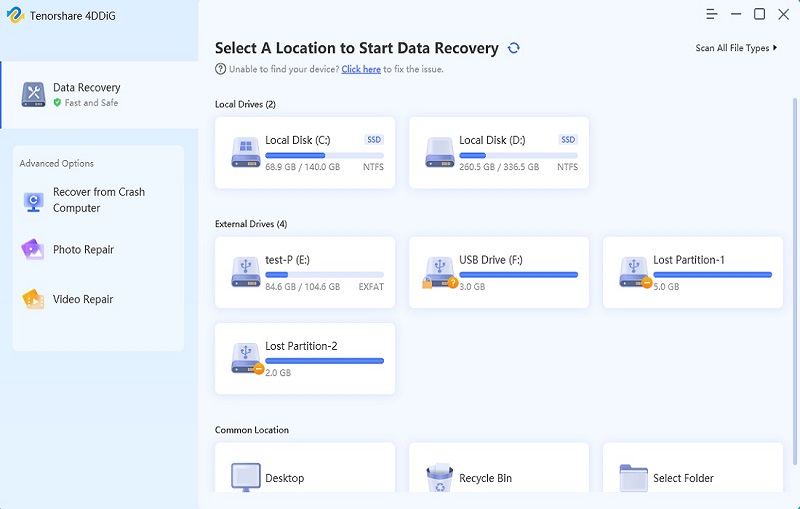
Open the Tenorshare 4DDiG data recovery software and on the homepage, select a location from a list of options like Devices and Drives, Partitions, and Advanced Repair. Then, select the file types that are missing and click "Start" to scan the folder/location.

-
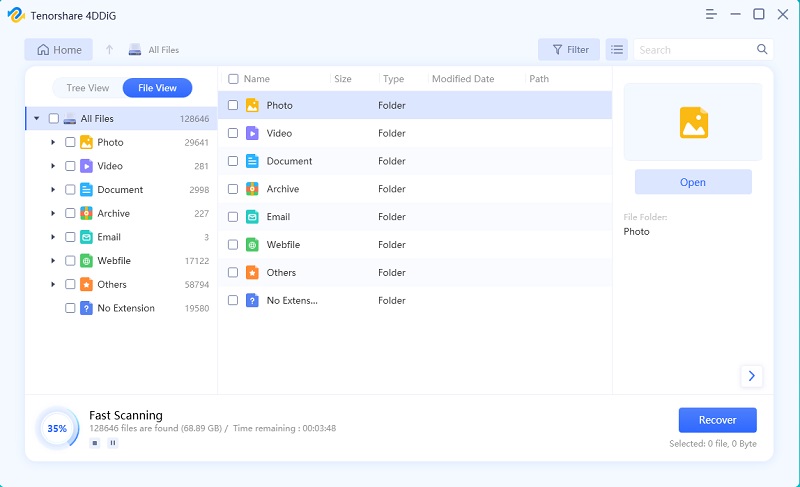
Start a scan to fully find missing files, and you can choose to pause at any time during the process.
![scanning local disk]()
-
After the scan is complete, you can preview the files and select the data you need to recover.

Summary
In the hope, you get all your answers regarding attempted to write read only memory, here is another remedy for recovering the lost data in the process. It is a fact that all the fixes given above have equal chances of either rescuing the situation or crashing the system. This recovery tool is for the second option when you want your photos, files, documents, videos, and others back. The Tenorshare 4DDiG is the most recent and technically packed for the reliable, safe, and complete recovery of the data lost in the process.
💡 Summarize with AI:
You May Also Like
- Home >>
- Windows Fix >>
- Massive Tips to Fix Attempted Write to Readonly Memory Windows 10/11

 ChatGPT
 Perplexity
 Google AI Mode
 Grok
Grok


