Quick Fix for Windows Can't Communicate with The Device or Resource
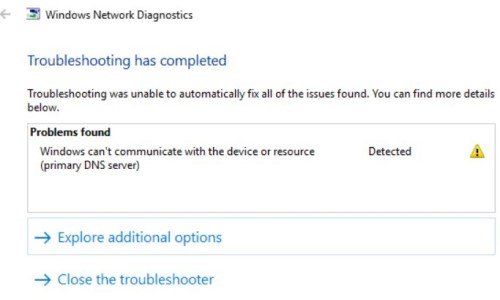
Are you unable to access your internet because of the “ Windows can't communicate with the device or resource (Primary DNS Server) ” error? Let’s be truthful. The internet is a vital part of our daily life. So it’s not wrong to say that our WiFi is equally important to us as eating and sleeping. But when we are unable to connect to the internet, nothing can be more frustrating. You can diagnose this DNS Server error when you run the Windows Network Diagnostics tool. It is too familiar an error and can happen due to many reasons. So we’ve listed every reason behind the DNS Server error and have also shared solutions to eliminate this issue. Check them out below.
Part 1: Windows Can't Communicate With The Device or Resource Overview
What is Windows Can't Communicate With The Device or Resource Errors
The “Windows can't communicate with the device or resource” error will appear as the result of the Windows Network Diagnostics scan results when you run that tool. The reason behind this issue is the failure of your PC to establish a connection with the Domain Name System (DNS) of the internet. Typically, your PC’s DNS server is provided by your internet service provider. It converts website names into IP addresses, allowing you to browse any website without problems. There is also a secondary DNS server in place in case the primary one fails. However, due to bad PC configuration, there can be issues in establishing a stable connection with the DNS server.
What Causes Windows Can't Communicate With The Device or Resource (Primary DNS Server)
Several reasons can be behind the “Windows can't communicate with the device or resource (Primary DNS Server)” issue. However, the primary ones are wrong PC settings, outdated network drivers, and internet connection issues with your PC’s DNS server. The DNS Server error can also occur if you have a restricted internet connection and you’ve tinkered with its settings intentionally or accidentally.
As a precautionary measure, it’s always wise to have a data recovery plan in place. Even if the DNS error is resolved, unforeseen circumstances can lead to data loss. By utilizing 4DDiG professional data recovery software , you can safeguard your important files and folders from potential disasters.
Bonus Tip: How to Recover Data from Windows 11/10/7?
Interruptions in internet connection, such as the above-mentioned DNS error, "windows can't communicate with the device or resource" can also cause data loss. A stable internet is necessary for a file download or transfer. Any disruptions will fail to establish a stable connection, leading to file corruption, deletion, or damage. If that has happened to you and you are looking for a solution, try the Tenorshare 4DDiG data recovery software . It can recover data quickly regardless of if you are using Windows 7, 10, or 11. Here’s what 4DDiG has to offer:
- All-in-one file repair and recovery solution for hidden , formatted, corrupt, damaged, or deleted files.
- It can recover above 2000+ file types.
- It can restore videos, documents, audio, and images to their original state.
- Uses MD5 Message-Digest Algorithm to locate deeply hidden files and restore them to their original position.
- Retrieves data from all kinds of storage devices such as hard drives, SD cards, USBs, and Fujifilm cameras .
- Supports data recovery from all versions of Windows, including 7,10, and 11.
- Extract files lost or damaged due to malware attacks, formatted disk partitions, and crashed systems.
You can recover your Windows data using the 4DDiG tool in three simple steps as follows:
Trustpilot Rating 4.3
100% Secure
-
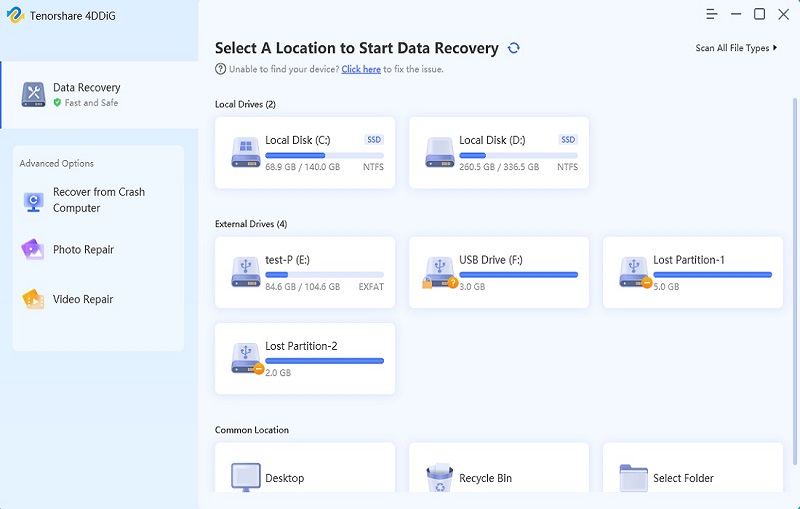
Download, install and launch the 4DDiG tool on your PC. From the interface, choose the drive where you’ve lost data and hit “Start.”

-
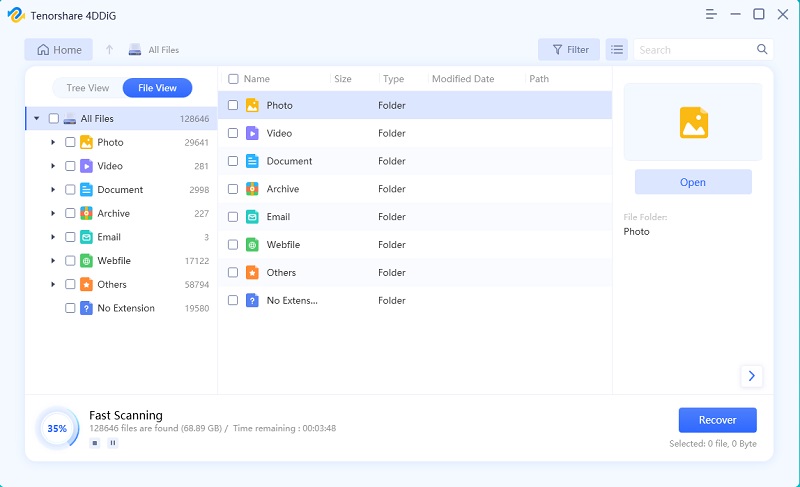
The scanning will find your target files and take some time to finish. But you can also pause the scan to check target files and their details according to their categories.

-
Once the scanning finishes, you’ll get a list of the results. Select the files you want to retrieve and hit “Recover.”

-
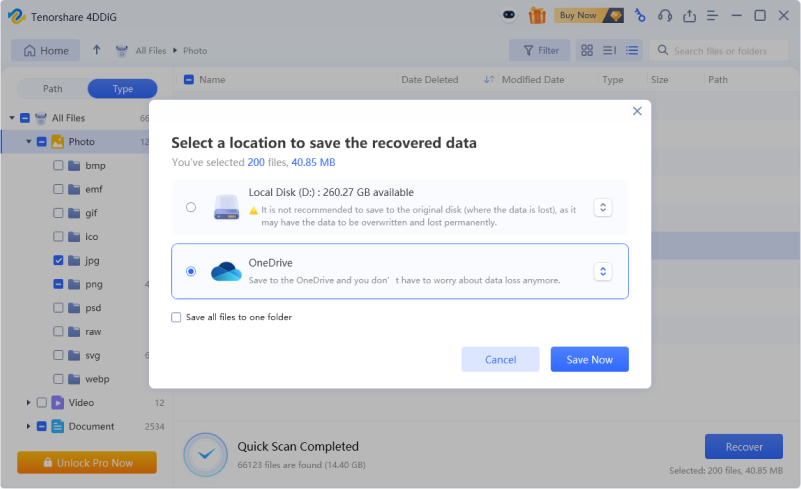
Just choose a location, local disk or cloud to save the recovered data.
 Free Download
Trustpilot Rating 4.3
Free Download100% Secure
Part 2: How to Fix Windows Can't Communicate With The Device or Resource (Primary DNS Server)
Here’s how to fix “Windows can't communicate with the device or resource (Primary DNS Server)” issue using nine reliable methods:
Fix 1: Restart the Modem and Router
Many times the “Windows can't communicate with the device or resource Primary DNS Server” error occurs due to a wrong configuration of your internet router. Or it may happen due to a recent change in the settings. Therefore, restart your router and check if the DNS Server error has been resolved. If not, reset your router manually.
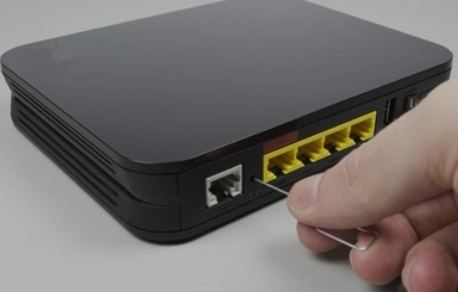
At the back of your router, look for a “reset” button. Many routers don’t have that button due to a user accidentally resetting the router to its factory configuration.
If you find a hole at the back of the router that says “reset,” use a pin to press inwards. This will reset your router.

Now restart your PC and connect it to the internet to check whether the DNS Server error has been resolved.
Fix 2: Keep Your Drivers Up-to-date
“Windows can't communicate with the device or resource (Primary DNS Server) Win 7 or 10” error may also happen if your network drivers are outdated. To resolve this issue, manually update the drivers.
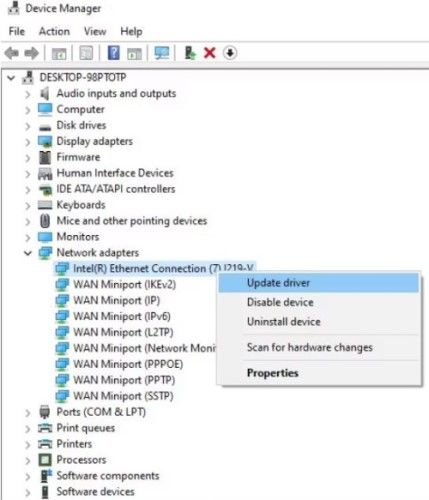
Press down the “Windows and X” keys. A “Device Manager” window will open. Select “Network adapters.”
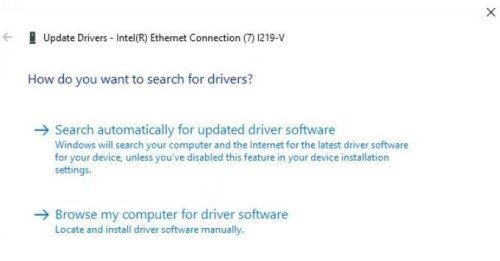
Choose your network device from the drop-down list. Right-click and hit “Update driver.”

Windows will give you an option to “Search automatically for updated driver software.” Choose that option and if there are new updates, install them.

Fix 3: Clear DNS Cache
If your DNS Cache is corrupted, it can also be why the Windows can't communicate with the device or resource.” issue occurred. To clean the DNS cache, follow the steps below:
Open the “Command Prompt” from the search bar. “Run it as Administrator.”
Type the following code: ipconfig /flushdns and hit “Enter”:
A “Successfully flushed the DNS Resolver Cache” message will appear when the DNS cache is cleared.
Fix 4: Run Command Prompt to Reset Connection Settings
If the previous solution fails to achieve the required result, there is another method that is the same as mentioned in “Fix 3.” But it is more advanced.
Open the “Command Prompt” from the search bar. “Run it as Administrator.”
Type the following code and hit “Enter” after each command:
Your DNS Cache plus any issue in your system’s configuration causing the DNS Server error will be cleared.
Fix 5: Change Both IPV4 and IPV6 Settings
If you’ve accidentally changed WiFi settings, it can block Windows from establishing a connection with the DNS Server. You might have a static IP address causing network issues. Therefore changing the settings of IPv4 and IPv6 protocols may resolve the DNS Server error. Here’s how to do that:
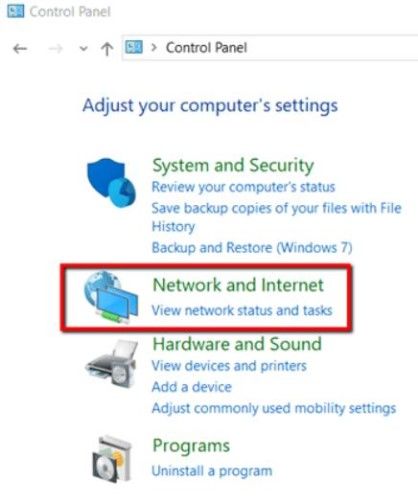
Open the “Control Panel.” Choose “Network and Internet.”

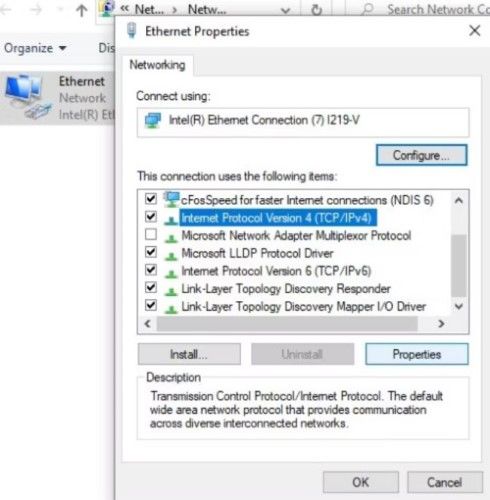
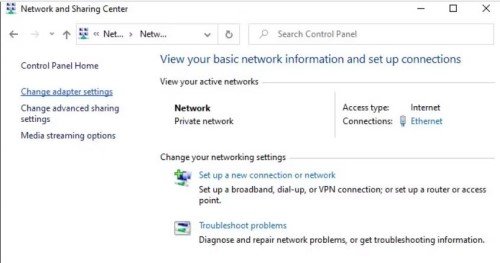
Select “Change adapter settings.” And then right-click to choose your connection and select “Properties.” Now double-click on the “IPv4” option.

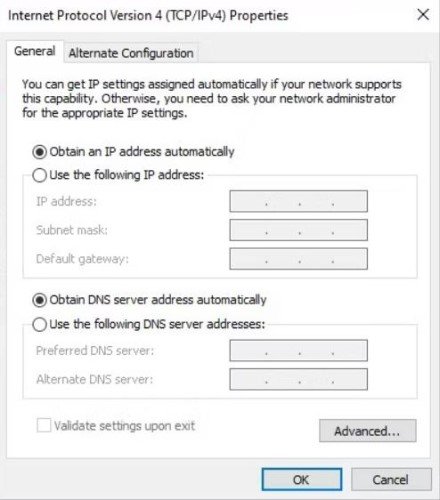
In the “General” menu, fill the blanks next to the “Obtain an IP address automatically” and “Obtain DNS Server address automatically.” Hit “OK.”

Now repeat the same steps with the IPv6 option as well.
Fix 6: Run NetShell Utility to Reset TCP/IP
Corrupt TCP/IP files can also cause a “Windows can't communicate with the device or resource (Primary DNS Server) Win 10 or 7” error. Luckily, Microsoft offers a solution to this problem.
Download the “NetShell” utility from the official Microsoft page. You can download it on another PC/laptop and transfer it to the PC with the DNS issue.
The download page will state that the tool is incompatible with Win 10. Ignore it and still download.
Double-click on the “.diagcab” downloaded file to launch the “NetShell” tool.
Hit “Next” and follow on-screen instructions to reset TCP/IP.
Fix 7: Modified the Hosts File
You can also edit your hosts file to eliminate the DNS Server error. Here’s how you can modify the hosts file:
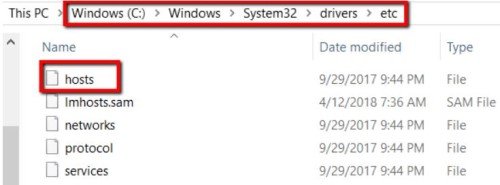
Open “Windows (C:),” choose “Windows,” then “System32 > drivers >, etc.” Locate the “hosts” file. Then use “Notepad” to open the file.

Select and delete everything in the “hosts” file. Choose “All Files” and “Save” the file.
Fix 8: Use Windows Defender to Scan for Malware
If you’ve tried all the above fixes and nothing seems to work, it might be because your system has malware. So use Windows Defender as a “Windows can't communicate with the device or resource” fix. It will remove the malware from your PC. Begin by following the steps below:
Open the “Settings” app. Select “Update and Security.”
Select “Windows Security” from the left pane. Next, choose “Virus & threat protection.”
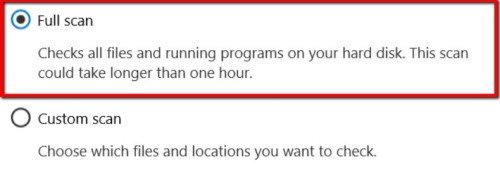
Choose “Run a new advanced scan.” Remember to select “Full scan.”

Hit “Scan now.” After scanning, restart your PC. The DNS Server problem should be resolved by now.
Fix 9: Switch to A Different DNS
An issue in your DNS might be causing the DNS Server error. A probable solution is to change your DNS to Google's Public DNS.
Open the “Control Panel.” And choose “Network and Internet.”
Select “Change adapter settings.” Then choose the network you are using. Right-click and select “Properties.”

Select the “IPv4” option beneath the “Networking” option, and choose “Properties.”
Select “Use the following DNS server addresses” beneath the “General” option.
Type 8.8.8.8 in the box next to the “Preferred DNS server” and hit “OK.”
Bottom Line
Have you ever been hit by the “Windows can't communicate with the device or resource (Primary DNS Server)” issue? If you have, it’s a common error where you cannot use the internet on your PC. That being said, read the fixes mentioned above. They should be able to resolve your DNS Server error. If you find that disruptions in the internet connection have caused file corruption or data loss, we also have a solution for that. Try the Tenorshare 4DDiG data recovery software for recovering deleted, corrupted, hidden, or damaged data from Windows. It doesn’t need an internet connection to run on your PC. Besides, it can instantly retrieve files from all types of storage devices and Windows versions, including 7,10, and 11.
Trustpilot Rating 4.3
100% Secure
💡 Summarize with AI:
You May Also Like
- Home >>
- Windows Fix >>
- Quick Fix for Windows Can't Communicate with The Device or Resource

 ChatGPT
 Perplexity
 Google AI Mode
 Grok
Grok

