How to Fix macOS Can't Repair the Disk
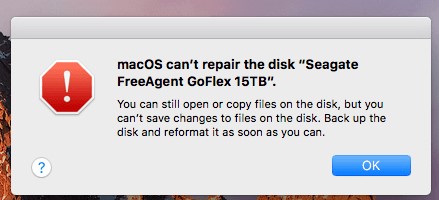
Have you ever received the frustrating "can't repair disk" error message when trying to use Disk Utility to fix an issue with your Mac's hard drive or an external disk? This error occurs when the drive has filesystem corruption beyond what Disk Utility can handle.
While the First Aid feature in Disk Utility can resolve many minor disk problems, some types of corruption or damage are beyond its repair capabilities. When that happens, it's easy to feel helpless about restoring access to your precious data and getting your Mac or drive working again.
The good news is there are several steps you can still take when Disk Utility fails to get the job done. In this article, we'll walk through 3 methods to try when you encounter the "can't repair disk" message, ranging from simpler troubleshooting to advanced recovery options.
We'll also discuss what might cause Disk Utility repairs to fail in the first place, so you can hopefully avoid this situation in the future.
Part 1: Why macOS Can't Repair the Disk?
There are a few key reasons you may get the "can't repair disk" error message when trying to fix drive issues with Disk Utility:
- Corrupted file system: If the file system structure on your Mac hard drive or external drive has become corrupted, First Aid may not be able to properly repair it. This can happen from sudden power loss, drive failure, etc.
- Advanced disk damage: If your drive has significant physical damage or corrupted sectors, the issues may be beyond what First Aid can fix. This tends to happen more with older drives.
- Recovery partitions: The recovery partitions on your Mac's system drive are read-only, so Disk Utility can't make actual repairs if there are problems with them.
Knowing the source of the issue can help guide your next troubleshooting steps when Disk Utility repairs fail. In the next section, we'll cover your options.
Quick Tip: Recover Data when macOS Can't Repair the Disk
When Disk Utility gives you the dreaded "can't repair disk" error, it can feel like your files and data are trapped on a failing drive with no way to access them. Before you panic, know that data recovery is possible with the right software, even with disk problems Disk Utility can't fix. An excellent option specifically for Macs is 4DDiG Mac Data Recovery.
It is a dedicated Mac data recovery application that can rescue lost or deleted files from Macs and external devices after accidents like accidental deletion, system crashes, disk damage, virus attacks, and even when macOS fails to repair disks. It has an intuitive interface that makes data recovery accessible for regular users in just a few clicks.
Reasons to choose 4DDiG Mac Data Recovery include:
- High recovery success rate of photos, documents, videos, emails, and 2000+ other file formats
- Repairs corrupted photos and videos
- Offers quick and deep scan modes to find files
- Preview and filter files before recovery
- Retrieves data from crashed, corrupted, or damaged drives
- No need to disable SIP protection during recovery process
Here are the key steps to use 4DDiG Mac Data Recovery to restore data from a disk that macOS is unable to repair:
Secure
Download
Secure
Download
-
Select a Disk Location
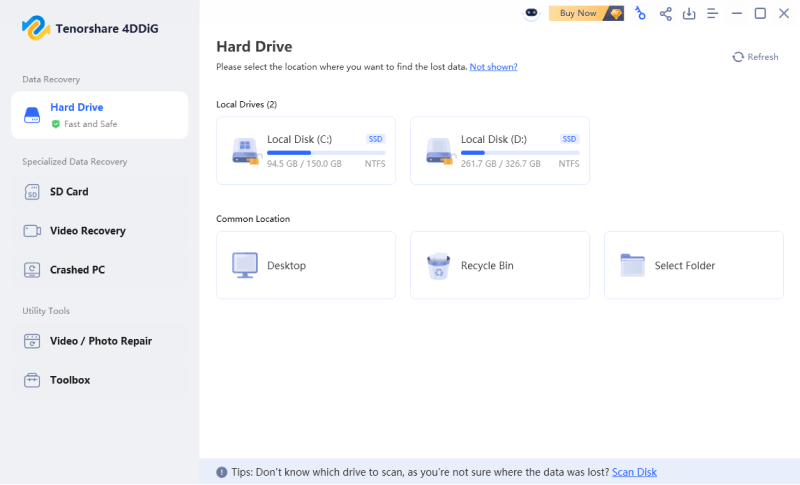
Open 4DDiG Mac Data Recovery and select the problematic drive or partition that is failing to mount or has the "can't repair disk" error in Disk Utility. Click "Scan" to start scanning the disk for lost and deleted files that can still be recovered.
-
Preview and Filter Files
Once the scan finishes, you can preview files found by the software. Filter by file types or use the search function to pinpoint the files you wish to restore. Select the files/folders you need to recover.
-
Recover Files
Choose a different safe storage location like an external hard drive to save the files you want to recover, not the original disk. Then click the "Recover" button to restore your selected files from the damaged/corrupted drive. Check the recovery location to access your rescued data.
Part 3: How to Fix macOS Can't Repair the Disk?
In this section, we'll provide 3 quick fixes to solve the notorious Disk Utility repair fail. Read on to learn simple techniques to salvage your situation, no advanced computer skills required!
Way 1: Restart the Mac and Use First Aid to Repair the Disk
Before trying anything complicated, a simple restart and First Aid retry could get your disk working again. Follow these steps:
- Click the Apple menu and select "Restart" to properly reboot your Mac. When prompted, confirm the restart.
- After the restart completes and you're logged back in, open Disk Utility again. Select the disk or volume that failed to repair previously.
-
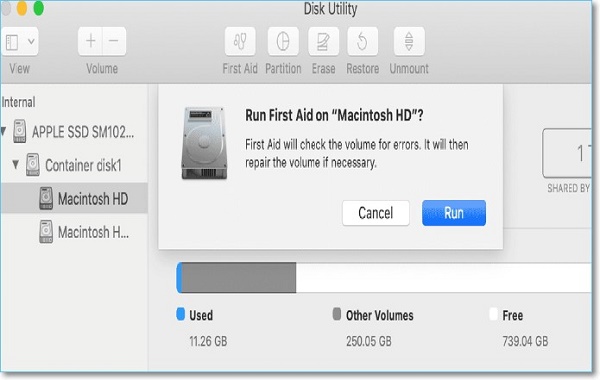
Click "First Aid" at the top of Disk Utility, then click "Run" to begin a new repair attempt.

- Wait for the First Aid scan to finish. If it reports the repairs were successful or that the disk "appears to be OK," your problem should be fixed after resetting components with the reboot.
- Try to access the disk like normal to confirm it's functioning again. If everything works fine now, no further troubleshooting is needed.
Way 2: Use FSCK Command to Fix macOS Can't Repair the Disk
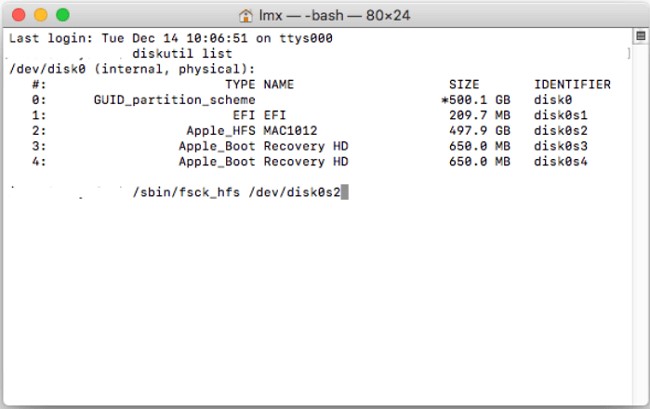
If First Aid repeatedly fails to repair your disk, you can try using the fsck command in Single User mode instead. Here's a step-by-step guide:
- Restart your Mac and enter Single User mode by pressing Command + S on older Macs or Command + R then selecting Utilities > Terminal on M1 models.
-
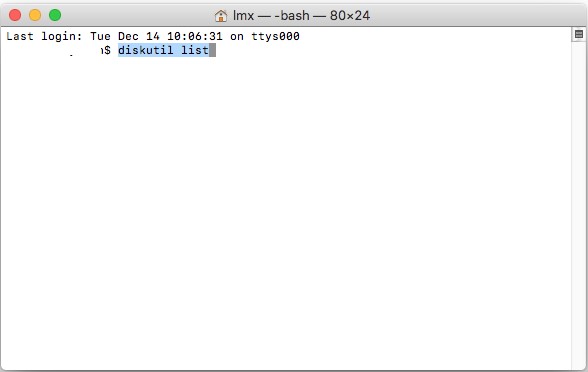
Type "diskutil list" and press enter to view connected disks. Note the disk number of the problematic disk.

-
Type "/sbin/fsck_hfs -fy /dev/diskXsX" replacing "X" with the actual disk and partition numbers. Then press enter to run fsck scan.

- Once the fsck repair process finishes, note if it says "The volume appears to be OK" or "File system was modified" for success.
- Type "reboot" and press enter to restart your Mac normally.
The fsck command checks and repairs file system issues at a deeper level. If you see "volume could not be verified completely," it means fsck also failed though and you'll need to try another advanced fix instead.
Way 3: Back-Up Disk Data and Reformat it
If First Aid and fsck are both unable to repair issues with your Mac disk or external drive, the last resort is backing up your data and reformatting the problematic volume. This wipes the existing file system and replaces it with a new blank one:
-
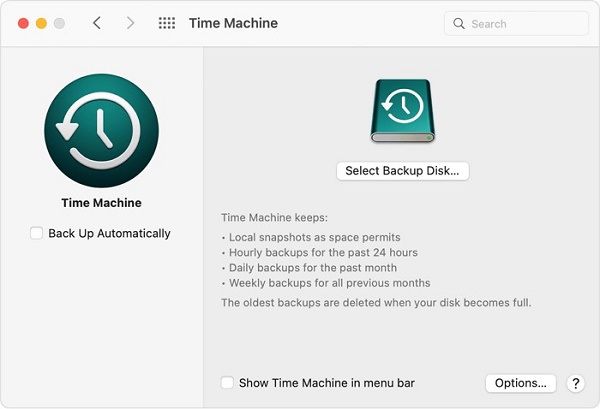
Connect an empty external hard drive that's larger than the data size you need to back up from the damaged drive. Use Time Machine to create a full system backup if it's your Mac's internal drive that needs reformatting.

-
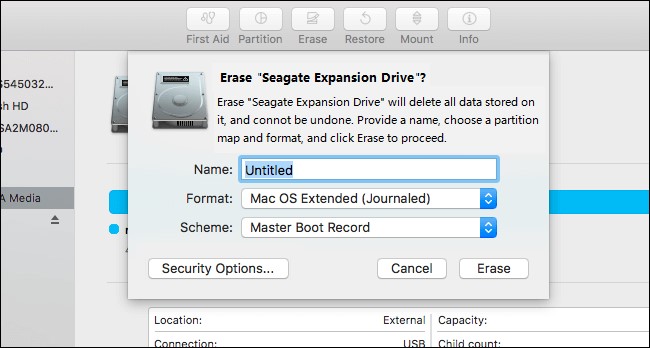
Open Disk Utility, select the drive causing errors, and click "Erase" at the top. Give it a name and select a format (the default is usually fine). Confirm the erase to wipe the disk.

-
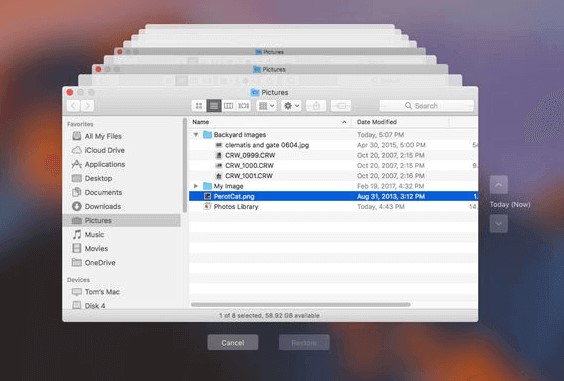
If you have a Time Machine backup, reconnect it after reformatting and go to System Settings > Time Machine to restore everything from your backup.

- For an external drive, use file recovery software like 4DDiG Mac Data Recovery to scan the reformatted drive and extract archived files that were erased.
While extreme, reformatting completely replaces old damaged file structures with new properly formatted ones. Just be absolutely sure to back up data first! Then you can restore personal files after the reformat using Time Machine or data recovery tools. This should fully resolve repair issues in Disk Utility.
Part 4: Frequently Asked Questions
Q: How do I repair my Mac disk in recovery mode?
Ans: You can repair your disk in recovery mode by restarting your Mac, holding Command + R, opening Disk Utility, selecting the disk, clicking First Aid, and running the repair process. This will scan and fix certain disk errors.
Q: How do I fix disk full problem on Mac?
Ans: To fix a full disk, clean out trash, large files and unused apps/iOS backups. You can also move media and documents to external storage, optimize storage settings, and use built-in tools like Storage Management to find and delete large files.
Q: Will repairing a disk on Mac erase data?
Ans: No, using the First Aid tool in Disk Utility just scans for and attempts to repair errors, it does not erase or modify your actual data. However, reformatting or erasing disks will destroy data. Ensure you back up important files before erasing.
Final Thoughts
Experiencing the frustrating "can't repair disk" error means your drive has issues Disk Utility can't fix. In this article, we explored why this happens and outlined various fixes. While data recovery is possible, the best solution is avoiding the problem entirely by regularly backing up and monitoring disk health. We highly recommend software like 4DDiG Mac Data Recovery to instantly create backups and recover lost files when needed. With comprehensive disk verification, timely file backups, and data recovery assurance from reliable tools, you can save your Mac system from data disasters before they occur.
 ChatGPT
 Perplexity
 Google AI Mode
 Grok
Grok

