How to Fix Can't Empty Trash Because Disk Is Full? 5 Proven Ways
Are you facing can't empty trash because disk is full issue on your Mac? Check our detailed guide to fix this issue and download 4DDiG Mac Data Recovery tool to recover any lost files from your Mac!
Are you facing the frustrating can't empty trash because disk is full issue on your Mac? If you've ever encountered this annoying problem, you know how it can disrupt your workflow and leave you in a state of digital deadlock.
Fortunately, you're not alone, and there's a solution at hand. In this article, we'll explore five proven ways to resolve this common issue and free up valuable disk space on your Mac.
With our step-by-step guidance, you can regain control of your computer, eliminate those persistent "disk full" warnings, and enjoy a smoother, more efficient computing experience.
So, keep reading.

Part 1: Why Can't I Empty the Trash on macOS Sonoma/Ventura?
Before learning how to fix the can't empty trash because disk is full Mac error, it's important to first understand why you are facing can't empty trash on Mac because disk is full problem.
Well, several factors can contribute to this problem. Let's discuss them in detail.
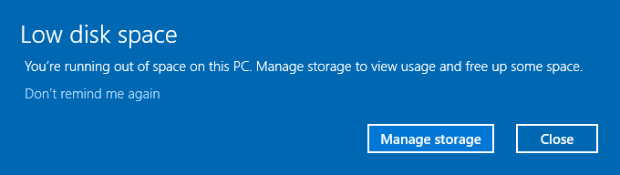
- Insufficient Disk Space: The most obvious reason is that your disk is running out of space. When your storage is near capacity, macOS may struggle to clear out the trash, making it appear as if the disk is full.
- Large Files in Trash: If you have large files or folders in your trash, they can take up a significant amount of space. macOS needs room to temporarily store files before deleting them.
- Corrupted Files: Sometimes, files in the trash can become corrupted, which can hinder the emptying process.
- In-Use Files: If any of the files you're trying to delete are in use by another application, macOS won't be able to remove them.
Now, let's move on to the solutions to address these issues and regain control of your Mac's storage space.
Part 2: How to Fix Can't Empty Trash Because Disk Is Full?
As there are different reasons why trash can't be emptied because disk is full issue, there are 5 different solutions that you can try and get rid of the issue.
Here, we are going to explain them in detail.
Method 1. Force Empty Trash on Mac Using Terminal
When facing a situation where your Mac's trash won't empty despite your disk being full, this common issue can be resolved by utilizing Terminal, a powerful command-line tool.
By using Terminal, you can force the deletion of stubborn files that refuse to empty from the trash.
Here are the steps that can help you:
- Open the Terminal application you can find on launchpad.
- Type the command "sudo rm -rf ~/.Trash/*" (without quotes) and press Enter.
-
Enter your admin password when prompted.
- Wait for the process to complete.
- Check your trash – it should now be empty.
Method 2. Clear Cache Files in the Browser
One often overlooked aspect contributing to disk space issues is the accumulation of cache files in your web browser. These files can consume a significant amount of storage and restrict your ability to empty the trash.
So, to get rid of the can't empty trash because disk is full issue, you will have to clear the cache files in the browser by following these steps:
- Open your browser's settings.
-
Navigate to the System Junk and then User Cache Files.
- Select the option to clear the cache.
- Confirm your choice.
- Empty your trash.
Method 3. Boot in Safe Mode to Delete Files
In some cases, files in use by applications can prevent you from emptying the trash. By booting your Mac in Safe Mode, you can circumvent these restrictions and successfully delete troublesome files.
Here are the steps that can help you:
- Restart your Mac and hold down the Shift key.
- Release the Shift key when the Apple logo appears.
- Once in Safe Mode, delete all the unwanted larger files stored on your Mac system.
- Once you delete all the unwanted larger files, empty the trash bin and restart your MacBook coming out of safe mode.
Method 4. Transfer Some Files to External Disks
When your Mac's internal disk is nearing full capacity, one effective way to tackle the can't empty trash because disk is full issue is by transferring some of your files to external storage devices. This not only alleviates the immediate storage pressure but also enhances the overall performance and organization of your Mac.
Method 5. Repair Your Disk
Disk errors and corruption can also lead to the "can't empty trash because disk is full" issue. By repairing your disk using macOS's built-in tools, you can address potential problems and restore normal trash-emptying functionality.
Here are the steps that can help you:
- Begin by restarting your Mac.
- As your Mac restarts, immediately press and hold the Command + R keys until the macOS Utilities window appears. For Apple Silicon Macs, you can press the Power button instead.
-
In the macOS Utilities window, select "Disk Utility" and then click "Continue."
-
In Disk Utility, locate the disk where you want to delete the files. Click on it and navigate to the "First Aid" tab.
- Look for the "Run" button. If you don't see a "Run" button, you might find a "Repair Disk" button instead. Click on the appropriate option to initiate the diagnostic and repair process.
- Once the First Aid operation is complete, quit Disk Utility. Restart your Mac to return to normal mode.
Helpful Tip: How to Recover Lost Data from Emptied Trash on Mac?
Have you ever accidentally emptied your Mac's trash, only to realize that some of the files you deleted were actually important? It's a frustrating situation, but fear not!
With the help of 4DDiG Mac Data Recovery, you can effectively recover lost data from emptied trash on your Mac.
Here's why 4DDiG Mac Data Recovery is the solution you need:
- Extensive File Support: 4DDiG can recover over 1000 file types and formats, ensuring that you can retrieve a wide range of data, from documents to multimedia files.
- Easy-to-Use Interface: The software is designed with a user-friendly interface, making data recovery a breeze even for those with limited technical expertise.
- Deep Scan: It offers a deep scan feature to comprehensively search for and recover lost files, leaving no stone unturned in the recovery process.
- Preview Functionality: Before you recover your files, you can preview them to ensure you're restoring the correct data.
Now, let's quickly learn how you can recover your lost data using the 4DDiG Mac Data Recovery tool.
-
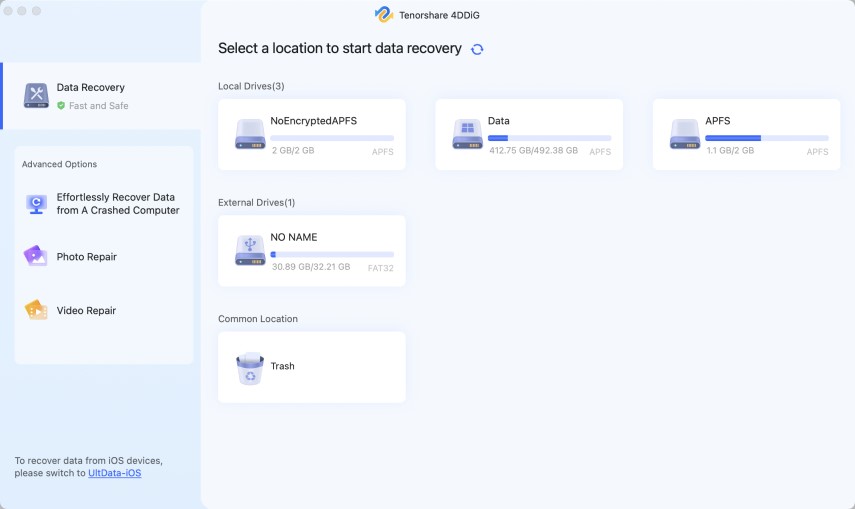
Download and install the 4DDiG Mac Data Recovery tool on your Mac and launch it. Now hover over the emptied trash where you have lost your file and hit the small Scan button that just appeared in the right corner.
FREE DOWNLOAD Secure Download
FREE DOWNLOAD Secure Download
Secure Download
FREE DOWNLOAD Secure Download
-
The tool will start scanning for all the lost files on the emptied trash. So you will have to wait patiently. Once the scanning process is completed, you can preview the files by going into file types.
-
Once you have found the required files, you will have to select them and hit the Recover button. Now, choose the location to save those files. (It is advised to save these files in another location.)
Conclusion
To summarize, by following the steps outlined above, you can easily resolve the "can't empty trash because disk is full" error on your Mac. However, data loss is a common risk during these tasks, which is where the 4DDiG Mac Data Recovery tool comes in. With its advanced features and user-friendly interface, you can easily recover any lost files and ensure the safety of your data.

You May Also Like
- Home >>
- Mac Problems >>
- How to Fix Can't Empty Trash Because Disk Is Full? 5 Proven Ways