Tired of macOS Sequoia/Sonoma's bugs? Want to downgrade from macOS Sequoia/Sonoma to Ventura without losing data? This article is especially for you. No matter the reason behind your downgrade, we will tell you how you can perform this complex task easily without losing data. We'll show you how to ditch Sequoia/Sonoma and get back to Ventura seamlessly, without losing a single photo, document, or song. Ready to reclaim your Mac experience? Let's dive in!

Part 1: Can I Downgrade macOS to the Previous Version?
The answer to this question is definitely yes! While Apple often encourages users to upgrade to the latest version of macOS for its new features, it's important to note that issues like compatibility and system performance glitches can sometimes arise after an upgrade. If you encounter such problems when you upgrade your macOS to Sonoma, it may be necessary to downgrade macos Sequoia/Sonoma to Ventura. However, downgrading isn't always a straightforward process. To ensure a successful downgrade, it's important to backup all your essential data before starting the process.
Part 2: How to Downgrade from macOS Sequoia/Sonoma to Ventura without Losing Data?
Following is the proper way to downgrade from macOS Sequoia/Sonoma to Ventura without losing data.
1.Preparations for macOS Sequoia/Sonoma Downgrade
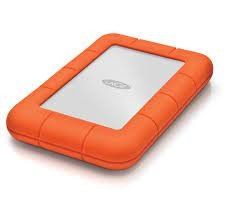
- 16+ GB USB-C Drive
- Good Internet Connection to Activate Your Mac
- You have the option to install macOS Ventura, Monterey, or any older version of macOS on your Mac. However, to do this, you'll have to delete all the data on your computer first.
- Back up mac to external drive.
2.Downgrade from Sequoia/Sonoma to Ventura without Losing Data
Step 1: Download the Installer Setup
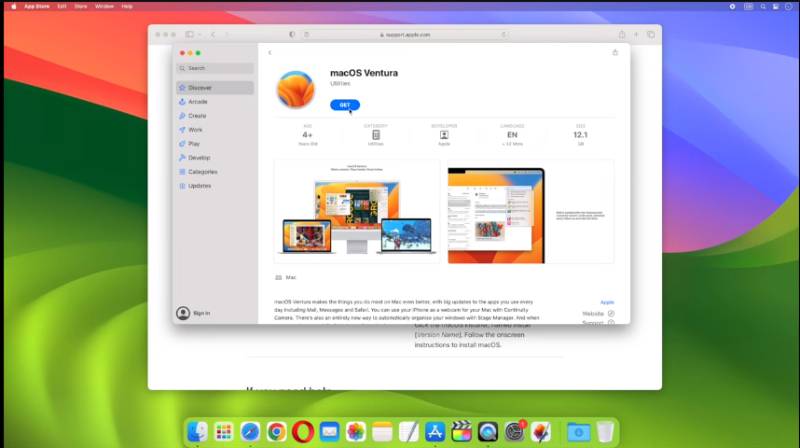
- To access the macOS Ventura, Click here which will take you to the Mac App Store on the Ventura Page.
When you get to the page, just click on the link to download macOS Ventura. It will take you to the App Store.

Here, just click on "Get" to download macOS Ventura.

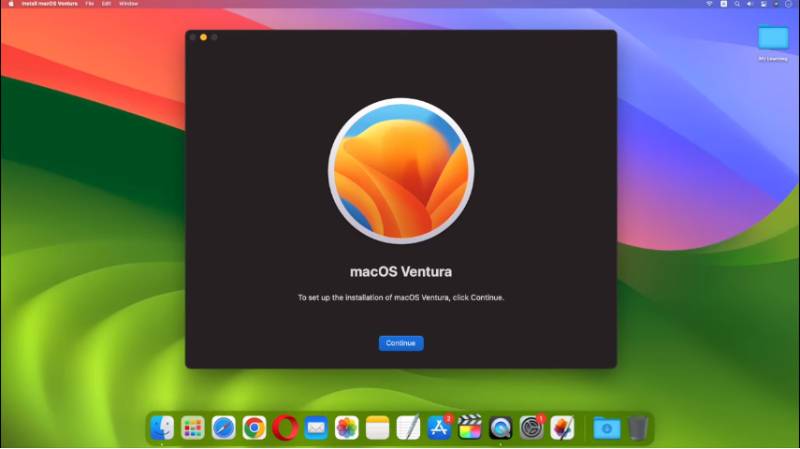
Once the download finishes, the macOS Ventura installer will open automatically.

When the window pops up, use your keyboard to press command+Q. This will close the installer and you can move on to the next step.
Step 2: Create a Bootable Installer
In this step, we will get our USB Drive ready so that we can use it to start up our computer. First, connect your USB drive to your Mac. Make sure your USB drive has enough space, at least 16 GB. If you have any important files on your USB drive, make sure to save a copy of them somewhere safe before you begin. This is important because the process will delete everything on your USB drive.
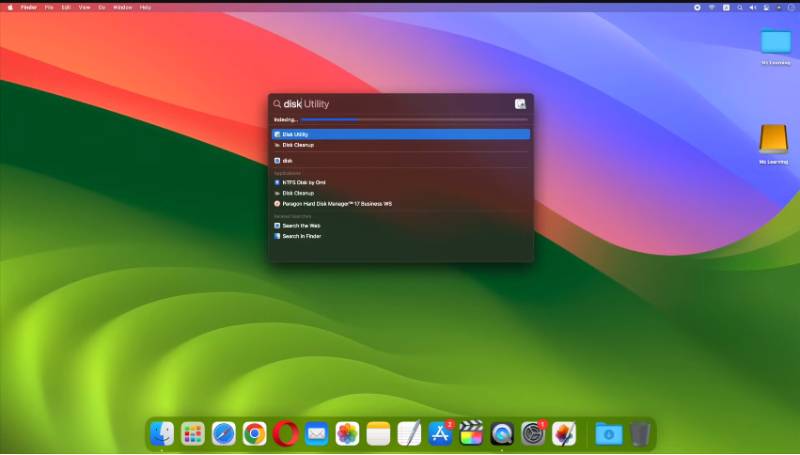
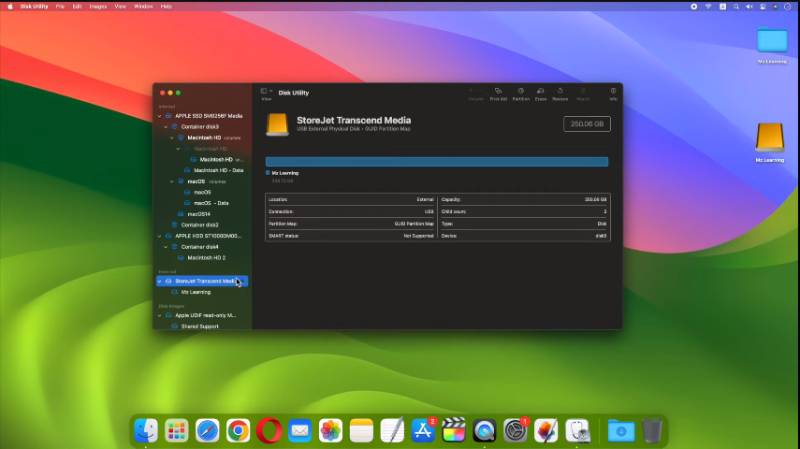
Open the Disk Utility app. You can do this by pressing the command and spacebar, typing "disk utility," and hitting enter.

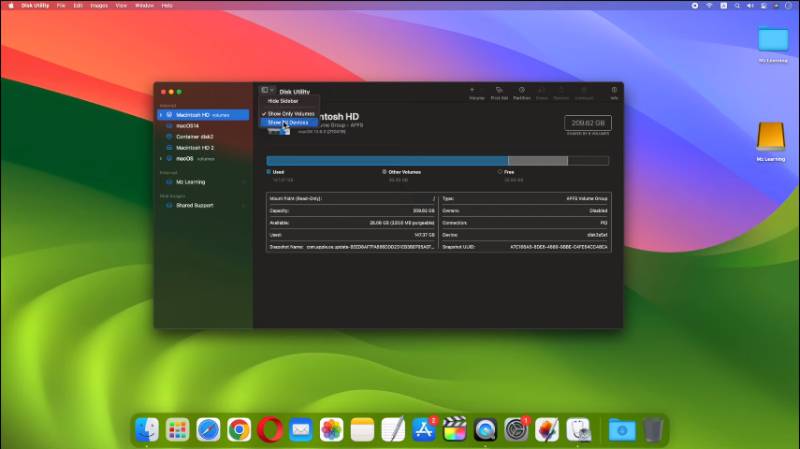
The disk utility app is in the Utilities folder of your applications folder. Go to the view menu and choose to show all devices.

On the left sidebar, select the main level of your USB drive and click on the Erase button, which is the fourth option from the top right side.

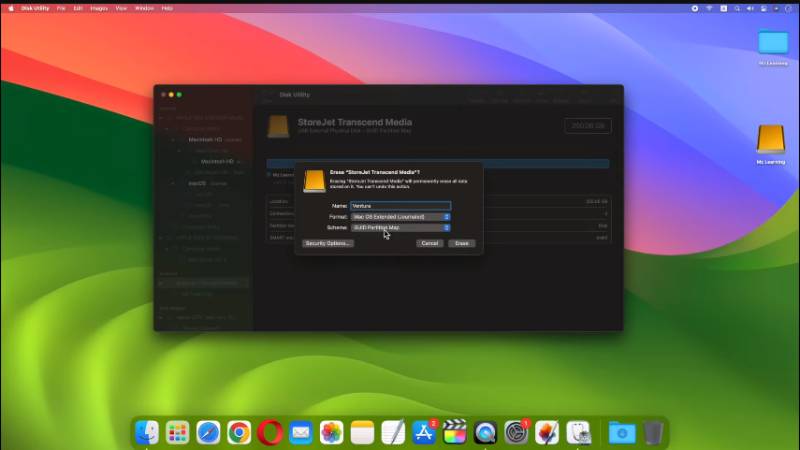
In the name field, give a name to the USB flash drive. From the format drop-down menu, choose Mac OS extended journaled. From the scheme drop-down menu, select the grid partition map.

- Now everything is set. Click the erase button. After erasing, close the disk utility app.
Now, open the terminal app and input the following command.

All you need to do is replace "Ventura" with the name of your USB drive and press the enter key.
The terminal will start making the USB drive ready to install macOS Ventura. This might take some time. When it's done, you'll see a message saying "Install media is now available." Close the terminal. Your USB drive is now ready for installing macOS Ventura.
Step 3: Install macOS Ventura in Recovery Mode
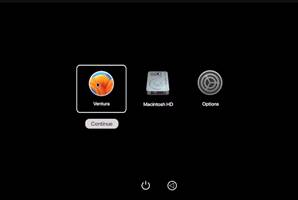
To install macOS Ventura in recovery mode, restart your Mac.
Choose the installation drive and then select macOS Ventura, and click continue.
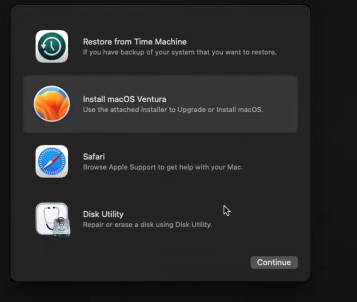
 Important: If you encounter an error, select the utility disk and click continue. In the disk utility, choose your hard drive (usually named Macintosh HD) and click "Erase."
Make sure that the option "apfs" is selected. Erase the hard drive and close the window.

Now, select Install macOS Ventura and click the continue button, then follow the instructions that appear on the screen.

- During the installation process, your computer may restart several times. Generally, this process will take around 30 to 40 minutes, depending on your computer's hardware configuration.
Part 3: How to Recover Lost Data after Downgrading macOS Sequoia/Sonoma to macOS Ventura?
After downgrading your macOS from Sequoia/Sonoma to Ventura, it's essential to be prepared for any unexpected data loss that may occur during the transition. This is where 4DDiG Mac Data Recovery comes to the rescue, offering a comprehensive and user-friendly solution to recover your valuable files.
With the assistance of this dependable software, recovering your valuable information after a downgrade-induced accidental file deletion or unexpected errors resulting in data loss is a breeze, requiring only a few clicks. Below is the step-by-step process to recover lost data from your hard drive on Mac.
First, install the software and open it. Then, choose a location on your computer, like your local drives, where you want to search for the lost files. Move your mouse pointer over that location, and you'll see a small icon in the lower right corner that says "Scan." Just click on it, and the software will start searching for all the files that were lost.
Free DownloadFor PCSecure Download
Free DownloadFor MACSecure Download

It may take some time to look through all the files that have been deleted. Once the scan is done, you can click on certain types of files to see more information about them.

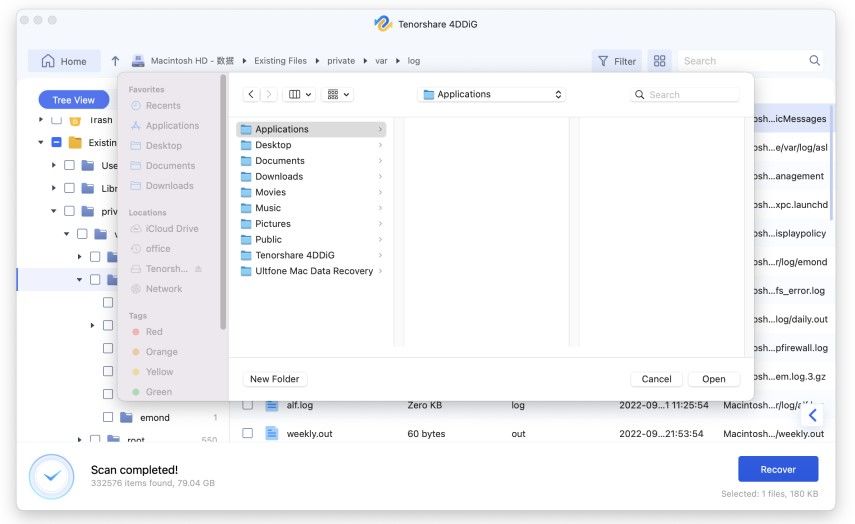
Click on the "Recover" button and choose a place to save the files you found. It's not a good idea to save them in the same area where you lost them, as this could result in permanent loss of data.

Conclusion
After reading this article, you may have understood how to downgrade macOS Sequoia/Sonoma to Ventura. If you are facing any issue after Upgrade Your Mac to macOS Sequoia, you can easily downgrade from macOS Sonoma to Ventura without losing data by following the above method.
Although the process of downgrading can be manageable, it's not necessarily easy, and there is a risk of data loss during the downgrade. Fortunately, 4DDiG Mac Data Recovery offers a straightforward and convenient solution for recovering lost data. With this software, you can easily retrieve your valuable files in the event of data loss during the downgrade process.





 ChatGPT
 Perplexity
 Google AI Mode
 Grok
Grok
