4 Ways to Install macOS Sequoia on Unsupported Mac
Download 4DDiG Mac Data Recovery to recover lost data during macOS Sequoia installation on unsupported Macs. This tool ensures your files stay safe throughout the process. Keep reading for detailed steps on how to install Sequoia smoothly!
Can you install macOS Sequoia on an unsupported Mac? Apple recently announced macOS Sequoia and many users are wondering if they will be able to experience the latest features on their older Mac models. Unfortunately, Apple has limited this update to newer models, so older Macs won't receive official support for macOS Sequoia. But don’t worry, there are ways around this limitation. In this article, we’ll explore four effective steps to install macOS Sequoia on unsupported Macs. These steps will help you bypass these restrictions and keep your Mac running the latest software.
Part 1: Can I Install macOS Sequoia on an Unsupported Mac?
Yes, it is possible to download older macOS or install macOS Sequoia on unsupported Mac models, although it requires some technical knowledge and careful execution.
Apple officially limits new macOS versions to specific Mac models, but community-developed tools and methods allow users to bypass these restrictions.
The primary factors that make this installation possible are:
- OpenCore Legacy Patcher: This tool enables the installation of newer macOS versions on older, unsupported hardware by modifying the system to recognize the older Mac as a supported model.
- Bootable USB installers: Creating a bootable USB with the macOS Sequoia installer allows you to bypass the standard installation process and install the OS on unsupported machines.
- Community-developed patches: These address hardware compatibility issues and enable features that might not work on unsupported Macs.
- Firmware updates: In some cases, updating the firmware of older Macs can improve compatibility with newer macOS versions.
While these methods can successfully install macOS Sequoia on unsupported Macs, it's important to note that not all features may work perfectly, and you may encounter stability issues or reduced performance.
4DDiG Mac Data Recovery If installation errors occur or your Mac faces data loss during the process, can help recover your files quickly. Continue reading for more detailed instructions and solutions.
Part 2: Recover Data when macOS Sequoia Installation Fails
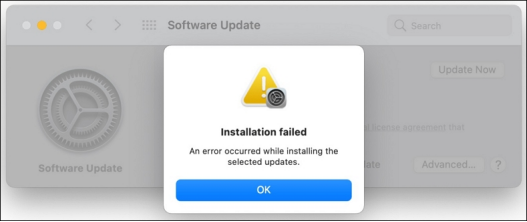
Installing macOS Sequoia on unsupported Macs carries risks, including potential data loss if the installation fails. 4DDiG Mac Data Recovery is here to protect you from this data loss issue. This tool can recover your data even if your Mac becomes unbootable after a failed Sequoia installation. 4DDiG is great at retrieving lost files, repairing damaged partitions, and rescuing data from system crashes. These are all common issues that occur during OS upgrades. It works with various file types and storage devices.
- Bootable recovery for unbootable Macs
- Support for all Mac chips (T2 chip, M1, M2, M3, M4)
- High success rate for system crash and update failure recovery
- Recovery from various storage devices (internal/external drives, SSDs, USBs)
- Option to restore data to local storage or Google Drive
Secure Download
Secure Download
Here's how to use 4DDiG Mac Data Recovery to recover your data after a failed macOS Sequoia installation:
-
Launch and Select
Install and open 4DDiG Mac Data Recovery on a working Mac. Connect your affected drive (if external) or use target disk mode for internal drives. Select the drive where macOS Sequoia installation failed.
-
Scan for Lost Data
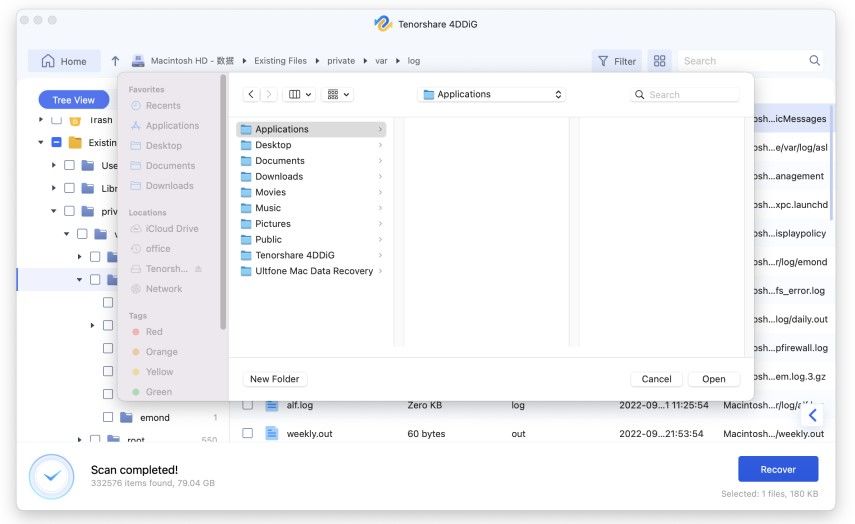
Click " Scan " to start the recovery process. 4DDiG will perform a thorough scan of the selected drive, searching for all recoverable files. You can pause or stop the scan at any time if you see the files you need.
-
Preview and Recover
Once the scan is complete, preview the found files to ensure they're what you need. Select the files you want to recover and click " Recover ". Choose a safe location on a different drive to save your recovered data.
To prevent overwriting potentially recoverable data, always save recovered files to a different drive than the one you're recovering from.
How to Downgrade macOS Sequoia to macOS Sonoma without Losing Data
Part 3: How to Install macOS Sequoia on an Unsupported Mac?
Now that we've covered data recovery, let's focus on the main task: installing macOS Sequoia on your unsupported Mac. This process requires careful attention to detail and patience.Follow these steps precisely to maximize your chances of a successful installation and minimize risks to your data.
Step 1: Download macOS Sequoia Resource
To install macOS Sequoia on your unsupported Mac, you first need to download the installer. You'll get this directly from Apple using a trusted resource.
Here's how to do it:
-
Open your favorite web browser and search for " macOS Sequoia Full Installer Database ".
-
Look for the section titled " macOS Sequoia BETA Full Installer ". You'll find download links for the complete installer package here.
-
Choose the appropriate version for your Mac and click the download link. You're looking for a file named InstallAssistant.pkg .

-
Once the download finishes, locate the pkg file in your Downloads folder and double-click to open it.
-
Follow the installation wizard. This will place the full macOS Sequoia installer in your Applications folder.
Remember, this method works for both Intel and Apple Silicon Macs. You're getting the same installer you'd find on the App Store, just through a different channel.
Step 2: Create Bootable macOS Sequoia USB

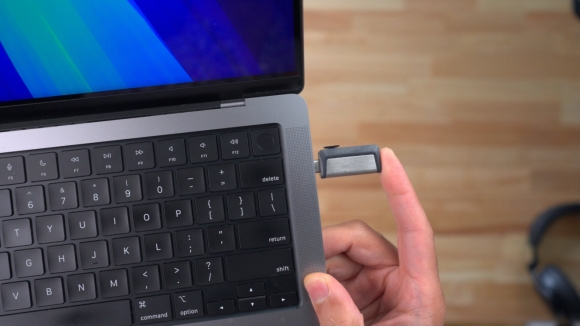
Creating a bootable USB drive is essential for installing macOS Sequoia on your unsupported Mac. This process will erase all data on the USB drive, so make sure to back up any important files first. You'll need a USB drive with at least 16GB of storage.
Here's how to create your bootable USB:
-
Connect a 16GB (or larger) USB drive to your Mac. Remember, all data on this drive will be erased.
-
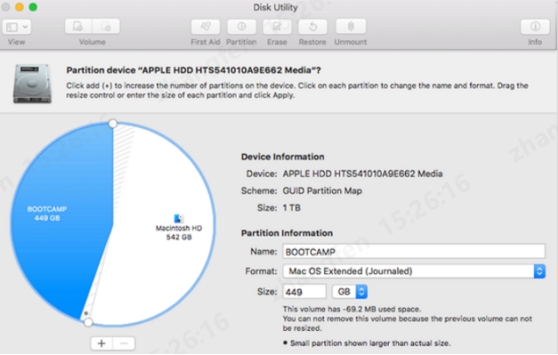
Open Disk Utility. You can find it by clicking on the magnifying glass in the top right corner and typing " Disk Utility ".

-
In Disk Utility, select your USB drive from the left sidebar. Click " Erase " at the top of the window.
-
Name your USB drive " Sequoia ". Choose "Mac OS Extended (Journaled)" as the format. Click "Erase" to format the drive.

-
Once formatting is complete, open Terminal. You can find it in Applications > Utilities > Terminal .
-
In Terminal, paste the following command, replacing ' /Applications/Install macOS Sequoia.app' with the actual location if different:
sudo /Applications/Install\ macOS\ Sequoia.app/Contents/Resources/createinstallmedia --volume /Volumes/Untitled
-
Press Enter and follow the on-screen prompts. This process may take some time.
When Terminal shows " Done ", your bootable USB drive is ready. This USB will be crucial for the next steps in installing macOS Sequoia on your unsupported Mac.
Step 3: Install OpenCore Legacy Patcher

OpenCore Legacy Patcher is a critical tool that allows you to install macOS Sequoia on your unsupported Mac. It modifies your system to bypass Apple's restrictions. This step involves downloading the patcher and using it to prepare your bootable USB drive.
Here's how to do it:
-
Open your web browser and search for " OpenCore Legacy Patcher GitHub ". Go to the official GitHub page.
-
Look for the " Releases " section and download the latest version of OpenCore-Patcher.
-
Once downloaded, open the OpenCore-Patcher application.
-
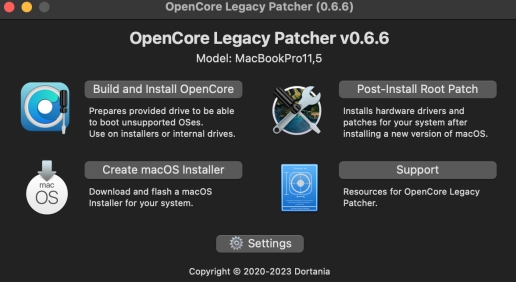
In the main window, click on " Build and Install OpenCore ".

-
Follow the on-screen instructions to create an OpenCore package for your specific Mac model.
-
When the package creation is complete, click on " Install OpenCore ".
-
Select the USB drive you prepared in Step 2 as the installation destination.

-
Follow the prompts to install OpenCore on your USB drive. This process may take several minutes.
After completion, your USB drive is now equipped with both macOS Sequoia and OpenCore. This combination will allow you to boot and install macOS Sequoia on your unsupported Mac in the next step.
Step 4: Install macOS Sequoia on Unsupported Mac
Now that you've prepared your bootable USB with macOS Sequoia and OpenCore, you're ready to install the new operating system on your unsupported Mac. This process will overwrite your current OS, so ensure you've backed up all important data.
Here's how to proceed:
-
Plug your bootable macOS Sequoia USB drive into the unsupported Mac you want to upgrade.
-
Turn on or restart your Mac. Immediately press and hold the Option key as it starts up.
-
Keep holding the Option key until you see the boot selection screen.
-
You'll see your usual startup disk and the USB drive. Select the USB drive (it might be labeled "EFI Boot") and press Enter.
-
Your Mac will now boot from the USB drive. You'll see the macOS Utilities window.
-
Select " Install macOS " from the options presented.
-
Follow the on-screen instructions to select your Mac's internal drive as the installation destination.
-
Begin the installation process. Your Mac may restart several times during this process.
-
When prompted, complete the setup process for your new macOS Sequoia installation.
Remember, this process may take some time. Be patient and don't interrupt the installation. Once complete, you'll be running macOS Sequoia on your previously unsupported Mac!
Part 4: Frequently Asked Questions
Q1: Can I Install macOS Sequoia on an unsupported Mac without USB?
Ans: Unfortunately, you can't install macOS Sequoia on an unsupported Mac without a USB drive. The USB method is crucial for bypassing Apple's restrictions. It allows you to boot from an external drive and use OpenCore Legacy Patcher, which are necessary steps for unsupported Macs.
Q2: What to do if my Mac is not compatible with Sequoia?
Ans: If your Mac isn't compatible with Sequoia, you have a few options. You can try using OpenCore Legacy Patcher as described in this guide. Alternatively, consider upgrading your hardware if possible.
Q3: Is it safe to install macOS Sequoia on an unsupported Mac?
Ans: Installing macOS Sequoia on an unsupported Mac carries some risks. You might encounter stability issues or reduced performance. However, if you follow the steps carefully and back up your data, it's generally safe to try.
Q4: How to Prepare Your Mac to Upgrade to macOS Sequoia?
Ans: To prepare for macOS Sequoia, start by backing up all your important data. Check your Mac's specs to ensure it has enough storage and memory. Update all your apps to their latest versions. Finally, clean up your Mac by removing unnecessary files and apps to free up space.
Final Words
Installing macOS Sequoia on your unsupported Mac is possible with careful steps and the right tools. Remember, this process carries risks, so always prioritize your data's safety. We highly recommend using 4DDiG Mac Data Recovery before and after the installation. It's a powerful tool that can save your files if anything goes wrong. With proper preparation and 4DDiG as your backup, you can enjoy the latest macOS features on your older Mac.
💡 Summarize with AI:
You May Also Like
- Home >>
- Mac Recovery Solutions >>
- 4 Ways to Install macOS Sequoia on Unsupported Mac





 ChatGPT
 Perplexity
 Google AI Mode
 Grok
Grok

