Full Guide to Install macOS Sequoia from USB
Installing macOS Sequoia from a USB drive can sometimes lead to data loss due to unexpected issues, such as incomplete installations or corrupt files. If you lose important data during the process, 4DDiG Mac Data Recovery can help retrieve lost files efficiently. It supports recovery from formatted drives, system crashes, and more, ensuring a hassle-free experience.
Many Mac users—especially those who are updating their systems—often wonder how to install macOS Sequoia from USB. Though it can seem difficult, installing a new macOS version is not so difficult. Install macOS Sequoia from a USB drive with simple steps and appropriate actions. This approach guarantees a clean installation and helps to prevent possible problems with former system files. This article will walk you through each stage. You'll learn how to build a bootable USB stick, download the macOS installer, and finish the setup procedure. Additionally, we’ll discuss how to recover any lost data during the installation.
Part 1: Can I Install macOS Sequoia from USB?
Indeed, macOS Sequoia may be installed from a USB device really quickly. Most consumers can easily follow a few simple stages in the procedure. This approach is not without problems, though, either. You can run across issues including data corruption, unanticipated crashes, or installation failures. These problems might cause frustrating damage to your system files.
Installation mistakes can arise for several causes. The USB drive could occasionally be broken or there might be compatibility problems. Other times it results from inadequate security or storage capacity. Whatever the reason, such mistakes could stop a good installation from happening.
In these kinds of circumstances, you really need a data recovery tool available. Here is when 4DDiG Mac Data Recovery proves quite helpful. Fast retrieval of lost or damaged files using this utility helps to minimize any system disturbance. It examines your device with just a few clicks to retrieve possibly lost data. Whether a faulty file or installation issue causes it, 4DDiG can assist in restoring your critical data so that nothing is irreversibly lost.
Part 2: Back Up Your Data Before Installing macOS from USB
Backup of your data is really crucial before beginning the macOS Sequoia installation . Any mistake made during installation might result in data loss, a major issue. If something goes wrong, a dependable recovery program such as 4DDiG Mac Data Recovery offers a perfect fix.
Even from formatted or corrupted devices, 4DDiG Mac Data Recovery enables you to restore lost or destroyed files. This program efficiently restores files whether your installation fails or files are inadvertently deleted. It runs across all file formats including images, movies, and documents, is quick and easy for use.
Secure Download
Secure Download
Here’s how to use it in just three simple steps:
-
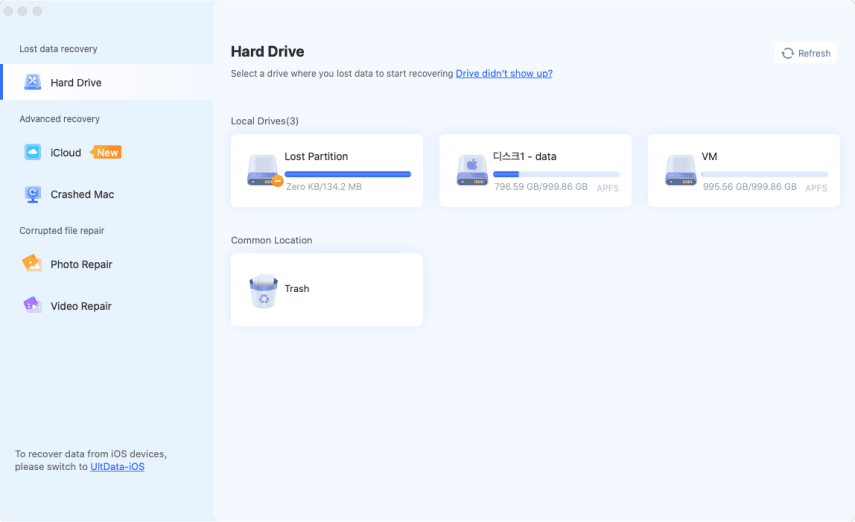
Select the Drive or Folder
Open 4DDiG and choose the drive or folder where you lost data. The tool supports external drives too.
-
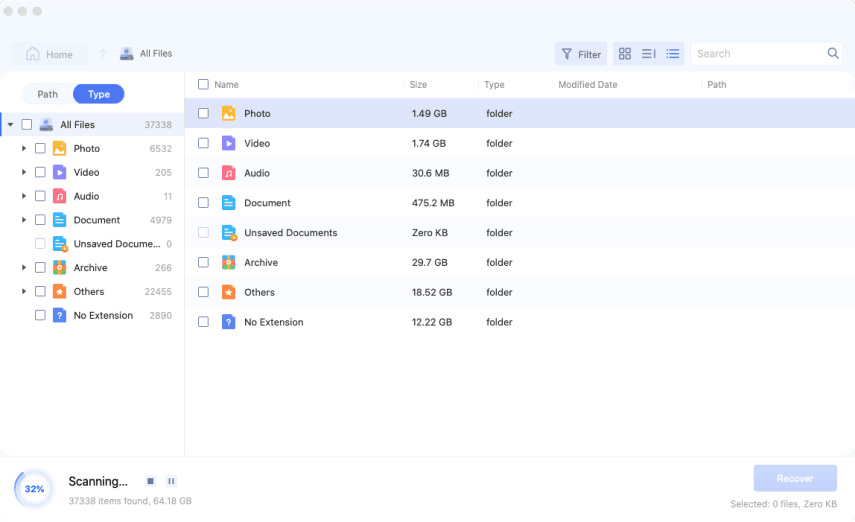
Start the Scan
Click on "Scan" to begin. As the scan progresses, you'll see files in real-time. You can pause once the files you're looking for are found.
-
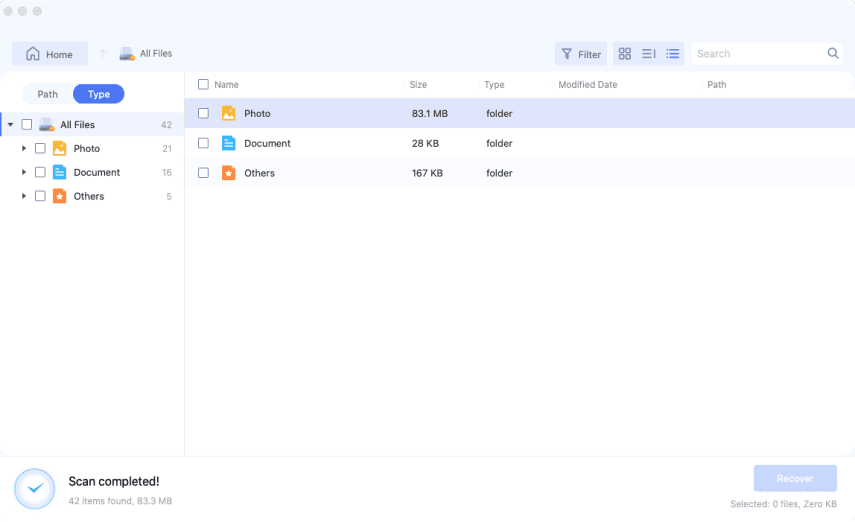
Preview and Recover Files
Preview the scanned files, select the ones you need, and hit "Recover." Save them in a different and safe location to avoid overwriting. This easy-to-use tool can recover your precious files in just a few clicks, giving you peace of mind during the installation process.
People Also Read:
How to Downgrade macOS Sequoia to macOS Sonoma without Losing Data
FREE DOWNLOADSecure Download
FREE DOWNLOADSecure Download
Part 3: How to Install macOS Sequoia from USB Device?
Installing macOS Sequoia from a USB device is a straightforward process, but it requires careful preparation to avoid errors. By creating a bootable USB installer and following the correct steps, you can successfully install macOS Sequoia on your system without any complications. In this section, we’ll guide you through the necessary steps, from preparing your USB drive to completing the installation, ensuring a smooth and hassle-free upgrade. Let’s get started with the key steps you need to follow.
Now that your data is backed up, it's time to move forward with installing macOS Sequoia from USB .
Step 1: Prepare a USB Device
To begin, you'll require a USB drive to serve as the installation target. A USB flash drive with a minimum storage capacity of 16GB is sufficient. Choose one that provides both USB-C and USB-A connections for versatility across different devices. You can easily find a 16GB USB flash drive at an affordable price, ensuring ample space for the macOS Sequoia Beta installer. This configuration enables you to install the new operating system on your Mac seamlessly, accommodating various connection types for convenience and compatibility.
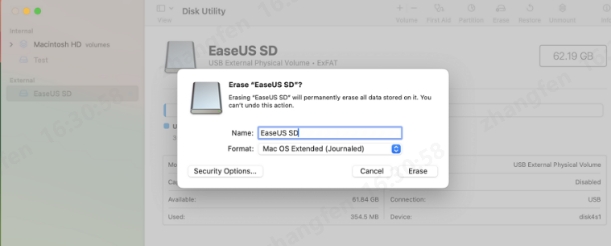
Prior to creating a macOS Sequoia bootable USB flash drive, you should format the USB device using Disk Utility. Navigate to "Disk Utility," select the USB device, and click on the "Erase" button located at the top menu.
Step 2: Download the macOS Sequoia Installer
The subsequent step involves downloading the macOS Sequoia Installer to proceed with the installation process. To obtain the macOS 15 Sequoia installer, open "Terminal" and utilize the softwareupdate command. Adhere to the following steps:
-
Access "Terminal" by navigating to "Applications > Utilities."

-
Employ this command to list available installers, and press "Return" to view the macOS 15 Sequoia installer.
softwareupdate --list-full-installers

-
Subsequently, download the installer to your Applications folder with this command, and press "Return" on your keyboard to initiate the download.
softwareupdate --fetch-full-installer --full-installer-version 15.0
If you find this post to be helpful, disseminate it on social media to assist others in learning how to install macOS Sequoia beta from a USB drive.
Step 3: Create the macOS Sequoia USB Installer
To create a macOS Sequoia USB installer, first, open Terminal on your Mac. Once open, you’ll need to type the following command:
sudo /Applications/Install\ macOS\ Sequoia.app/Contents/Resources/createinstallmedia --volume /Volumes/USBDrive –nointeraction
This command creates the bootable installer using your downloaded macOS Sequoia file. Remember, you must replace "USBDrive" in the command with the actual name of your USB device. If your USB is named differently, the command won’t work, so ensure that the name matches exactly before executing the command.
Step 4:Install macOS from the Bootable Installer
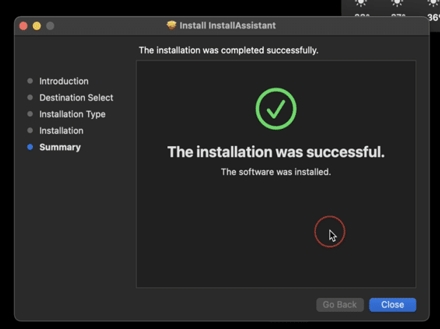
Restart your Mac and hold down the Option (Alt) key as it powers on. Select the USB installer from the boot menu, and follow the on-screen instructions to install macOS Sequoia on your device.
To install macOS using a bootable installer, verify that you have successfully created the bootable installer by adhering to the preceding steps. Connect the bootable USB drive to your Mac to install MacOS Sequoia. Follow the subsequent steps:
-
Insert the USB drive containing MacOS Sequoia into your Mac.
-
Initiate your Mac and press and hold the power button until the "Loading Startup Options" window displays your bootable volumes.
-
Select the volume with the bootable installer, then click "Continue." Adhere to the on-screen instructions presented in the macOS installer that opens.
If you are unable to install macOS Sequoia on your Mac, here is an article tutorial to rectify this error.

Part 4: FAQs
Q1: How to make a bootable USB on Mac?
To create a bootable USB, format your USB drive using Disk Utility and then use Terminal to run the create install media command with the macOS Sequoia installer.
Q2: How do I install Sequoia on an external hard drive Mac?
After creating the bootable USB, select the external hard drive during the installation process when prompted.
Q3: How to install macOS from terminal recovery?
To install macOS from Terminal, reboot your Mac into Recovery Mode by holding Command + R and follow the prompts in Terminal using the appropriate installation command.
Conclusion
Installing macOS Sequoia from a USB device can be a straightforward process if you follow the correct steps. It allows you to perform a clean installation, upgrade your system, or troubleshoot issues without too much hassle. However, it’s crucial to take precautions before starting the installation to avoid potential data loss. Always remember to back up your important files beforehand. This simple step can save you from unexpected problems that could lead to losing valuable information during the installation process. If files are lost during the process, 4DDiG Mac Data Recovery is the perfect solution to recover your precious files and get them back.
Secure Download
Secure Download


 ChatGPT
 Perplexity
 Google AI Mode
 Grok
Grok

