How to Downgrade macOS Sequoia to macOS Sonoma without Losing Data
Is your Mac acting like a bucking bronco after the latest macOS Sequoia? While waiting for Apple's developer heroes to tame the bugs, some might yearn for the simpler days of Sonoma. But downgrading, like wrangling a wild horse, requires a steady hand. Don't fret, intrepid developer! This guide will show you 4 ways to downgrade macOS Sequoia to macOS Sonoma without losing data and return to the familiar (and hopefully stable) range of Sonoma.
Part 1: Can you downgrade macOS versions?
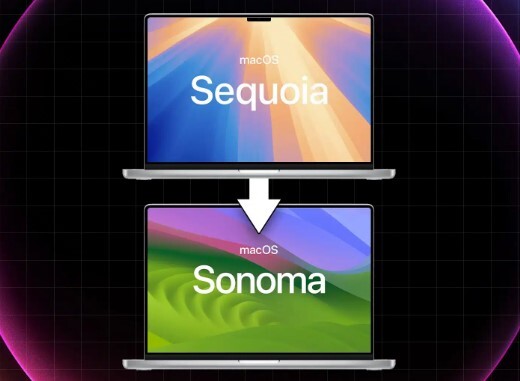
Downgrading macOS Sequoia isn't as straightforward as updating, but it is possible. However, there's a catch: it requires a complete reinstall of the older operating system and you cannot use a Time Machine backup from the newer version.
Here's the reality:
- Technically downgrade: By creating a bootable installer for the desired older macOS version and wiping your drive, you can reinstall the older version.
- Not easy: This process involves backing up your data beforehand and then essentially starting fresh with the older OS.
- Data loss is a risk: Since you can't use a Time Machine backup from the newer version, you'll need to manually back up your important files before downgrading.
Alternatives to consider:
- Wait for a stable macOS Sequoia update: If the bugs are manageable, waiting for Apple to release a more stable version of Sequoia might be the safest option.
-
Use a virtual machine: If you need to test something specific in the older version, consider setting up a virtual machine with macOS Sonoma instead of downgrading your entire system.

Part 2: How to Downgrade macOS Sequoia to macOS Sonoma without Losing Data
With the potential pitfalls of data loss acknowledged, let's delve into the nitty-gritty of downgrading from macOS Sequoia to macOS Sonoma. While a complete reinstall is inevitable, we'll explore 4 methods to help you navigate this process as smoothly as possible:
Way 1: Downgrade macOS Sequoia to macOS Sonoma using 4DDiG Mac Data Recovery
While downgrading macOS Sequoia to Sonoma involves reinstalling an older OS, data loss doesn't have to be an inevitable consequence. 4DDiG Mac Data Recovery emerges as a powerful tool in this scenario, enabling you to safeguard your precious data during the downgrade process.
4DDiG Mac Data Recovery prowess lies in its comprehensive data recovery capabilities, spanning over 2000 file types from various storage devices. Whether you've accidentally deleted files, formatted drives, or encountered system crashes, 4DDiG Mac Data Recovery tool can scan and retrieve your lost data with remarkable efficiency.
Secure
Download
Secure
Download
With 4DDiG as your data recovery companion, downgrading your macOS without data loss becomes a worry-free endeavor. Its robust capabilities and user-friendly interface make it an invaluable tool for any Mac user.
Stepping into Data Recovery with 4DDiG:
-
Launch and Select: Begin by launching 4DDiG on your Mac and selecting the storage device where your lost data resides.

-
Scan and Preview: Initiate a thorough scan to uncover your lost files. Once the scan completes, preview the recoverable files to confirm their presence.

-
Recover and Save: Select the files you wish to restore and choose a secure location to save them. 4DDiG will seamlessly restore your data, ensuring your precious files are within reach.

Way 2: Downgrade macOS Sequoia to macOS Sonoma with Time Machine
Feeling the growing pains of the macOS Sequoia? No worries, intrepid traveler! If you wisely created a Time Machine backup before embarking on this adventure, you can sail back to the familiar shores of macOS Sonoma in no time. Here's how to use your Time Machine as a trusty vessel for this data-preserving journey to downgrade macos sequoia to macos sonoma.
- Plug in your Time Machine: Like any good ship needs a sturdy anchor, connect your Time Machine backup drive to your Mac.
- Set Sail for Restart: Hit the Apple icon and choose "Restart" to begin your voyage back to a more stable system.
- Chart the Course: Hold the power button during startup to access the options menu. Here, select "Options" and then "Continue" to chart your course towards the Recovery Menu.
- Captain's Log: Enter your administrator credentials to unlock the Recovery Menu, your control center for this time travel mission.
- Time Machine Engaged: Select "Restore from Time Machine Backup" and brace yourself for the time warp!
- Navigate the Past: Follow the prompts and choose your trusty Time Machine drive as the source of your rescue mission.
- Pick Your Destination: Select the most recent backup from macOS Sonoma, the stable harbor you seek. Hit "Restore" and let the time travel commence!
With these steps, your Time Machine will whisk you downgrade from macOS 15 to the familiar and bug-free waters of macOS Sonoma, all your data safely intact. Now, you can enjoy smooth sailing while waiting for a more polished version of Sequoia to arrive.

Way 3: Downgrade macOS Sequoia to macOS Sonoma with macOS Recovery
Stranded in the buggy wilderness of macOS Sequoia without a Time Machine backup? Fear not, resourceful explorer! We can still navigate back to the comfortable shores of macOS Sonoma using Recovery Mode. This method essentially lets you download and install a stable version of macOS, like a digital life raft, compatible with your Mac. Here's how to embark on this data-wiping downgrade journey:
- Initiate Reboot: Click the Apple logo and choose "Restart" to begin your trek back to stable ground.
- Unlock Hidden Options: Hold the power button during startup to access a secret passage - the startup options menu. Here, select "Options" and then "Continue" to proceed.
- Captain's Credentials: Enter your administrator login to unlock the Recovery Menu, your central command for this data-free downgrade.
- Reinstall Mission: Select "Reinstall macOS" - your ultimate weapon against buggy software. Click "Continue" to launch the installation of the stable macOS Sonoma.
With these steps, you'll be guided through the process of wiping your drive and installing a fresh copy of macOS Sonoma. While this method won't preserve your current data, it offers a clean slate and a return to a more stable operating system. Just remember, back up your data before embarking on any downgrading adventure!
Before setting sail for the bug-free shores of macOS Sonoma, ensure your Mac has a stable internet connection. Recovery Mode requires an internet connection to download the Sonoma installer, just like a ship needs a good wind to reach its destination.
Way 4: Downgrade macOS Sequoia to macOS Sonoma with USB installer
Adventurous users with a spare Mac at their disposal can attempt the "bootable USB tango" to downgrade to Sonoma. This method involves creating a bootable USB installer for Sonoma on another Mac, essentially a digital dance partner for your downgrading journey. Here's how it goes:
- Craft Your Sonoma Partner: Using another Mac, create a bootable USB installer containing macOS Sonoma. This will be your guide on the downgrade dance floor.
- Plug in the Partner: Connect the bootable USB installer to your Sequoia-laden Mac.
- Set the Stage: Click the Apple logo and select "System Settings" to start setting the stage for the downgrade.
- Navigate the Menu: Head over to "General" in the sidebar and click on "Startup Disk." This is where you choose your dance partner.
- Select Your Partner: Highlight the bootable macOS installer as your new startup disk and hit "Restart."
- The Downgrade Dance Begins: Your Mac will boot into Recovery Mode, ready to follow Sonoma's lead. Here, select "Reinstall macOS" to begin the downgrade dance.
- Follow the Steps: Hit "Continue" and meticulously follow the on-screen instructions. This will guide you through the installation of macOS Sonoma, essentially replacing Sequoia with your new dance partner.
Remember: This method wipes your drive, so ensure you have a backup of your data before attempting the bootable USB tango!
Part 3: FAQ about Downgrade macOS Sequoia to macOS Sonoma
Q 1: How do I revert my Mac to the previous version?
Downgrading macOS requires a full reinstall. Back up your data first! Here are 2 options:
- Time Machine (fastest): If you have a Time Machine backup from before the upgrade, you can restore your entire system with minimal effort.
- Recovery Mode (clean install): Use internet recovery or a bootable USB installer to reinstall an older compatible macOS version. This wipes your drive, so back up your data first!
Q 2: Should you install macOS Sequoia?
Hold off on macOS Sequoia unless you're a developer comfortable with bugs and potential data loss. It's a , meaning it's unfinished and might cause crashes or instability. Wait for the public release or a more stable update if you need a smooth Mac experience.
Q 3: When will macOS Sequoia arrive on Mac?
The public release for all compatible Macs is set for September, alongside other Apple software updates like iOS 18, iPadOS 18, and watchOS 11. Can't wait to try the new features? The macOS Sequoia developer is available now for those comfortable with potential bugs. For a more stable experience, the public will be offered in July.
Conclusion
Downgrade macOS Sequoia can be a complex process and may result in data loss. It's crucial to back up your data thoroughly before attempting any downgrade. If you encounter any data loss during the process, consider using a reliable data recovery tool like 4DDiG Mac Data Recovery to retrieve your lost files. This powerful tool can effectively scan and recover various data types from various storage devices, including internal and external hard drives, SSDs, memory cards, and more. With its user-friendly interface and advanced data recovery capabilities, 4DDiG Mac Data Recovery can help you restore your precious data with ease.
💡 Summarize with AI:
You May Also Like
- Home >>
- Mac Recovery Solutions >>
- How to Downgrade macOS Sequoia to macOS Sonoma without Losing Data


 ChatGPT
 Perplexity
 Google AI Mode
 Grok
Grok

