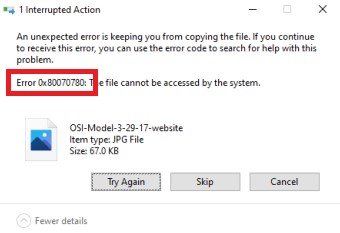
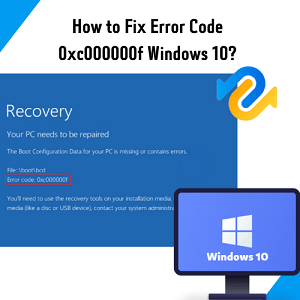
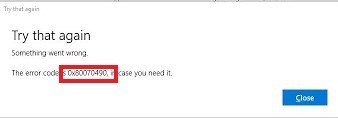
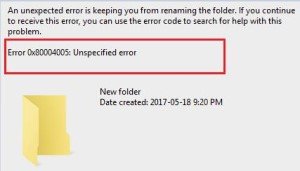
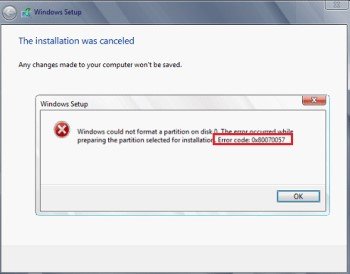
Is your PC showing a Blue Screen of Death with a 0x80070057 error? This error is well-known among Windows users and system admins and can appear with a white pop-up window or the Blue Screen of Death. The causes of this error could be many, but the most irritating thing for users is that the messages that come with this error 0x80070057 can vary. In short, the message could be “Unspecified Parameters Encountered,” “Unknown Error,” or “Required services are not running.” However, the message appearing with the error code will tell you a lot about it. So, it’s possible to fix the cause of the problem. This article will explain you 11 quick and easy fixes for the most common type of 0x80070057 errors.
- Part 1: Overview of Error 0x8000057
- Bonus Tip: How to Restore Data after Windows Update?HOT
-
Part 2: 11 Ways for Windows Update Error 0x80070057
- Fix 1: Clean Up System Files
- Fix 2: Correct Windows Date and Time
- Fix 3: Check for Windows Update
- Fix 4: Run CHKDSK to Fix 0x80070057
- Fix 5: Run System File Checker to Fix Error 0x80070057
- Fix 6: Use DISM Command to Fix
- Fix 7: Alter the Group Policy Settings
- Fix 8: Reset the Windows Update Repository
- Fix 9: Run Windows Update Troubleshooter
- Fix 10: Restore Windows to Factory Settings
- Fix 11: Replace System Drive with A New SSD
- Part 3: 2 Different Error Code 0x80070057 Messages-How to Fix?
Part 1: Overview of Error 0x8000057
What Is the 0x80070057 Error Code?
The 0x80070057 error code is typically related to storage drive issues and can occur when you attempt to update Windows or install a new application. It usually appears when you upgrade your Windows from an older version to Windows 10.
What Causes the 0x80070057 Error Code?
The causes of the 0x80070057 error code are numerous, and many times they are vague. However, the most probable reasons include corrupt partition and registry and issues in Windows updates, installation, hardware, or storage. There are also more instances of this error, such as for Virtual Box users for Windows 10, who often encounter e_invalidarg (0x80070057). This code means that Windows is unable to access a storage drive (SSD or HDD).
Bonus Tip: How to Restore Data after Windows Update?
Upgrading your Windows can cause data loss, especially if you don’t have a backup. Sometimes a failed Windows update installation can also result in data loss. You cannot particularly roll back the update if you don’t have a system restore point. So what to do in this situation? Luckily a tool like Tenorshare 4DDiG data recovery software can particularly help in this situation. It can restore your Windows and all its audio, video, document, and photo files to their original state. Here’s what more 4DDiG has to offer:
- Easy to use and intuitive user interface.
- Retrieve data from Windows-based storage devices like hard disks, USBs, and SD cards.
- It can recover data, irrespective of internal or external devices.
- It uses an advanced MD5 Message-Digest Algorithm to recover files with accuracy.
- Restore all Windows versions from 7 to 11.
- Recover more than 1000 file types.
- Recover formatted, corrupted, deleted, and damaged files.
- You can preview files before restoring them.
Let’s find out how you can use 4DDiG to restore Windows Data after an update in 3 easy steps:
For PC
Secure Download
For MAC
Secure Download
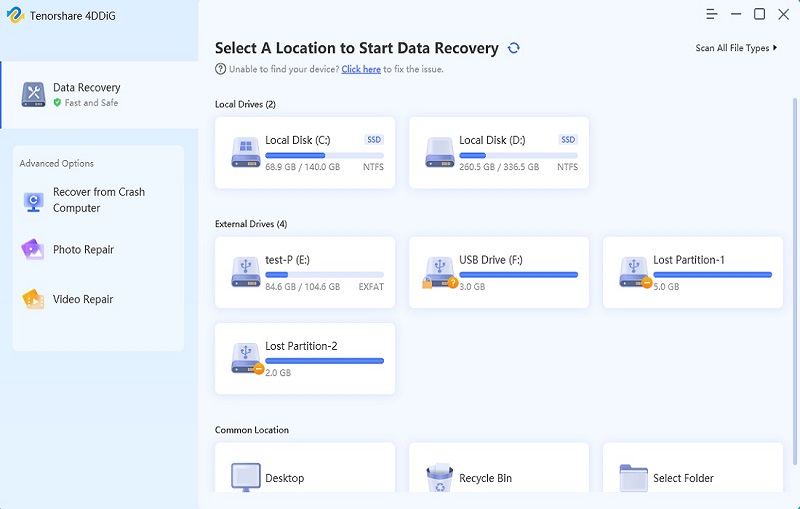
- Download the 4DDiG tool, and install it on Windows where you want to restore your data. Open the tool and choose a drive to roll back the update.
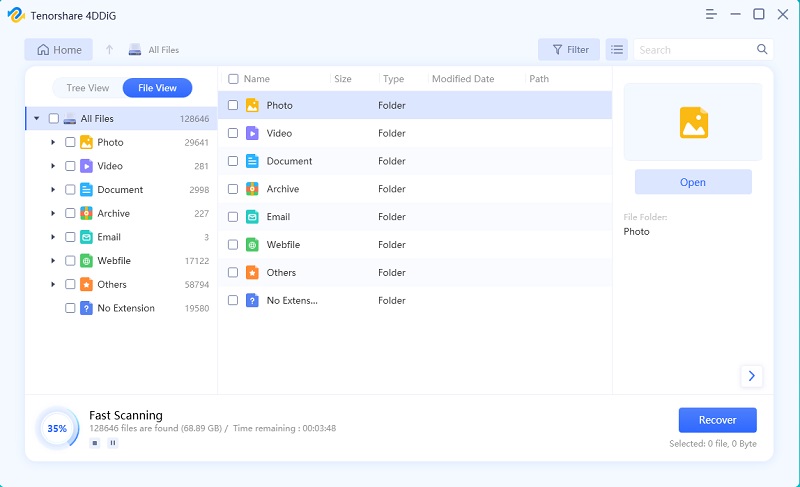
- Hit the “Start” button to start the restoration process. You can also pause the scan to preview files according to categories like Lost Location, RAW Files, Deleted Files, etc., under the Tree View.
- Following the completion of the scan, press “Recover” and choose a location to save them. Your Windows data should be restored by now.

Part 2: 11 Ways for Windows Update Error 0x80070057
The annoying thing about the 0x80070057 error is that you can never be sure why it occurs. However, the most common reason is if you try to install a Windows update and run out of storage space. So with this aspect in mind, we’ve listed 11 ways below to remove Window update error 0x80070057:
Fix 1: Clean Up System Files
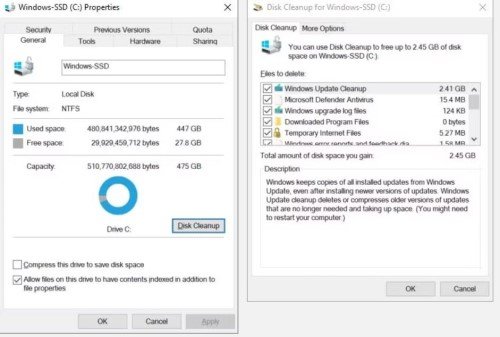
The 0x80070057 error often shows up when you are updating Windows since the update files are huge and can take up a lot of disk space. Besides, Windows store the old version files in a Windows.old folder when performing a new update. The folder can take up more space than you may have in your storage drive. That’s another reason why the Windows update fails, and the 0x80070057 error appears. The solution is to view how much storage space your hard disk has left and clean up the system files to free up disk space. Here’s what you can do:
Step 1: Open the File Explorer by clicking the “Win + E” keys and proceed to “This PC.”
Step 2: Check the disk space. If it is less, right-click on the disk and choose “Properties > Disk Cleanup > Clean up system files.”
Step 3: Check which files are unnecessary, like the “Windows Update Cleanup” and the “Recycle Bin.”
Step 4: Select files and press “OK.” Then confirm to “Delete Files.”
Fix 2: Correct Windows Date and Time
If your Windows clock is out of sync, this can also cause the 0x80070057 error. So, check the clock in the Windows Taskbar to see whether its time and date are in sync with the actual time and date. If it looks in sync, skip this step. Otherwise, follow the instructions below to fix it:
Step 1: In Windows 11, click the “Win + I” keys to open “Settings” and proceed to “Time & language > Date & time.” In Windows 10, right-click on the “Windows Taskbar” to choose “Adjust date/time.”
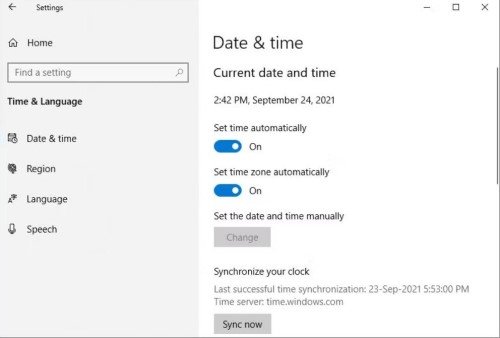
Step 2: Now, adjust for daylight saving time automatically and set time automatically, then set time zone automatically.
Step 3: Press the “Sync Now” button to sync your Windows clock.
Fix 3: Check for Windows Update
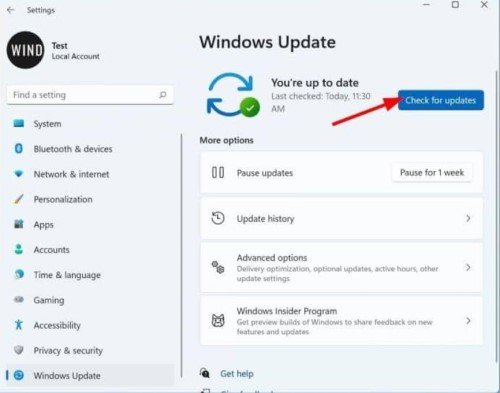
If you haven’t installed any Windows updates, but still the 0x80070057 errors appear, this means there is a missing update. So, click the Win + I keys and follow the steps below:
Step 1: In Windows 11, open “Settings,” choose “Windows Update,” and proceed to “Check for updates.” And install the missing updates. In Windows 10, head to “Update & Security” and choose “Check for updates.” And install the missing updates.
Fix 4: Run CHKDSK to Fix 0x80070057
CHKDSK is a simple way to check for corrupt files and hardware issues in your drive, which might be the reason behind the 0x80070057 error occurrences. Here’s what to do:
Step 1: Open the File Explorer by clicking the “Win + E” keys and proceed to “This PC.”
Step 2: Right-click and select “system drive.” Next, choose “Properties.”
Step 3: Choose the “Tools” tab, select “Check,” and then click on the “Scan drive.”

If the CHKDSK scan finds any issues, fix them and restart your PC.
Fix 5: Run System File Checker to Fix Error 0x80070057
Another way to fix the 0x80070057 error is by using the in-built System File Checker tool. It can resolve any issues your file system is facing and restore it to its original state. Follow the instructions below to fix error 0x80070057 with System File Checker:
Step 1: Choose to run the “Command Prompt” as Administrator from the “Start Menu.” Then enter the “sfc /scannow” command.
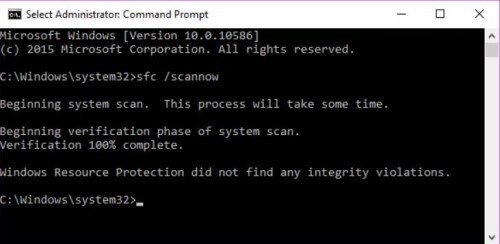
Step 2: The scan results will show whether your system has:
- Corrupt files that the System Checker has fixed.
- Corrupt files that the System Checker is unable to repair.
- No corrupt files.
If the System File Checker is unable to repair some corrupt files, you’ll have to replace them with good copies manually. However, manually replacing them can be time-consuming, especially if there are too many files to replace. So you can use Deployment Image & Serving Management (DISM) instead.
Fix 6: Use DISM Command to Fix
You can use DISM to fix the error 0x80070057. It will restore the health of the corrupt file system. Here’s how you can run DISM:
Step 1: Choose to run the “Command Prompt” as Administrator from the “Start Menu.”
Step 2: Enter the “dism /Online /Cleanup-Image /RestoreHealth” command.
Step 3: Once the command finishes running, restart the system and open the command prompt again.
To repair the corrupt files, enter the “sfc /scannow” command.
Fix 7: Alter the Group Policy Settings
If you are using Windows 10 Pro and have encountered an error like result code: e_invalidarg (0x80070057), this could be due to the Group Policy Settings. You may have, by mistake or intentionally, rendered the Windows update system useless. Here’s how to fix Windows update error 0x80070057 by altering the Group Policy settings:
Step 1: Press the “R and Win” keys at the same time and a run dialogue will open.
Step 2: Type “gpedit.msc” and hit “Enter.”
Step 3: Choose “Computer Configuration > Administrative Templates.”
Step 4: Next select “Windows Components > Windows Update.”
Step 5: Choose “Configure Automatic Updates > Not Configured” and restart your system.
The Windows update process should be fixed by now.
Fix 8: Reset the Windows Update Repository
Another way to fix the 0x80070057 error is by resetting the Windows Update Repository. It will reset all the Windows Update components. The whole procedure of resetting the repository is mentioned in this Microsoft document.
Fix 9: Run Windows Update Troubleshooter
If you’ve encountered an issue like the e_invalidarg 0x80070057 error in Windows OS, you can fix it by running Windows Update Troubleshooter. Find out below how to run it:
Step 1: Download the “Windows Update Troubleshooter.”
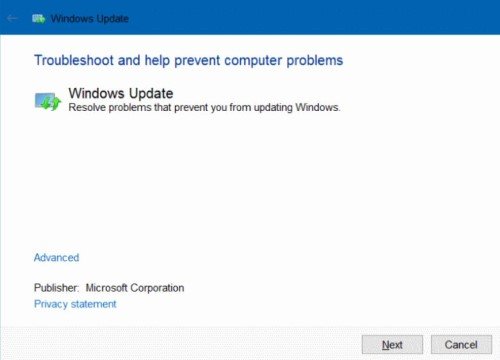
Step 2: Run the “Troubleshooter” and choose “Windows Update > Advanced,” and Run the tool as administrator. Click “Next.”
Step 3: The Troubleshooter will scan to find Windows update issues and resolve them. But remember to check the automatic fix box.
Fix 10: Restore Windows to Factory Settings
Restoring your Windows to factory settings should be your last resort, as it will roll your system back to its original setting, wiping out everything. So, remember to create a backup before you proceed to this last resort. An example of how you can factory reset in Windows 10 is mentioned below:
Step 1: Open “Settings” and then select “Update & Security.” Next, select “Recovery.”
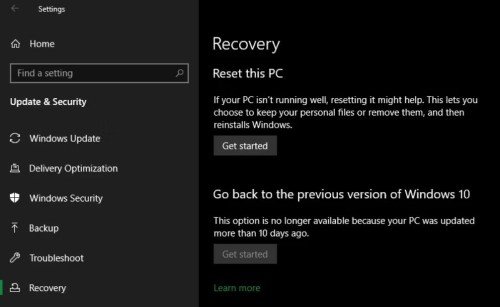
Step 2: Now select “Reset this PC” and “Get started” to begin factory restore.
Fix 11: Replace System Drive with a New SSD
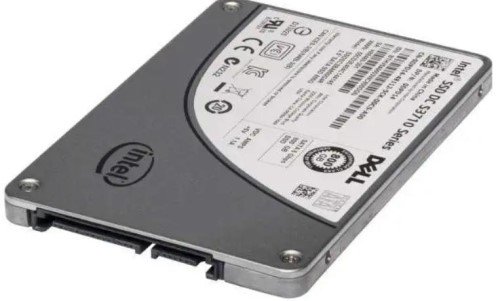
If all the above methods fail to resolve the 0x80070057 error, replace your hard disk with a new SSD drive.
Part 3: 2 Different Error Code 0x80070057 Messages-How to Fix?
If you encounter a different error code 0x80070057 with a particular message, there are a number of ways you can resolve them. Check out the following common messages that come with this error and their fixes:
0x80070057 Error Code 1: But We'll Try Again Later
If you are using Windows 10, you may have come across the 0x80070057 error with an attached message stating there is an issue with installing Windows updates. So, the system will try again later. If that’s the case, try the fixes below to alleviate the problem:
Fix 1: Rename SoftwareDistribution Folder
Step 1: Press the “R and Win” keys at the same time and a run dialogue will open.
Step 2: Type “%SystemRoot%” and hit “Enter.” Then move down to the “SoftwareDistribution” folder.
Step 3: Rename it to “SoftwareDistributon.old.”
Step 4: Next, restart your PC and try to install the update.
Fix 2: Edit the Windows Registry
If the above fix doesn’t work, attempt to make changes to the Windows Registry.
Step 1: Press the “R and Win” keys at the same time and a run dialogue will open. Then type “regedit” and hit “Enter.”
Step 2: Check that the following registry entries are the same as your registry:
- [HKEY_LOCAL_MACHINE\SOFTWARE\Microsoft\WindowsUpdate\UX\Settings] "UxOption"=dword:00000000
- [HKEY_LOCAL_MACHINE\SOFTWARE\Microsoft\WindowsUpdate\UX] "IsConvergedUpdateStackEnabled"=dword:00000000
0x80070057 Error Code 2: The Parameter Is Incorrect
When you attempt to back up files on your PC using Windows Backup, and the process fails, you may encounter the 0x80070057 error code. This happens due to a wrong internal parameter, and you can resolve it by using the following fixes:
Fix 1: Modify the Windows Inbuilt Service
Step 1: Press the “R and Win” keys at the same time and a run dialogue will open. Then type “regedit” and hit “Enter.”
Step 2: Locate the registry key:
- HKEY_LOCAL_MACHINE\SOFTWARE\Policies\Microsoft\SystemCertificates
- Right-click to choose the “SystemCertificates,” and create “New > DWORD (32-bit) Value.”
- Type “CopyFileBufferedSynchronousIo,” and change the Value to 1.
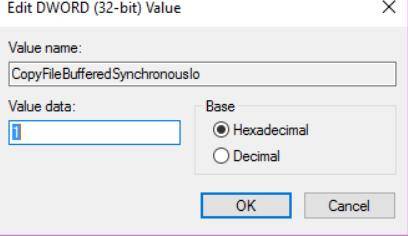
Press “OK” and restart your PC.
Fix 2: Change the Decimal Symbol
Step 1: Open “Control Panel > Clock, Language, and Region.”
Step 2: Under the “Region” heading, choose “Change date, time, or number formats.” This will open a new window.
Step 3: Choose “Additional Settings.”
Step 4: There ought to be a “full stop” next to the “Decimal symbol.”
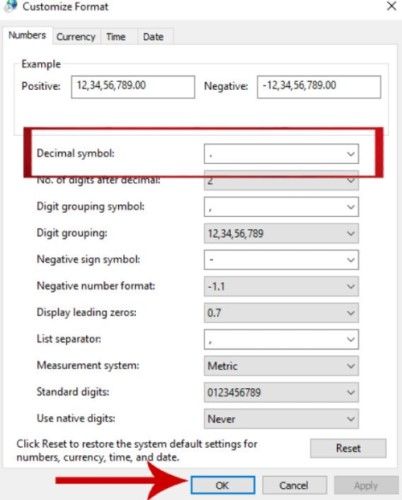
Choose “Apply,” and then hit “OK.”
Conclusion
During the Windows update process, you may encounter the 0x80070057 error. However, this code can occur for several reasons, and not all are clear. You can look at the message attached to the code and try to tackle it by using any of the earlier-mentioned methods in our post. Or you can try these methods one by one according to the situation of the 0x80070057 error and see which one works the best. Windows can also be the cause of losing your precious files. If you don’t have a backup, you might experience permanent data loss. However, Tenorshare 4DDiG data recovery software can rescue you from this situation if you give it a try. It can restore all documents, images, videos, and audio to their original state before the update in just three clicks. You can use it on all Windows versions from 7 to 11 to restore your data with high accuracy.
 ChatGPT
 Perplexity
 Google AI Mode
 Grok
Grok
