How to Fix Time Machine Stuck on Preparing Backup [2024]
If you are experiencing the mac time machine stuck on preparing backup stage problem, follow the steps in the article. If any data loss occurs during this process, you can quickly restore the lost data using the click-based recovery process offered by 4DDiG Mac Data Recovery.
How to Fix Time Machine Stuck on Preparing Backup?“Im running an iMac (2013) on Catalina (I know I shouldn't have updated but I did) connected to a brand new external 4TB HDD. The Time Machine just wont back up and is stuck at "preparing backup" stage for several hours. How do I solve this situation?”
Time Machine is a convenient, built-in, trustworthy solution for routine Mac backups. The backup plan can handle backups automatically once you've set it up. It might occasionally become frozen or stuck. The most frequent problem with Time Machine is that time machine stuck on preparing backup. Time Machine will only backup files and folders that have seen some modifications since the last backup after the initial backup.
Therefore, when it is comparing current data with recently backed-up data, it will show the "Preparing..." status. However, if that stage lasts an extended period, it may get stuck in this process. How to fix time machine stuck on preparing backup? If you are experiencing the mac time machine stuck on preparing backup stage problem, refer to this tutorial to learn the causes and solutions.

Part 1: What Means Time Machine Stuck on Preparing Backup
The built-in backup program in macOS created by Apple is called Time Machine, as most of you are aware. It was initially made available in Mac OS X Leopard to make it easier and safer for users to back up their operating systems. Time Machine supports all popular external storage devices, and you may connect them through a network or USB & Thunderbolt for a wired connection.
Time Machine can back up systems and files on any computer running macOS, the desktop operating system created by Apple Inc. Even though Time Machine flawlessly performs when backing up, macbook pro time machine stuck on preparing backup at times. Many users discovered that their Time Machine was constantly creating backups; the process seemed to take an eternity. They are still determining what occurred or how to address the issue effectively.
Part 2: Why Is My Time Machine Stuck on Preparing Backup
Some claim that the Time Machine spends hours or even a day preparing backups: Always planning backup is what Time Machine suggests. What took place? There are numerous things to blame for it. When a Time Machine backup takes longer than expected, you should be on the lookout for the following things:
- The size of the files that need backing up is excessive.
- The backup process's settings are incorrect.
- The backup drive is incredibly dated.
- The speed of your Mac is slow.
- A slow or inconsistent network connection is present.
- Recent software changes cause the problem.
- Last time, your Mac wasn't properly shut off.
- There was a break in the previous Time Machine backup.
- For a very long time, you have not backed up Mac.
- Your Mac or external backup device is infected with a virus.
- Earlier than being ejected, a disc was unplugged from your Mac.
Part 3: How to Fix Time Machine Stuck on Preparing Backup
How to fix time machine stuck on preparing backup? Numerous factors can cause the Time Machine to become stuck. Therefore, you must take several actions to restore everything to normal. One by one, carry out the steps below:
Way 1: [Remedy] Restore Mac when Time Machine Stuck on Preparing Backup
The backup procedure may be hampered by time machine stuck on preparing backup, which could result in data loss or insufficient data protection. The trustworthy answer is 4DDiG Mac Data Recovery. This robust data recovery program has many benefits and was created especially for Mac computers. Thanks to its extensive recovery capabilities, It can recover various file formats, including emails, documents, images, and videos.
Additionally, 4DDiG Mac Data Recovery enables selective file restoration by allowing users to inspect recoverable files before starting the recovery procedure.
- Recover lost data from Mac and peripheral storage devices including USB, SD card, digital camera, etc.
- Fast scan and 3 clicks away to restore data. No need to disable SIP.
- Recover deleted files on Mac with high success rate.
- T2 chip, M1, M1 Pro, M1 Max and macOS Ventura are supported
-
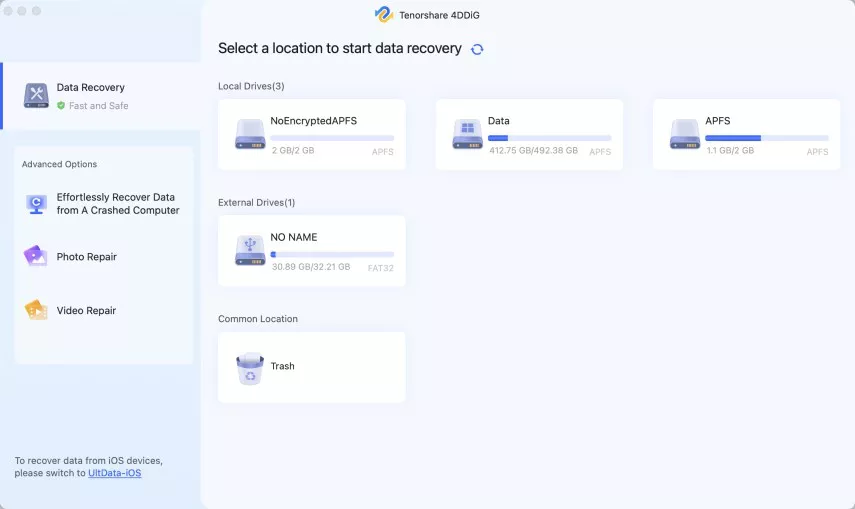
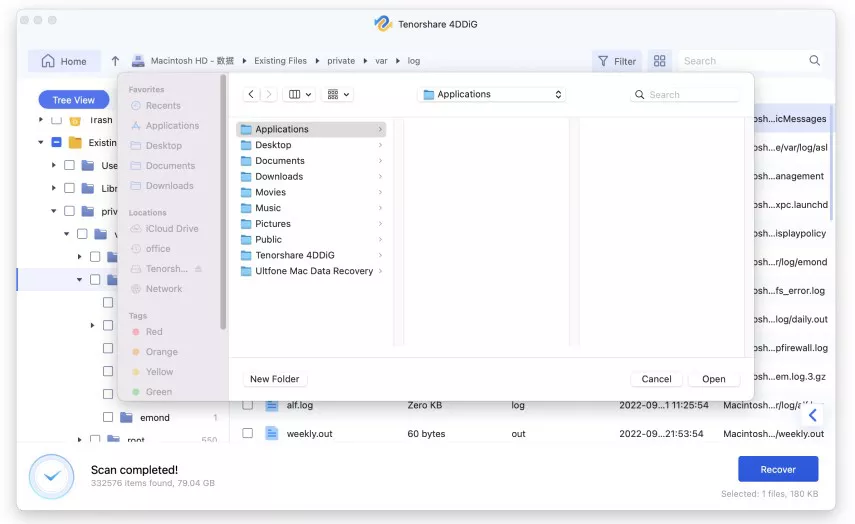
Install and Launch 4DDiG-Mac and Choose a location, such as your local drives, to initiate the data recovery process for your Mac. Place your mouse over the desired location, then click Scan to start looking up all lost files.
FREE DOWNLOAD Secure Download
FREE DOWNLOAD Secure Download
Secure Download
FREE DOWNLOAD Secure Download

-
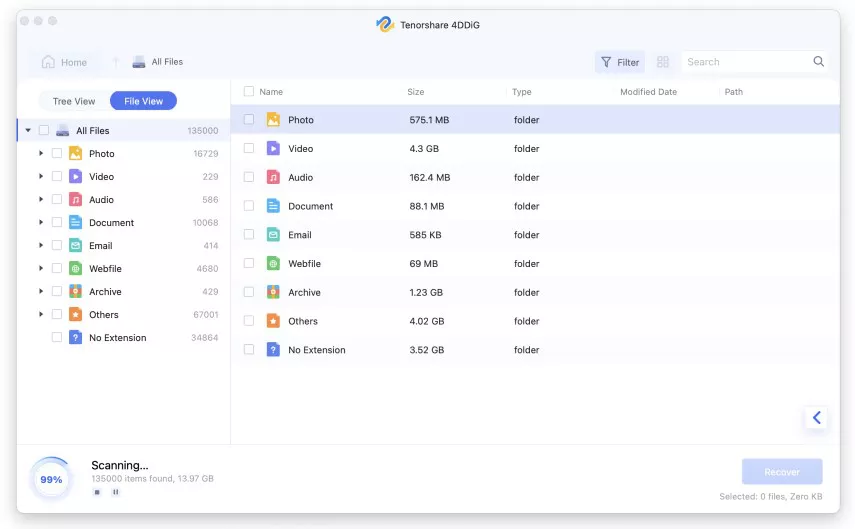
It takes a while to scan all deleted files. After the scanning result is generated, you can click on specific file types to preview more details.
-
Click "Recover" button and select a location to save found files. It's not recommended to save the recovered files to the partition where you lost them. This may cause permanent data loss.
Way 2: Stop Time Machine Backup.
Before moving forward from a mac time machine stuck on preparing backup, the current backup procedure must be stopped. How to do it:
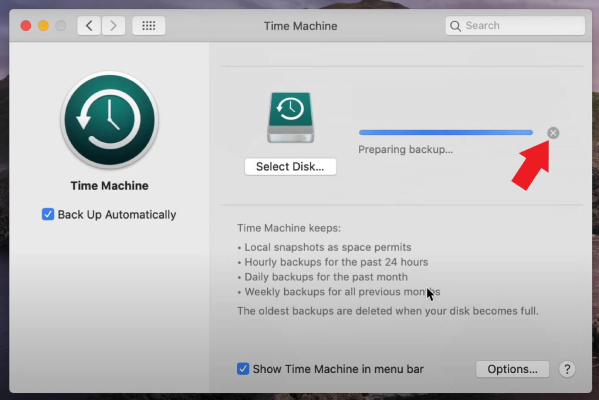
- In the Apple menu, select "System Preferences," then look for "Time Machine."
- To bring up the Time Machine window, double-click on it. The window's interior has a blue progress bar.
- After a brief delay, the backup operation will end when you click the "X" icon.
-
Before taking the following step, it is crucial to be patient and wait until the procedure has ceased.
Way 3: Delete the ".inProgress" File.
Finding and deleting Time Machine's ".inProgress" placeholder file from the backup drive comes next once the backup procedure has been stopped.
- Launch a Finder window to accomplish this, then select the backup drive. Locate and click on the "Backups.backupd" folder.
- You might need to go to another folder inside this one titled for your Mac, such as "David's iMac." Find the file with ".inProgress" at the end of its name in that folder, then remove it.
-
Empty the "Trash" and ensure the file is gone.
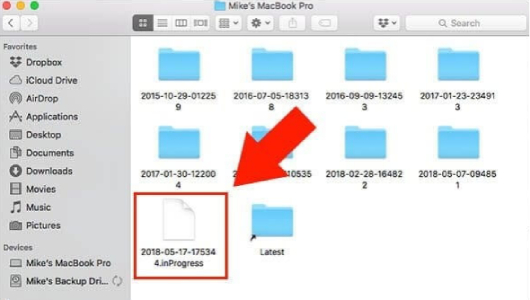
When Time Machine discovered files that required a backup, the.inProgress file was generated. Its name, which consists of 8 numbers representing the year, month, and day of the backup, six random numbers, and the.inProgress extension, is xxxx-xx-xx-xxxxxx.inProgress. 2021-09-21-123456.inProgress, as an illustration.
If you're having difficulties finding the file, you may use the "List View" to arrange the files and folders by "Date Modified" or perform a search for ".inProgress" to help you find it.
Way 4: Block Spotlight from Indexing
How to fix time machine stuck on preparing backup? The Time Machine backup preparation stage may be interrupted if Spotlight indexes the Time Machine backup volume. Add your backup folder to the "Privacy" option in Spotlight preferences to prevent Spotlight from indexing files.
- Choosing System Preferences from the Apple icon's drop-down menu would be best. Additionally, you can access the System Preferences pane by directly clicking its Dock icon.
- In this window, look for the Spotlight icon and click it.
- In the Spotlight window that just opened, click the Privacy tab.
- The list of programs and processes that Spotlight still needs to index shows up.
- The + (Add) button is located in the bottom left corner.
-
To the list, look for the Time Machine backup folder and include it. Additionally, you may drag & drop it right onto the list.

Way 5: Restart the Time Machine Backup Process
Once the ".inProgress" file has been completely erased and the Spotlight interruption problem has been resolved, restart your Mac while keeping the backup disc plugged in. Due to this process, the files associated with your Time Machine backup drive should be re-indexed on your Mac.
- Restart your Mac while keeping the backup disc attached. Click the Apple logo.
- To start a fresh backup, click the Time Machine icon and select Back Up Now.
- Selecting the undesirable items with the Add button (+) and then clicking Option can expedite the Time Machine backup by not backing up some data.
Part 4: FAQ
Q1: How Long Should Mac Be on Preparing Backup?
The amount of data on your Mac, the size of the backup, the speed of the connection between your Mac and the Time Machine backup disc, and whether it is an initial backup all affect how long a Time Machine backup takes.
Q2: How to Avoid Time Machine Being Stuck on Preparing Backup
Ensure there is enough space on the backup drive to prevent Time Machine from getting stuck on "Preparing Backup." Keep your network connection steady and take care of any software incompatibilities. To speed up the process, you should also frequently update macOS and Time Machine and consider eliminating big or useless files from the backup.
Q3: How Does Time Machine Work?
The methods below can be used to activate Time Machine on a Mac and begin the backup procedure:
- Connect your Mac to an external storage device like a hard drive.
- Select "System Preferences" from the Apple menu by clicking on it in the top left corner of the screen.
- Click "Time Machine" in the System Preferences box to start.
- To activate Time Machine, turn the switch to the "On" position.
- To select the connected external storage device as the backup destination, click the "Select Backup Disc" button.
- Click the "Use Disc" option after selecting the desired backup disc from the list.
- Click the "Options" button and add the objects you want to leave out of the backup to the exclusion list.
- Now Time Machine will automatically start the backup procedure following the chosen backup schedule or immediately start a backup.
Conclusion
Although Time Machine is a valuable tool for backing up your data on a Mac, problems can arise occasionally. Follow the steps above if macbook pro time machine stuck on preparing backup stage. When you finish all the steps, the problem should no longer exist for whatever reason it did. And if any data loss occurs during this process, you can quickly restore the lost data using the click-based recovery process offered by 4DDiG Mac Data Recovery.