Can’t Install macOS Sequoia? Here’s How to Fix It
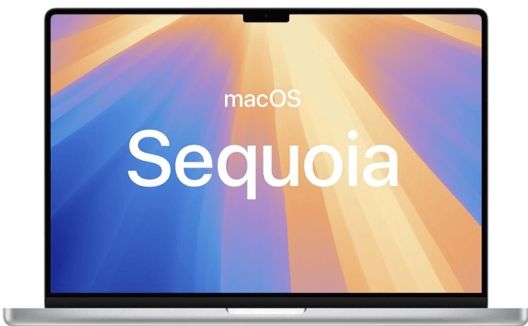
Are you facing issues with the regrettable “Can’t install macOS Sequoia” issue? You're not alone. In particular, many users encounter similar problems related to updating to the latest version of MacOS.
These glitches can be rather annoying and may occur due to compatibility issues, low hard disk space, or a bad installer. But don’t worry!
Here are some tips that will help you bypass these installation issues and complete this task without any serious difficulties.
Fix the issue of being unable to install macOS Sequoia in 5 Ways.
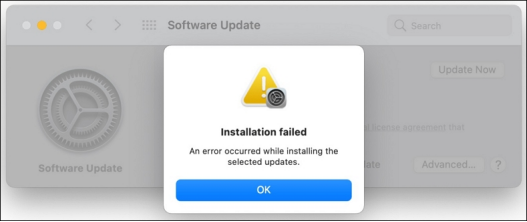
Several users have reported receiving errors while going through the installation process of macOS Sequoia meaning they cannot continue with the process and sometimes the macOS update stuck at 30 minutes.
Again, it might be compatibility problems, low disk space, or even other technical concerns that may lead to a message like, “macOS Sequoia cannot be installed”. Thankfully, there are numerous approaches to diagnosing and treating these problems appropriately.
1.Check Compatibility
Installing macOS and Sequoia often involves compatibility issues. Macs must meet system requirements to install macOS Sequoia. If you have an old Mac or if your Mac model doesn’t support the hardware required for macOS Sequoia, you will receive a notice that macOS Sequoia cannot be installed on the computer.
Go to the Apple site or “About this MAC” to verify the system requirements and see if your Mac supports Sequoia. You can download a new OS if your MAC is compatible. This method also works when the macOS Tahoe not showing up on your device.
2.Free Up Disk Space
Low disk space is another common cause of the macOS Sequoia installation error.
Downloading and installing macOS Sequoia may take some space. Therefore, you must free up disk space if it is full.
Start by visiting “About This Mac” and reviewing the “Storage” section. You can delete huge files, remove superfluous apps, or relocate them to external storage from there. Make sure there's enough space for the installation to go well.
3.Verify Internet Connection
One also find that an unstable or slow internet connection can also be a reason why macOS Sequoia won’t install. Due to the fact that the installation process takes a stable
To rectify this, be sure your Mac is connected to a stable Wi-Fi connection, or use Ethernet if the problem persists. If you have a slow or unstable Internet connection, you may lose connectivity during the installation and obtain a damaged or incomplete installation package.
4.Repair Disk Permissions And File System
Some problems that might hinder the installation of macOS Sequoia include disk errors or file permission. To solve these issue, repair your disk permissions and the file system through the Disk Utility that is provided in Mac OS X.
First, open Disk Utility from the utilities folder and then choose the disk in which you want to install the mac os.
Subsequently, move the cursor down to select ‘First Aid’ so as to check for any issues in the disk permission and filesystem. This will assist you in verifying that the Mac’s drive is well-tuned and optimized for the new OS installation.
5.Corrupted Installer File
Sometimes the core installer file for macOS Sequoia itself may be damaged making installation a challenge. This can happen due to factors such as interrupted downloads or when a file gets corrupted in the process of downloading. To rectify this, remove the existing installer file and then download it via the Apple official website.
To avoid such an issue again in the future, ensure that you are downloading and using the most current and accurate installer. If the error still persists, you can try installing the software after downloading it.
Steps to Recover Data Using 4DDiG
If you have failed to install macOS Sequoia and you have lost some files you need, follow the steps below to retrieve your data using 4DDiG:
Download and install the 4DDiG software
FREE DOWNLOADSecure Download
FREE DOWNLOADSecure Download
First, you have to get the 4DDiG software from the official website and run the installation on your Mac. It is very easy to install and the whole process only takes about a few minutes.
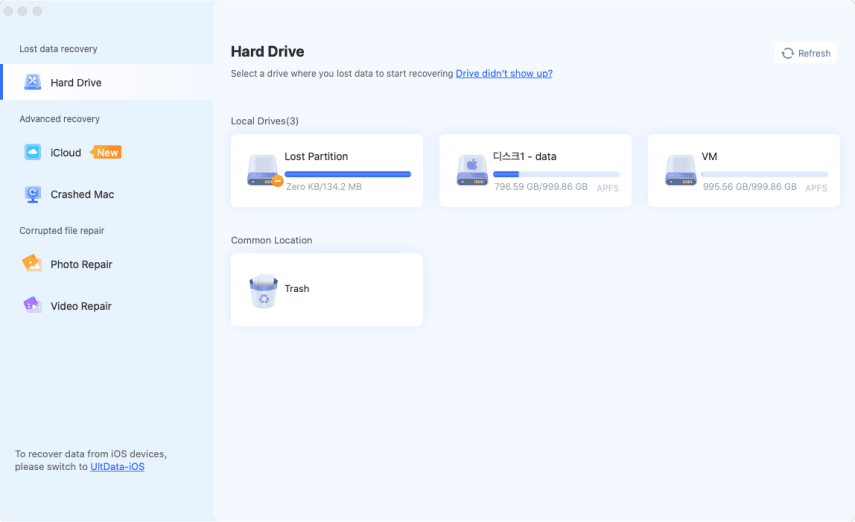
Launch 4DDiG and select the disk where you lost the data

When installed, launch 4DDiG and choose the drive or partition on which data got deleted during the macOS installation. It is very important to select the correct disk in order to avoid scanning files that are unnecessary to the process.
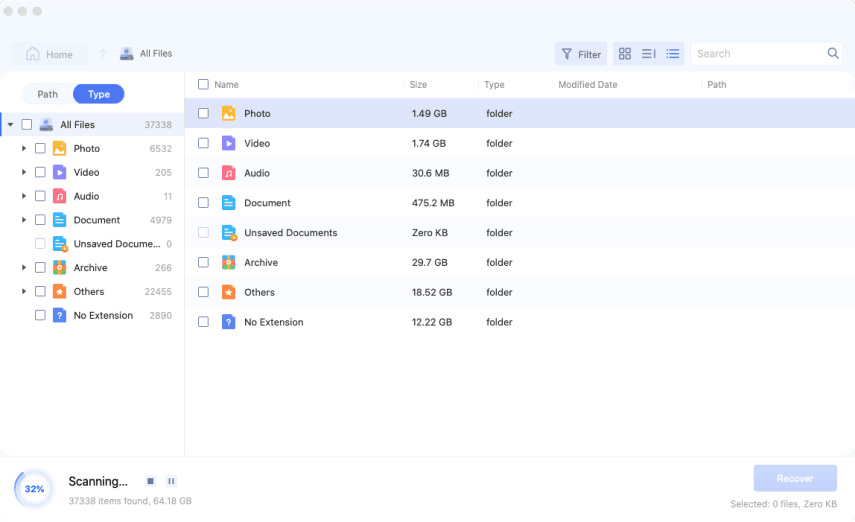
Start the scan to search for lost files

Click the 'Scan' button to begin searching for the lost files. 4DDiG will perform a deep scan of your selected disk, looking for all recoverable files. This process may take some time, depending on the size of your drive.
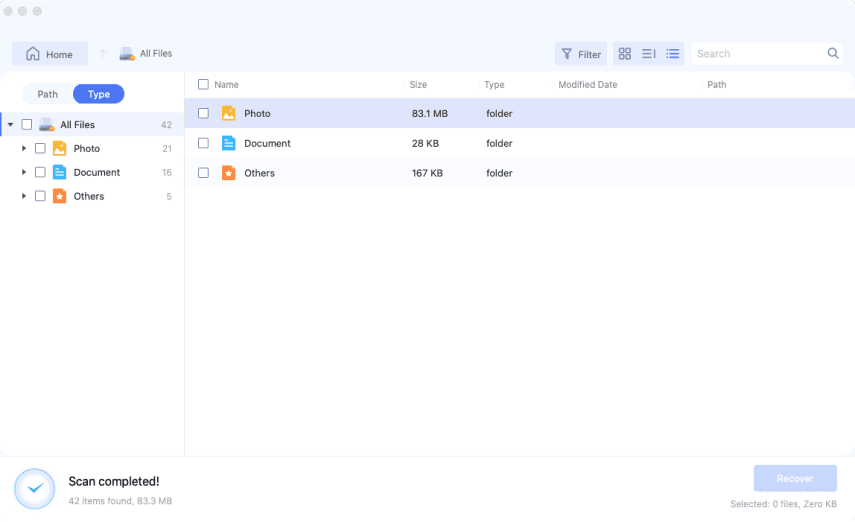
Preview and recover your lost files by clicking the 'Recover' button

As soon as the scan is done, 4DDiG will present you with the list of files that can be recovered. This way, you can preview the files and be certain that they are the files that you want to recover. Choose the files that you want to recover, then click on the ‘Recover’ option.
Save the recovered files to a secure location
Last, select where to store the files that were recovered from the corrupted computer. They should not be saved to the disk that was affected by the loss of data in order not to overwrite existing files. When backed up, your important data is recovered to the point that it can be used.
Employing 4DDiG Mac Data Recovery is an effective and highly efficient technique to retrieve lost data in the event that the macOS installation of Sequoia is unsuccessful. Therefore, by following these steps, you shall be able to unlock your locked files conveniently.
Final Verdict
It can be quite annoying to encounter errors while attempting to install macOS Sequoia but following the right processes ensures that errors are fixed, and the system is functional again. Whatever the case is, whether it is compatibility, disk space, or corrupted files, solving these issues logically would not take much time.
Furthermore, if the installation process results in data loss, there are always applications such as 4DDiG Mac Data Recovery that can help you retrieve your data with much ease. By so doing, you will be in a position to rectify installation issues and also ensure that your important data is not lost in the process. Before performing updates on macOS it is important that you always have backups and the relevant tools just in case something goes wrong.
FAQs
1. Why won’t my Mac let me install macOS?
There are a few common reasons why your Mac won’t let you install macOS. It may be due to compatibility issues where your Mac fails to meet the recommended system requirement. Lack of sufficient disk space on the computer or damage to the installer file can also lead to the failure of the installation.
2. How can you fix the issue of “macOS not being installed on the computer”?
In order to resolve the “macOS cannot be installed on this computer” issue, you should first make sure that your Mac meets the requirements of the specific macOS release. Secondly, verify available storage space and release some disk space if necessary for better performance. Last but not least, attempt to repair your disk in Disk Utility to fix any file system issues.
3. Why can’t macOS Sequoia be installed on Macintosh HD?
This issue can arise due to corrupted files, incompatible file systems, and lack of adequate storage in the Macintosh HD. Check if you can solve the problem by repairing the disk using Disk Utility, freeing some space, or downloading an installer from a Mac.
 ChatGPT
 Perplexity
 Google AI Mode
 Grok
Grok

