How to Password Protect USB Flash Drive
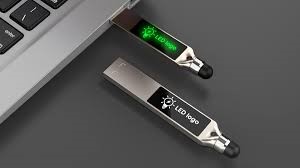
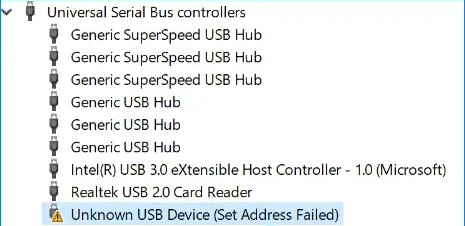
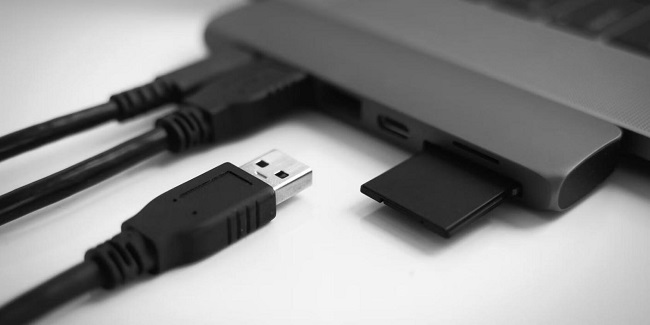
In an era dominated by digital data and the ubiquitous use of portable storage devices, ensuring the security of sensitive information is paramount. USB flash drives have become a common means of carrying and transferring data, making them susceptible to data breaches and unauthorized access. This article explores the feasibility of password protect usb drive and provides a comprehensive guide on five effective methods covering password protected flash drive.
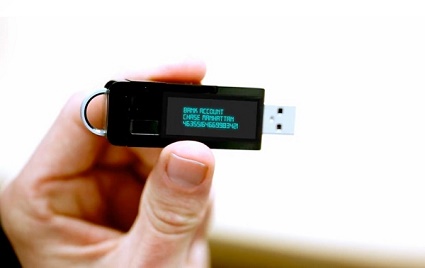
Part 1: Can USB Flash Drives Be Password Protected?
USB flash drives are indispensable for carrying and transferring data due to their compact size and convenience. However, the ease of use poses a significant security risk, especially when these devices contain sensitive or confidential information. In response to this concern, users often wonder if it is possible to password-protect USB flash drives effectively. In this section, we will delve into the technical aspects of USB flash drives and explore the various methods available to secure them against unauthorized access.
Part 2: How to Password Protect USB Flash Drive
This section presents five distinct methods to password-protect USB flash drives, each catering to different preferences and requirements.
Way 1: How to Recover Data from a Password Protect USB Flash Drive
Losing access to the data stored on a password protected usb can be a distressing experience. Whether due to a forgotten password or unexpected data corruption, the need to recover this information is crucial. 4DDiG Windows Data Recovery simplifies the recovery process and offers a user-friendly interface and advanced features that make it a preferred choice for users facing such challenges.
Secure
Download
Secure
Download
-
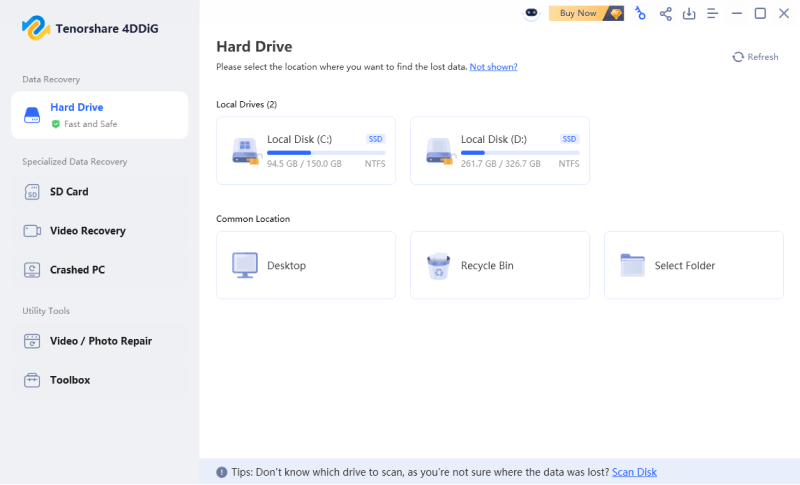
Select Local Disk
Upon installing and launching 4DDiG, navigate to the Data Recovery section. Choose your local disk and initiate the scan by clicking Start. Optionally, tailor the process by selecting specific file types from the options in the upper-right corner.
-
Scan the Local Disk
4DDiG performs a comprehensive scan on the chosen drive, swiftly locating missing data. Feel free to pause or stop the scan at any point during the process. The intuitive interface categorizes files under Deleted Files and other sections for easy identification. Switch to File View for a detailed look at specific file types.
-
Preview and Recover
Once the target files are identified, preview them for accuracy before initiating the recovery process. For data safety, recover files to a secure location, avoiding the same partition where the data was initially lost. This straightforward approach ensures a smooth and fast data recovery experience with 4DDiG.
Way 2: Password Protect USB Flash Drive on Windows 10 with BitLocker
Windows 10 comes equipped with BitLocker, a robust encryption feature designed to enhance the security of data storage devices, including USB flash drives. This section outlines the step-by-step process of enabling BitLocker on a USB flash drive, ensuring that your data remains protected with the encryption capabilities of the Windows operating system.
- Begin by connecting the USB flash drive to your Windows 10 computer. Ensure that the drive is recognized and accessible through File Explorer.
- Right-click on the USB flash drive in File Explorer.
-
Select "Turn on BitLocker" from the context menu.

- BitLocker provides various methods for unlocking the drive, including passwords, smart cards, or recovery keys. Choose the "Use a password to unlock the drive" option for password protection.
- Enter a strong and secure password. Using a combination of letters, numbers, and special characters is essential to enhance the password's strength.
- Confirm the password by entering it again.
- BitLocker generates a recovery key that can be used to unlock the drive in case the password is forgotten. Choose whether to save the recovery key to a file, print it, or save it to your Microsoft account.
- Choose between the two available encryption options:
- Encrypt used disk space only: This option is faster and best for new drives or drives with minimal data.
- Encrypt the entire drive: This option provides comprehensive protection by encrypting the whole drive, including any free space.
- Select the appropriate option based on your preferences and requirements.
- Click on the "Next" button to begin the encryption process. BitLocker will start encrypting the USB flash drive, and this process may take some time, depending on the size of the drive and the amount of data it contains.
- Once the encryption process is complete, BitLocker will notify you. You can now safely eject the USB flash drive from your computer.
Way 3: Password Protect USB Flash Drive with MS Office
Microsoft Office provides an unconventional yet effective method to password-protect USB flash drives. Using the encryption features within MS Office applications, users can add a layer of security to their sensitive data. This section walks through password protected external hard drive using MS Office, offering a convenient solution for those already familiar with Microsoft's productivity suite.
- Locate and open the document you want to protect using the corresponding Microsoft Office application (e.g., Microsoft Word, Excel, PowerPoint).
- If the document is not already created, you can create a new one and save it to your USB flash drive.
- Once the document is open, navigate to the "File" tab in the upper left corner of the application.
- Select "Info" from the menu.
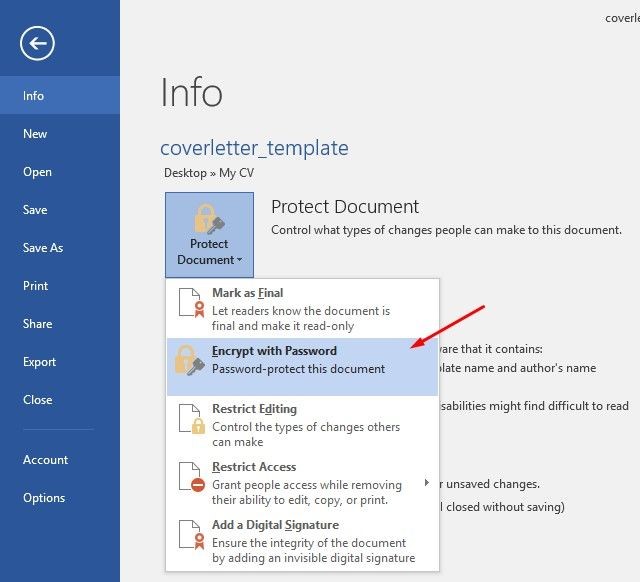
- Under the "Info" section, find and select the "Protect Document" option. The specific wording may vary slightly depending on your Office application (e.g., "Protect Workbook" in Excel).
-
Choose the option that says "Encrypt with Password."

- Enter a strong and secure password. Ensure that it combines letters, numbers, and special characters to enhance its strength.
- Confirm the password by entering it again. This step ensures the correct password is used during subsequent attempts to access the protected document.
- Save the document to apply for password protection. Save it directly to your USB flash drive or overwrite the existing file.
- Safely eject the USB flash drive from your computer.
- Now, the specific document on your USB flash drive is password protected. When someone attempts to open the protected document, they will be prompted to enter the password you set.
Way 4: Password Protect USB Flash Drive via Rohos Mini Drive
Rohos Mini Drive is a third-party software solution that creates encrypted partitions on USB flash drives. This section explores the features and steps of using Rohos Mini Drive to secure usb flash drive with password. By leveraging this specialized tool, users can enhance the security of their data with ease and flexibility.
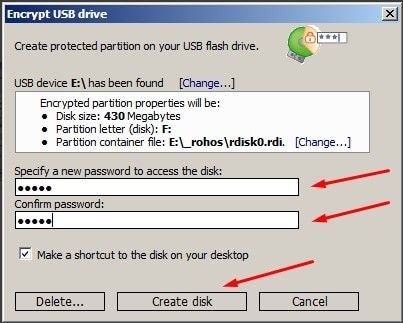
- After installation, launch Rohos Mini Drive. The software will prompt you to set up a new encrypted partition.
- Click on the "Setup USB Key" button to configure a USB key that will act as the access token for the encrypted partition. This USB key will need to be inserted whenever you want to access the protected content.
- Select your USB flash drive as the target for the encrypted partition. Rohos Mini Drive will create a hidden and encrypted partition on the drive where your protected files will reside.
- Enter a strong and secure password. This password will be required to unlock and access the encrypted partition. Use letters, numbers, and special characters for enhanced security.
- Specify the size of the encrypted partition. It is the space on the USB flash drive that Rohos Mini Drive will protect. You can allocate as much space as needed based on your storage requirements.
-
Click on the "Create Disk" button to format and create the encrypted partition on the USB flash drive.

- Once the process is complete, Rohos Mini Drive will show a confirmation message. You can now access the protected partition on your USB flash drive.
- Open the newly created encrypted partition using Rohos Mini Drive.
- Add the files and folders you want to protect by dragging and dropping them into the encrypted partition.
- After adding or accessing the protected files, always use your operating system's "Safely Remove Hardware" option to eject the USB flash drive.
Way 5: Password Protect USB Flash Drive via BitLocker
Besides its built-in encryption capabilities, BitLocker can also be utilized as a standalone tool for password-protecting USB flash drives. This section provides an alternative method to enable BitLocker on a USB flash drive, offering users flexibility in choosing the approach that best suits their preferences and requirements.
- Begin by connecting your USB flash drive to your Windows computer. Ensure that the drive is recognized and accessible through File Explorer.
- Right-click on the connected USB flash drive in File Explorer.
- Select "Turn on BitLocker" from the context menu.
-
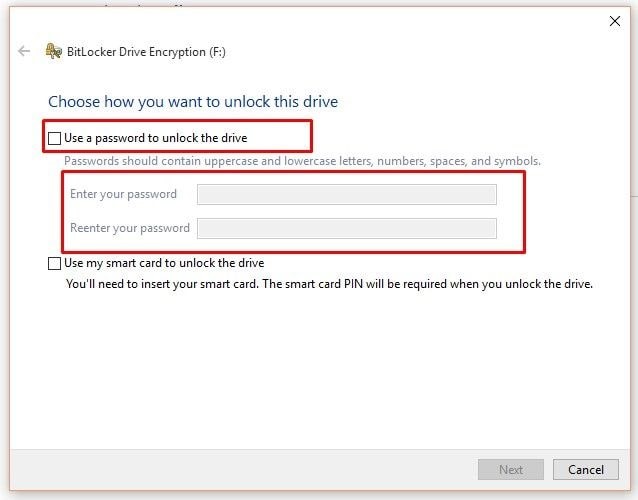
BitLocker provides various methods for unlocking the drive, including passwords, smart cards, or recovery keys. Choose the "Use a password to unlock the drive" option for password protection.

- Enter a strong and secure password. Using a combination of letters, numbers, and special characters is important to enhance the password's strength.
- Confirm the password by entering it again.
- BitLocker generates a recovery key that can be used to unlock the drive in case the password is forgotten. Choose whether to save the recovery key to a file, print it, or save it to your Microsoft account.
- Choose between the two available encryption options:
- Encrypt used disk space only: This option is faster and best for new drives or drives with minimal data.
- Encrypt the entire drive: This option provides comprehensive protection by encrypting the whole drive, including any free space.
- Select the appropriate option based on your preferences and requirements.
- Click on the "Next" button to begin the encryption process. BitLocker will start encrypting the USB flash drive, and this process may take some time, depending on the size of the drive and the amount of data it contains.
- Once the encryption process is complete, BitLocker will notify you. You can now safely eject the USB flash drive from your computer.
Way 6: Password Protect USB Flash Drive by WINRAR
WINRAR, a popular compression and archiving tool, can password protected thumb drive. This section explores the step-by-step process of creating a password-protected archive using WINRAR, providing users with a versatile and accessible method to secure their data.
- Open WINRAR and navigate to the location of the files or folders on your USB flash drive that you want to password-protect.
- Select the files or folders you want to include in the protected archive.
- Right-click on the selected files or folders.
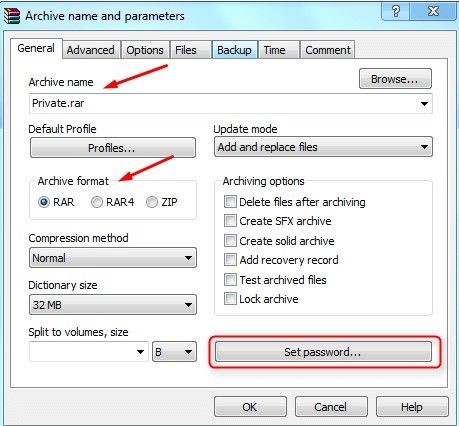
- From the context menu, choose "Add to archive."
- In the Archive name and parameters window, locate the "Set password..." button.
- Click on "Set password..." to open the Set password window.
-
Enter a strong and secure password in the "Enter password" field. Using a combination of letters, numbers, and special characters is essential for better security.

- Confirm the password by entering it again in the "Reenter password" field.
- You can choose additional settings, such as encryption method and compression level, based on your preferences. The default settings are usually sufficient for password protection.
- Click "OK" in the Set password window to apply the password protection.
- Click "OK" to create the password-protected archive in the Archive name and parameters window.
- Locate the newly created archive on your USB flash drive.
- Double-click on the archive to open it.
- WINRAR will prompt you to enter the password. Enter the correct password to access the contents of the archive.
- After creating and testing the password-protected archive, use your operating system's "Safely Remove Hardware" option to eject the USB flash drive.
Part 3: FAQ
Q1: What's a Password Protect USB Flash Drive?
Password-protecting a USB flash drive involves adding a security layer to the device, requiring a password to access its contents.
Q2: Can you lock a file on a USB drive?
You can lock a file on a USB drive using various methods. One common approach is to use file encryption or archiving tools like WINRAR or BitLocker to password-protect specific files or folders on the USB drive.
Q3: How do I password-protect a flash drive without BitLocker?
If BitLocker is unavailable or preferred, alternative methods exist to password-protect a flash drive. Users can use third-party encryption tools like Rohos Mini Drive or WINRAR to create encrypted partitions or archives with password protection.
Conclusion
In the digital information age, safeguarding our data is of utmost importance. This article has explored the various methods to password-protect USB flash drives, catering to different preferences and technical capabilities. From utilizing specialized software like 4DDiG Windows Data Recovery to leveraging built-in features like BitLocker, users have a range of options to enhance the security of their portable storage devices.

 ChatGPT
 Perplexity
 Google AI Mode
 Grok
Grok

