How to Fix the Please Insert the Last Disk of Multi-Volume Set Error?

5 mins read

Updated on 2026-05-22 15:15:46 to USB Recovery

If you are seeing the "please insert the last disk of the multi-volume set" error, it is usually caused by issues such as incomplete ZIP/RAR archives, corrupted USB storage, or improper extraction methods.

This guide will explain the main causes behind the error and show you how to fix it using methods such as checking or re-downloading the archive, moving all archive parts into the same folder and using a proper extraction tool like WinRAR or 7-Zip.

please insert the last disk of the multi volume set

The Causes of Please Insert the Last Disk of the Multi-Volume Set Error

The "please insert the last disk of multi-volume set" error usually appears when Windows cannot properly read a USB drive, external hard disk, SD card, or compressed ZIP/RAR file. It is commonly caused by corrupted files, damaged storage devices, interrupted transfers, or compatibility issues between Mac and Windows systems. Below are the most common causes of this error:

Using the USB Drive on Both Mac and Windows

When a USB drive is used on a Mac, macOS may create hidden system files on the drive. Windows can sometimes mistakenly identify these files as incomplete compressed archives, triggering the multi-volume set error.

Incomplete or Damaged ZIP/RAR Files

If part of a multi-volume ZIP or RAR archive is missing or corrupted, Windows may repeatedly ask for the "last disk" of the set.

Corrupted USB Drive or External Hard Drive

Damaged file systems, corrupted partitions, or bad sectors on a removable drive may cause Windows to incorrectly detect archive or volume data.

Virus or Malware Infection

Some malware can create corrupted hidden files or fake compressed folders on USB drives, which may repeatedly trigger this error message.

Improper USB Removal

Disconnecting a USB device without safely ejecting it can damage the drive's file structure and lead to archive-related errors.

How to Fix Please Insert the Last Disk of the Multi-Volume Set Error

In most cases, the issue can be resolved without data loss if the correct troubleshooting steps are followed. The methods below will help you identify the cause and fix the error effectively on Windows.

How to Fix USB Please Insert the Last Disk of the Multi-Volume Set

Fix 1: Try Another USB Port or Computer

If the error is caused by a connection issue or system-related problem, the fastest way to identify it is to test the USB drive on a different port or another computer. This helps determine whether the problem is related to the device itself or the current system environment, without making any changes to your files.

Fix 2: Move All Archive Parts to the Same Folder

The first thing to check is whether all parts of the multi-volume ZIP or RAR archive are stored in the same folder. Windows needs every segment in one location to correctly reconstruct the full file set. If any part is missing or placed elsewhere, the system may fail to recognize the archive and trigger the error.

  • Locate all parts of the compressed archive (e.g., .part1, .part2, .zip, .rar).
  • Select all related archive files.
  • Move them into a single folder on your computer.
  • Make sure no file is missing or renamed.
  • Try extracting the file again using 7-Zip or WinRAR.

Fix 3: Extract Files Instead of Opening Directly

Windows' built-in extractor can sometimes misread multi-volume ZIP or RAR files and trigger the please insert the last disk of the multi-volume set error. Instead of opening the file directly, using a dedicated extraction tool can help avoid recognition issues and ensure the archive is processed correctly.

  • Install a reliable extractor such as 7-Zip or WinRAR.
  • Right-click the ZIP or RAR file on File Explorer.
  • Select "Extract All". click to extract all zip file
  • Avoid double-clicking the file in Windows Explorer.
  • Check the extracted files after the process completes.

Fix 4: Rename the File

In some cases, Windows may fail to properly recognize a ZIP or RAR archive if the file name contains special characters, excessive length, or formatting issues. Renaming the file can help eliminate conflicts and allow the system to read the archive correctly.

Fix 5: Re-download the ZIP/RAR File

One of the most common reasons for the error is an incomplete or corrupted ZIP/RAR archive. If even one part of a split file is missing or damaged, Windows cannot properly reconstruct the full archive, causing the error to appear. In such cases, re-downloading the file from a reliable source ensures that all archive parts are complete and intact.

  • Check whether all archive parts are present in the download folder.
  • Verify that no file is missing, renamed, or partially downloaded.
  • If any part is incomplete, delete the existing files.
  • Re-download the ZIP or RAR file from the original source.
  • Ensure the download completes without interruption before opening it again.

Fix 6: Recover Data Before Formatting the Drive

If re-downloading the ZIP or RAR file does not fix the issue, it usually means the problem is no longer just a download error. In many cases, the files may already be partially corrupted on the USB drive or the storage structure has become unreadable by Windows.

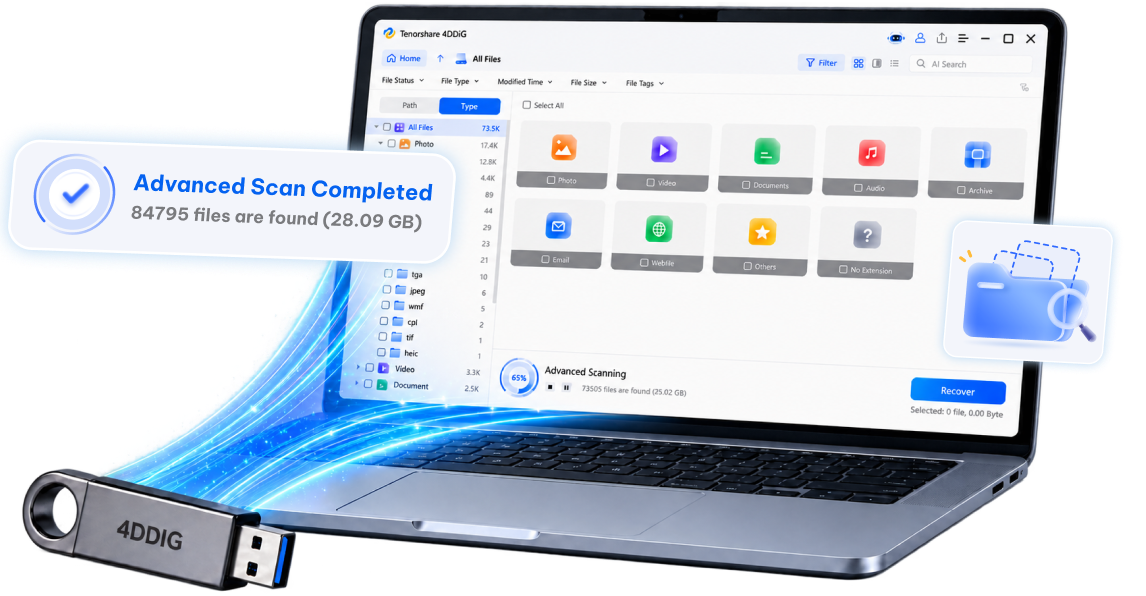
At this point, the safest approach is to avoid further modifications and focus on recovering accessible data first. 4DDiG flash drive recovery is designed for this situation, allowing you to scan USB drives and external storage devices to retrieve lost or unreadable files before applying any deeper repair or formatting operations.

  • Recover from various storage devices: Scans USB flash drives, external hard drives, SD cards, and other removable storage devices to recover files affected by corruption, unreadable partitions, or system errors.
  • Support recovery of common file types: Able to documents, images, videos, audio files, and compressed ZIP/RAR archives.
  • Deep scan for lost or hidden data: Performs a deep scan to locate deleted, hidden, or fragmented files.
  • Preview files before recovery: Allows users to preview recoverable files before restoring them, ensuring only needed data is recovered and saved safely.
FREE DOWNLOAD

Secure Download

FREE DOWNLOAD

Secure Download

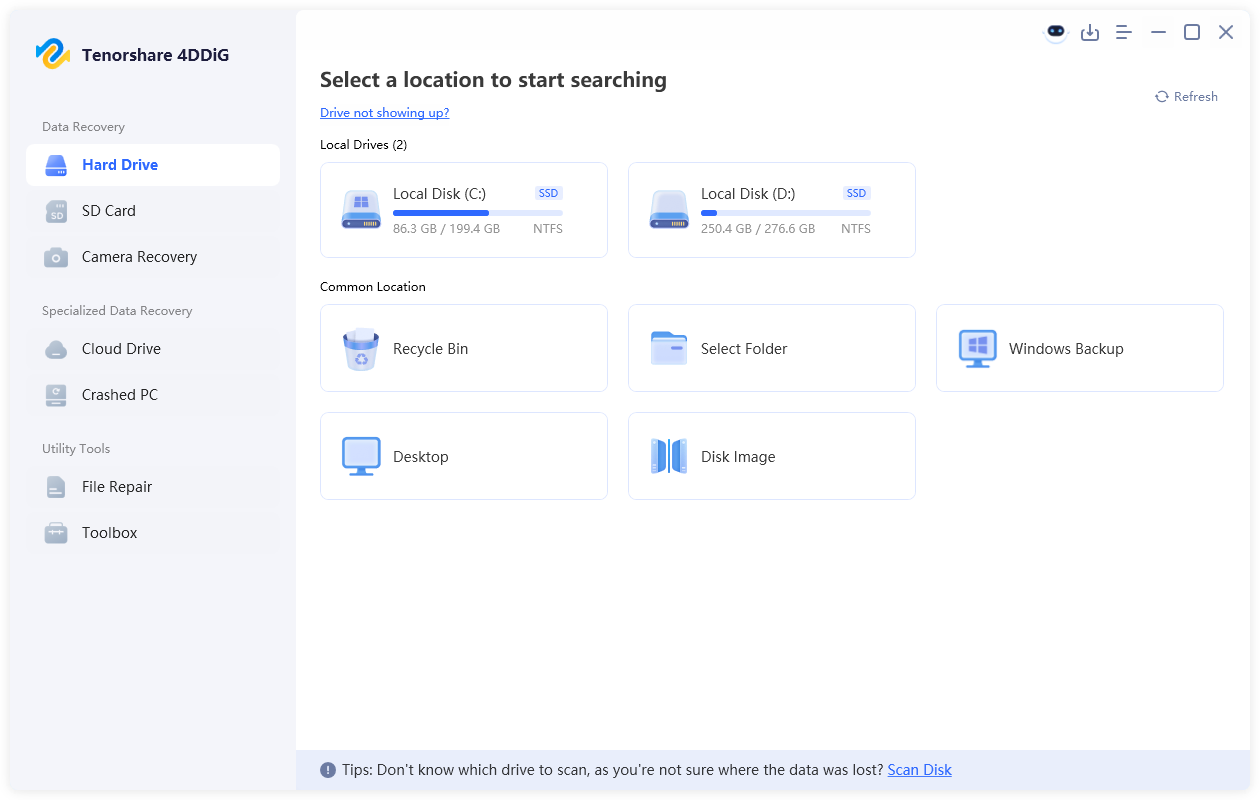
  • Install and open 4DDiG Data Recovery on your computer, then connect the USB drive affected by the “multi-volume set” error and select it from the device list.

    launch 4ddig and enter interface
  • Select File Type from the left panel to quickly filter files that are missing, unreadable, or stuck due to corrupted ZIP/RAR archives, while the tool automatically scans the drive.

    click type to see all files 4ddig
  • Preview the recoverable files (such as documents, photos, videos, or compressed archives) to confirm they are intact before recovery, then click "Recover".

    preview and recover the files
  • When prompted, save the restored files to a different location instead of the original USB drive to avoid overwriting data.

    save the recoverable files

▼Format your drive after recovering data from the USB:

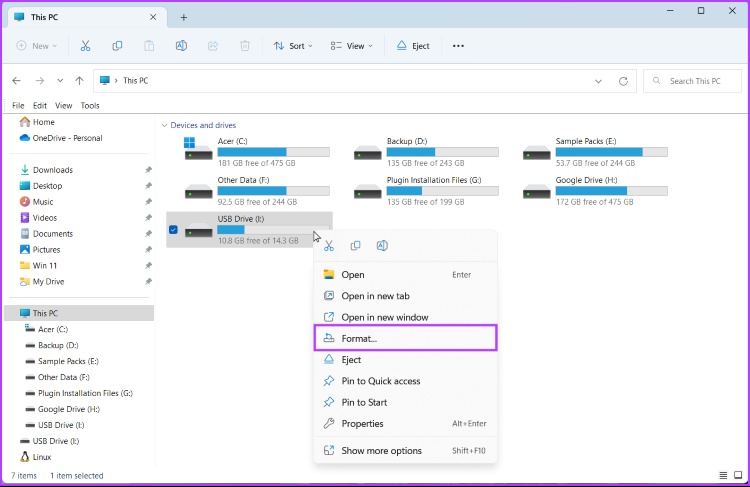
After recovering important files from the USB drive, you can proceed with formatting to resolve underlying file system issues that may be causing the "multi-volume set" error. This step helps reset the drive to a clean state and remove any corrupted structures that cannot be repaired through basic methods.

  • Connect your USB to your computer and open "This PC".
  • Right-click on the problematic USB flash drive and select the Format option. format a usb drive in file explorer
  • Choose a file system (FAT32 or NTFS), check the Quick Format option then click Start. Confirm and wait for the process to complete. start formatting a usb drive in file explorer
  • Then click on the start option and wait until your USB formatting is completed.

Fix 7: Show Hidden Files and Remove Mac Junk Files

Is the USB drive previously used on a Mac? If so, macOS may have created hidden system files that are not normally visible on Windows. These files can sometimes interfere with how Windows reads the drive and trigger the multi-volume set error.

  • Open the USB drive in File Explorer.
  • Enable "Hidden items" from the View menu.
  • Locate Mac-generated files such as .DS_Store and __MACOSX. ds store file on mac
  • Select and delete these unnecessary files.
  • Safely eject the USB drive and reconnect it to check if the issue is resolved.

Fix 8: Fix File System Errors on the Drive

File system errors on a USB drive can prevent Windows from correctly reading stored data, which may trigger the please insert the last disk of the multi-volume set error. Using CHKDSK helps scan and repair corrupted file structures and bad sectors on the drive, restoring normal access to your USB drive.

  • Connect the USB drive to your computer.
  • Press Win + R, type "cmd", and press Enter.
  • Right-click Command Prompt and select "Run as administrator".
  • Type the command: chkdsk X: /f /r (replace X with your drive letter). run the chkdsk prompt
  • Press Enter and wait for the scan and repair process to complete.
  • Safely eject the USB drive and check if the issue is resolved.

FAQs

1. How do I fix a compressed zipped folder error?

Here are the few methods using which you can fix compressed zip file errors:

  • Fix corrupt files using WinRAR
  • Fix compressed ZIP folders using Remo Repair ZIP
  • Fix folder access denied error with TEMP settings

2. Can't find a compressed zipped folder?

You can easily find a compressed or zipped folder on your computer simply by digging around with Windows' search function. Click start and then reach the search option. Now type 'ZIP' into the search box. Do not use quotation marks; only include the file extension. ZIP is the file extension of all zipped archives or compressed folders.

3. How do I delete the compressed zip folder?

Using Windows:

  • Open the option of the file explorer in a new window. The file explorer option is present in the start menu.
  • Now, look at this file you want to delete. You can browse your folders in the file explorer or simply use the search quick access field present on the top-right corner and find the zip file you want to delete.
  • Then click on the zip file present in your file explorer.
  • Press shift+del from your keyboard to delete the selected Zip file without moving it to the Recycle bin.

Using Mac:

  • Open a new finder window and simply click the blue smiling face icon present on the far-left and of yours.
  • Now find this app is that you wish to delete. You can browse your files or use the search bar present on the top right of the find the Window and open the folder that has the zip file you want to delete.
  • Right-click on the zip file that you wish to delete.
  • Select the move to trash option on the right-click menu. This will remove the selected zip file from your computer's trash bin.
  • Open the trash folder and click the trash bin icon present on the far-right of your dog to open the trash in the new Window.
  • Right-click on the ship file in the trash.
  • Select the delete immediately option on the right-click menu to permanently delete the selected zip file.

Summary

So now, if you encounter the please insert the last disk of the multi-volume set and click OK to continue error, you can follow the troubleshooting methods above to identify and fix the issue step by step.

In some cases, repairing a USB drive may involve formatting, which can lead to potential data loss if files are not backed up in advance. To avoid this risk, it is recommended to recover your important data first with an USB data recovery before performing any deep repair actions.

FREE DOWNLOAD

Secure Download

FREE DOWNLOAD

Secure Download

William Bollson (senior editor)

William Bollson, the editor-in-chief of 4DDiG, devotes to providing the best solutions for Windows and Mac related issues, including data recovery, repair, error fixes.

(Click to rate this post)

You rated 4.5 ( participated)