How to Recover Unsaved or Deleted Excel on Mac?
Want to recover unsaved or permanently deleted Excel files on Mac? Download 4DDiG Mac Data Recovery to retrieve unsaved or deleted Excel files on Mac.
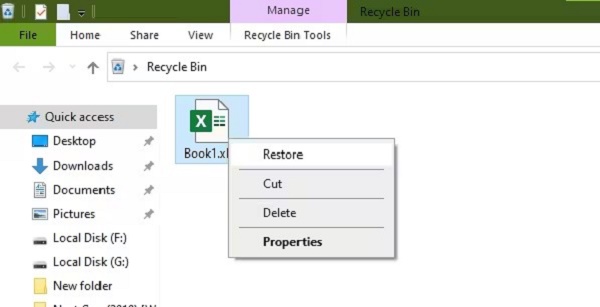
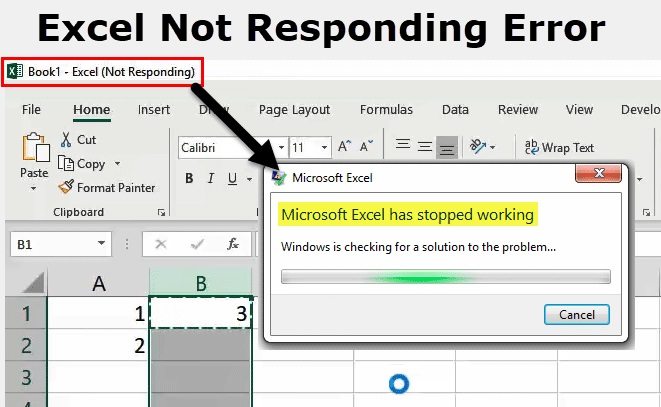
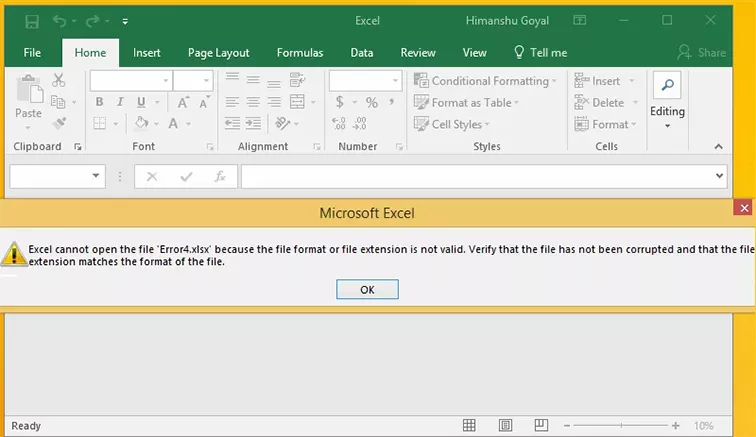
Losing Excel files on Mac can happen for several reasons, such as hard drive formatting, program crashes, accidental deletions, or virus intrusions. However, Mac users can take solace in the fact that there are effective recovery solutions available. In this article, we will present three fixes that can help recover unsaved or deleted excel file from Mac. Whether your Excel files were lost during a system crash or due to other reasons, this guide will provide the necessary assistance to retrieve them on your Mac device.
Part 1: The Ultimate Way to Recover Permanently Deleted/Unsaved Excel on Mac
While losing Excel files on a Mac can be distressing, there's a powerful and comprehensive solution available to tackle both permanently deleted and unsaved files - 4DDIG Mac Data Recovery. This advanced data recovery tool is designed to retrieve lost data from various scenarios, including hard drive formatting, program crashes, accidental deletions, and more. Whether your Excel files were lost due to an unexpected device shutdown or system crash during work, 4DDiG Mac Data Recovery has got you covered.
Let's take a moment to explore the key features of this powerful data recovery tool.
- Recovers various data types, including Excel files, documents, photos, videos, and more.
- Addresses different data loss scenarios like accidental deletion, formatting, and system crashes.
- Allows you to preview recoverable files before proceeding with the Excel data recovery.
- Guarantees 100% security during the recovery process.
- Supports a wide range of devices such as SD cards, USB flash drives, external hard drives, and more.
- Compatible with APFS, HFS+, FAT32, exFAT file systems.
Here's how to recover deleted Excel on Mac using 4DDiG Mac Data Recovery:
Secure Download
Secure Download
-
Select a Location
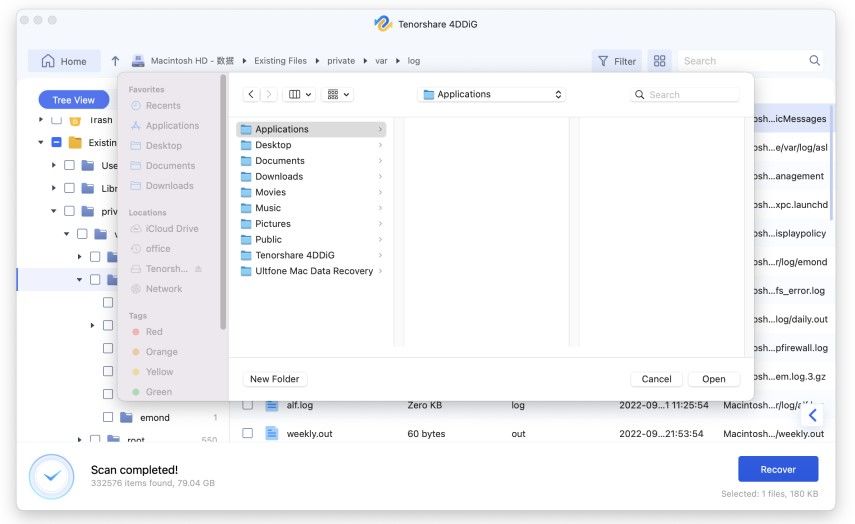
Download and launch 4DDiG Mac Data Recovery on your Mac device. Select a location where your Excel files were located before they were lost or deleted, then click on the Scan button, the tool will will thoroughly scan the selected drive/partition for lost or deleted Excel files.

Note
If you require data from the macOS High Sierra and the following system, you must disable SIP first to locate Mac files. Just take a photo of on-screen prompts and follow the steps.
-
Preview and Recover
Once the scanning process is complete, 4DDiG Mac Data Recovery will display a list of recoverable files. You can preview the Excel files to ensure their integrity. Select the files you want to recover and click on the "Recover" button.

-
Save Recovered Excel Files
Choose a safe location on your Mac where you want to save the recovered Excel files. Avoid saving them on the same drive/partition to prevent data overwriting.

That's it! With 4DDiG Mac Data Recovery, you can now efficiently recover permanently deleted or unsaved Excel files on your Mac. Remember to act quickly to increase the chances of successful recovery, and it's always a good practice to regularly back up your important files to avoid data loss in the future.
Part 2: How to Recover Unsaved Excel File on Mac?
In addition to the powerful 4DDiG Mac Data Recovery for retrieving permanently deleted Excel files, there are other potential methods to recover unsaved Excel files on your Mac. Let's explore these solutions one by one:
Fix 1. Restore Unsaved Excel Files from Mac Temporary Folder
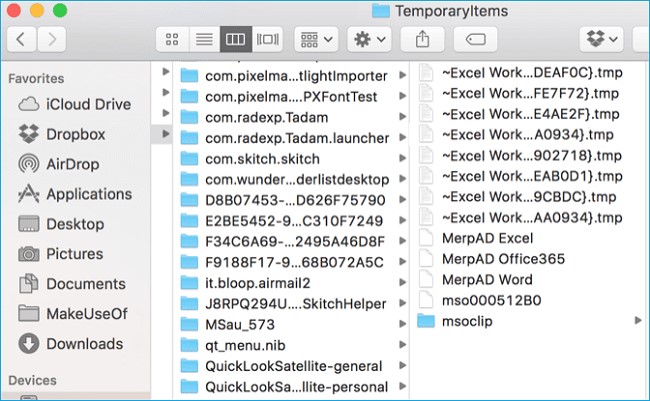
The temporary folder is a highly anticipated and straightforward solution to recover an unsaved Excel document on Mac. This folder typically contains automatically saved versions of the Excel file you are currently working on. Follow the step-by-step instructions below to effectively recover unsaved Excel files from your Mac using the Temporary Folder.
Open the "Applications" folder, click on "Utilities," and then locate and click on the "Terminal" application to access it.
In the Terminal window, type the following command: "open $TMPDIR" and press Enter.
The Temporary folder will now open. Look for the "Temporary Items" folder and select it. Manually search for the unsaved Excel file within the "Temporary Items" folder.
Once you find the file, right-click on it and select "Open With" from the drop-down menu. Choose "TextEdit" to open the temporary (.tmp) file in a format that allows easy editing.
After opening the file in TextEdit, make any necessary changes, and then save it to your desired location.

Fix 2. Retrieve Unsaved Excel Files from AutoRecover
Microsoft Excel comes equipped with an AutoRecover feature that automatically saves backup copies of your work at regular intervals. This feature can be a lifesaver if it was enabled in Excel before you encounter unexpected system crashes or accidental closures. Here's how to recover unsaved Excel on Mac using the AutoRecover feature:
- Start by opening Microsoft Excel on your Mac. If Excel recently experienced a crash or if you had unsaved files before closing the application, it should display an AutoRecover pane on the left side when you open it again. This pane will show a list of recovered files.
- In the AutoRecover pane, you will see a list of files that were recently recovered. Look for the file you want to retrieve and click on it to open it. Excel will open the recovered version of the file.
- Once the recovered file is open, save it immediately to a safe location on your Mac using the "Save As" option. This will ensure that you have a permanent copy of the recovered data.
In case Excel doesn't automatically detect the unsaved file, you can manually search for AutoRecover files on your computer. The location of AutoRecover files depends on your operating system. For example, on Windows, the default location is usually: C:\Users\YourUserName\AppData\Roaming\Microsoft\Excel\.
Fix 3: Recover Unsaved Excel File in Recent Workbooks
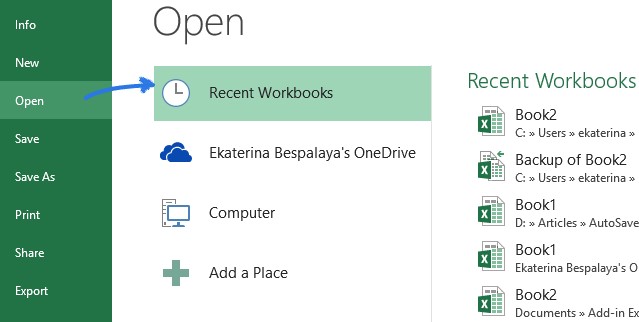
The Recent workbooks is another verified resolution of recovering deleted Excel files on Mac. This method is exclusively fit for the recovery of Excel files unsaved due to the Excel program crashing during work.
Open Microsoft Excel, then open the File tab on the upper right corner of the screen, select Open from the options given and then click on it.
Once you click on the Open option, there will be a pop-up menu to find the prospect of the Recent Workbooks option. Click on the Recent Workbooks.
You will see a list upon clicking on Recent Workbooks; the option for Recover Unsaved Workbooks will be listed at the end of the list. Select the Unsaved Workbooks to move to proceed further in Excel recovery on Mac.
Locate the unsaved Excel file from the Recover Unsaved Workbooks folder.
You can do two things here. 1 double click on the unsaved Excel file to open it. 2 right-click on it to find a drop-down menu. Click on the Open option to open the unsaved file.
To save the file, select the Save As option in the File menu of the unsaved file and choose the location to save the file.

Part 3. How to Retrieve Deleted/Lost Excel File on Mac?
Having explored effective methods to recover unsaved Excel files on Mac in Part 2, we now turn our attention to retrieving deleted or lost Excel files on your Mac. Let's dive into these recovery methods:
Fix 1: Get back Deleted Excel on Mac from Trash Bin
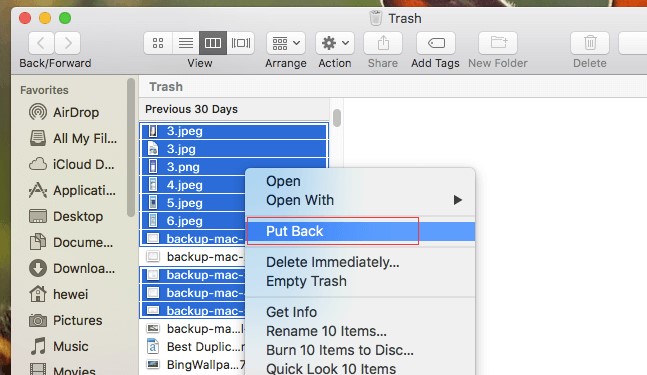
When you accidentally delete a file on your Mac, it is temporarily moved to the Trash Bin. Fortunately, files remain in the Trash for 30 days before permanent deletion. Here's how to retrieve deleted Excel files from the Trash:
Navigate to your Mac's desktop and open the Trash folder.
Browse through the Trash to locate the specific Excel file you wish to recover. If you have multiple deleted files, use the search box at the top left corner of the window to find them.
Right-click on the desired Excel file and select the "Put Back" option from the drop-down list. The file will be restored to its original location. Alternatively, drag the file to a new location for recovery.

Fix 2. Rescue Deleted Excel File on Mac with Time Machine
Time Machine is another option to recover deleted/lost Excel files on Mac if you have a good habit of making the corresponding backup data of the lost Excel files.
- Connect your Time Machine backup disk to your Mac device.
- Open the folder that once contained the deleted Excel file and click on the Time Machine icon in the menu bar.
Navigate through the timeline using the arrows or scroll to find the Excel file you want to recover. Once located, select the file and click on "Restore" to retrieve the deleted Excel file.

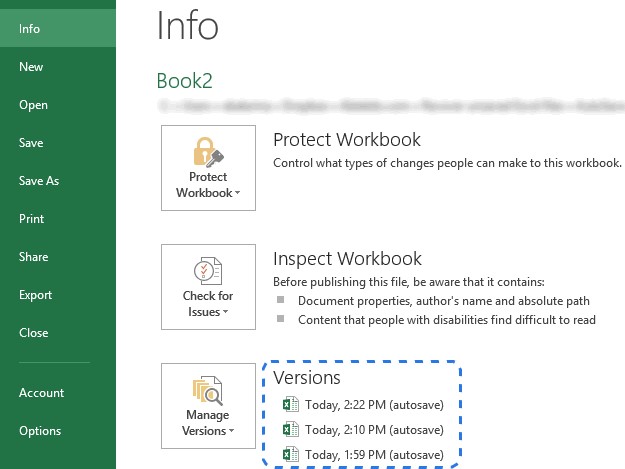
Fix 3: Recover Lost Excel Files Using autosave Backup
Microsoft Office applications, including Excel, feature an autosave function that creates backup versions of your files. This feature proves incredibly useful for recovering lost Excel files. Here's how:
- Open the Excel file you were working on and click on the "File" tab. Then, select "Info."
- Click on "Manage Versions" to access all the backup versions.
Select the desired backup Excel file that you need to recover. Click on it, and you will see an option to "Restore" on the yellow bar. Click on "Restore" to recover the unsaved or lost file.

Fix 4: Recover Deleted or Lost Excel on Mac via Online Backup
If you use online storage services, like iCloud, Google Drive, OneDrive, etc., to make backups, you can smoothly recover deleted Excel files.
iCloud
Log in to your iCloud account. Go to Settings>Advanced>Restore Files. To retrieve the Excel file, click on them and then click Restore File.
Google Drive
Access your Google account, and reach Google Drive. Open Trash, find your deleted Excel files. Right-click on the deleted Excel file, and choose Restore to regain the Excel file on your Mac device.
OneDrive
Go to OneDrive and log in. Take a look in the Recycle bin to find the lost Excel file. Right-click on the file and choose Restore to recover the deleted Excel file on your Mac machine.

Conclusion:
Remember to act promptly when attempting to recover unsaved or deleted Excel files, as timely action can significantly increase your chances of successful recovery. Whether it's utilizing the features of 4DDIG Mac Data Recovery or other methods mentioned earlier, you now have the knowledge and tools to safeguard your Excel files and prevent data loss on your Mac device.



 ChatGPT
 Perplexity
 Google AI Mode
 Grok
Grok

