Windows Install Not Detecting SSD? -An Expert Guide for You
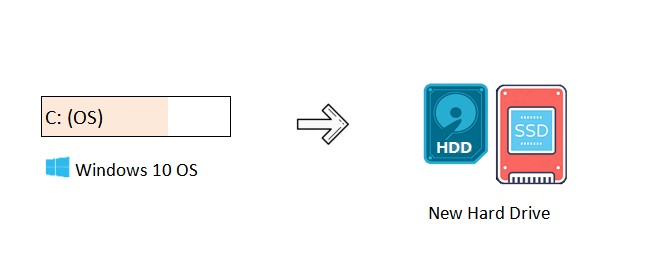
Installing the new Windows is paramount to enhance the overall performance of the computer. Unfortunately, after installing the new Windows, you might face the ''Windows install not detecting SSD'' issue. Several annoying reasons could end up contributing to this annoying issue, and one of the major ones is that the SSD doesn't like popular file formats like FAT32 or NTFS systems. Regardless of the reasons behind this issue, we'll introduce amazing solutions to fix the "Windows install not detecting" issue.
Part 1: What Causes Windows Installation Not Detecting SSD?
The following reasons are the main ones behind the issue.
-
Didn't connect the SSD properly to the power supply, motherboard, or computer.
-
Corrupted or outdated SSD drivers could lead you to face the issues you're having.
-
The BIOS settings of the computer couldn't get configured correctly, causing the issue you're struggling with.
-
If the new SSD isn't partitioned or initialized, the new SSD might not appear on the Window
-
If there is no drive assigned to the SSD, it won't show up on the computer.
Part 2: How to Fix Windows Install not Detecting SSD?
After learning about the potential reasons behind the ''SSD not detected while installing Windows 10" issue, you can dig into the following solutions to get rid of the unwanted scenario.
Method 1: Initialise the Drive
If you don't initialize the new SSD drive, you can't see it in the Disk Management Utility and File Explorer. Thus, you'll need to initialize the SSD Drive to fix the ''SSD not detected while installing Windows 10'' issue.
-
Press and hold the Win+X before choosing Disk Management and launching it. Check whether the SSD is termed ''Not Initialized'' and then choose Initialize after right-clicking on the drive.
-
Right-press the SSD drive and then choose the Update driver button to move ahead.

-
Select the partition style from the SSD and press the OK icon to begin initializing the SSS. After initializing the SSD, you'll need to format the new partition. Choose the New Simple Volume after right-pressing the unallocated space on your SSD. You can then follow the instructions on the screen to format the new partition.

Method 2: Alter the Boot Mode
Switching to boot mode is an appropriate way to dismantle the "Windows installer not detecting SSD" issue. Altering the boot mode is important if the computer's boot mode isn't accurate for your SSD drive.
-
To begin with, you'll need to navigate to the BIOS setup screen.
-
Creep into the BIOS menu and then visit the Boot tab. Tap on the UEFI/BIOS Boot before selecting the UEFI icon. Click on the Enter and F10 icons to save your edits before quitting the screen.

Method 3: Check SSD Connection
By checking the SSD connection, you can fix the "Windows install not detecting SSD" issue.
It might happen that that computer didn't recognize the SSD device, causing chaos.
-
Restart the computer and then press and hold the BIOS key. After pressing and holding the BIOS key, you'll see that the computer's BIOS is shown at the bottom of the screen after the computer restarts.
-
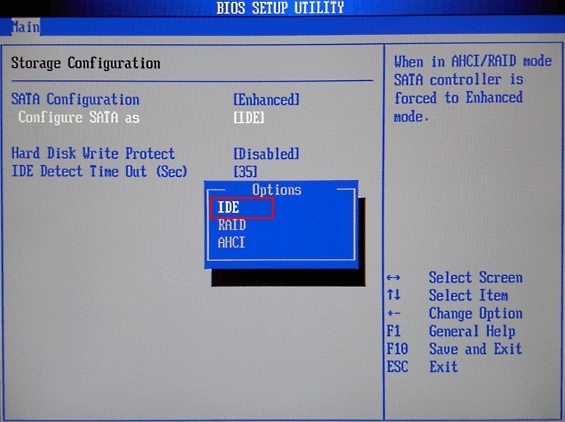
Navigate to the BIOS settings of the computer and check the SSD is recognized.
The SATA port options are in the BiOS's "storage configuration, " and you must make sure that they are activated.
Method 4: Load Driver to Obtain a Storage Driver
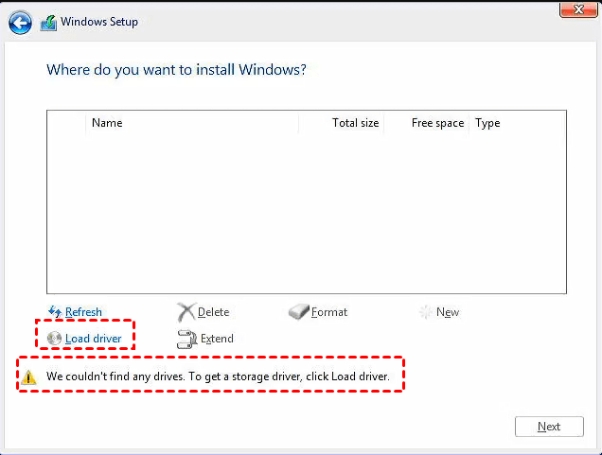
If you're dealing with the ''Windows install not detecting SSD'' issue and receive the pop-up saying we couldn't find any drives, you'll need to load your relevant drivers through the Windows installation process.
Method 5: Update SSD Driver
Using the outdated SSD drivers might also cause the ''Windows installation not detecting SSD'' issue, so updating the SSD drivers in an appropriate way to fix the issue.
-
Press the ''Windows+R simultaneously and then launch the Run dialogue.
Tap on the OK button after taking the devmgmt.msc
-
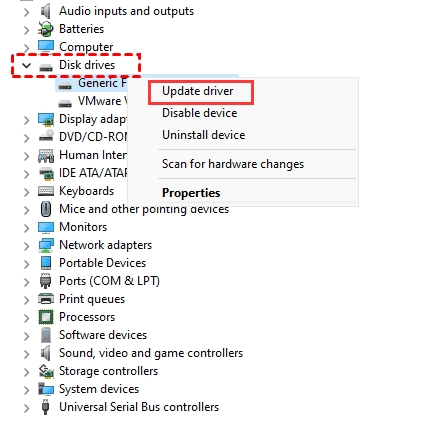
Expand the Disk drives after double clicking on it.
-
Right-click the SSD drive and choose the Update Driver afterwards.
-
Act upon the on-screen instructions after hitting the ''Search automatically for updated driver software to update the drivers.

Method 6: Update BIOS
You can also fix the ''Windows installer not detecting SSD'' issue by Updating the BIOS.
-
Navigate to the website of the manufacturer before downloading the latest BIOS (UEFI).
-
Unzip the downloaded files and then restart the PC before entering the BIOS (UEFI) by pressing the key on the keyboard (commonly F10 or F2, Del.
-
Locate the update screen after visiting the menus and choose the Update icon.
Once the updating process is completed, you'll need to restart the computer to see how it goes.

Part 3: How to Recover Lost SSD Data
Data loss could occur on an SSD drive for multiple reasons, but 4DDiG Data Recovery can help recover all the lost data. Apart from previewing the data, it empowers you to recover 2000+ file types without causing data loss.
- Whether it's an SSD drive, an SD card, or a memory card, 4DDiG is there to help you get back your precious data.
- Recover the lost or deleted photos , documents, videos, more than 2,000 files.
- Easily retrieve any deleted or lost documents, photos, videos and more.
Secure Download
Secure Download
Here's how to recover lost SSD data through 4DDiG Data Recovery software.
-
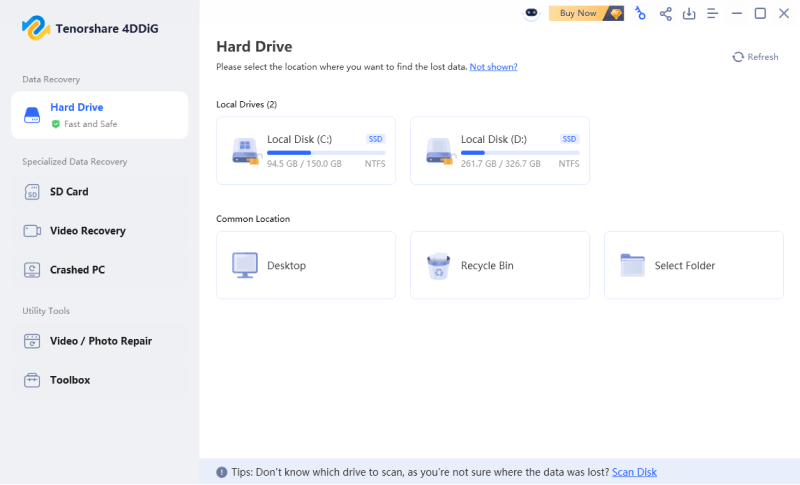
After starting the software, you'll need to select the location you've lost the data from and select the Scan button afterwards.

-
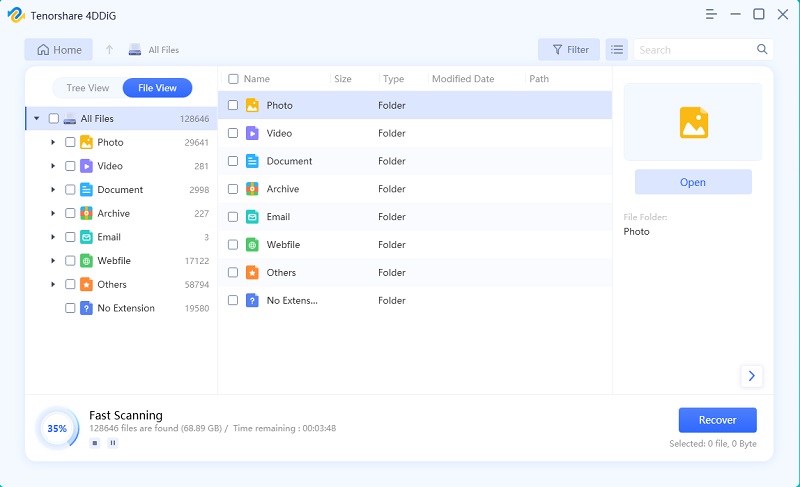
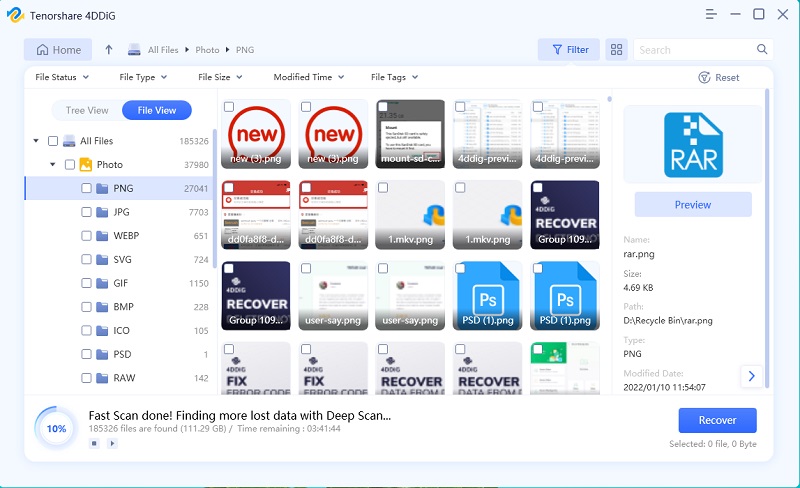
Tenorshare 4DDiG will scanning your SSD, if you find the data you want, you can pause it at any time.

-
After scanning for lost data, preview it and hit the Recover button to retrieve it.

Secure Download
Secure Download
In Conclusion
Apart from listing the potential reasons for the "Windows install not detecting SSD" issue, this guide has mentioned the prolific ways to fix it. Opting for the 4DDiG Data Recovery is by the far the best way to retrieve the lost data from the lost SSD data, offering the highest recovery rate and recovering the 2000+ file types.


 ChatGPT
 Perplexity
 Google AI Mode
 Grok
Grok


