6 Ways to Recover Data from M1 Chip Mac
For M1 Mac users, recovering data with Time Machine is different from other Macs. While you can use Share Disk Utility, a simpler and more efficient option is Tenorshare 4DDiG Mac Data Recovery, even if your M1 Mac won’t boot.
In November 2020, Apple introduced its most innovative and revolutionary M1 Chip that is more inclined towards delivering high-end efficiency to the users. Soon, the M1 Mac was announced for sale across the globe, making a massive demand for this fantastic product. But, big trouble occurs in case of data loss. Mac users with M1 Chip face a big challenge in recovering their M1 files due to its different CPU architecture from standard intel chips. Data loss on Mac M1 is unusual as it only happens when your Mac isn't switching on or you have mistakenly deleted the essential files. Not all software/online tools can help you restore M1 Mac and save you from a big data loss. Don't worry; Tenorshare 4DDiG is a fantastic tool to bring back your lost data. Interestingly, Tenorshare 4DDiG users can restore M1 files even if your Mac isn't booting.
Part 1: Apple Chip Overiew
Before we proceed to the M1 recovery steps, it's essential to take an overview of the Apple M1 Chip.
1. How to Check your Apple Silicon Models?
You must check whether you own an Apple Silicon model or not. Below is the list of Apple Silicon models that will help you know your Mac and acknowledge the challenges in m1 mac recovery. Check whether you own any of the Macs listed below.
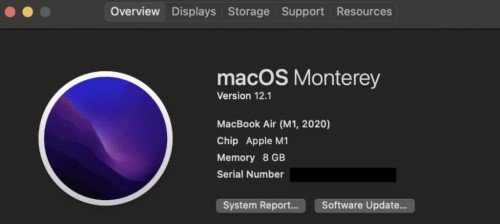
If you are unfamiliar with your Mac model, you can follow the below-listed steps to get information about your MacBook.
Click on Apple Logo > About This Mac > Overview. And your mac model will shows up.

Under the section Chip, if you find 'Apple M1' is mentioned, you are at the right place to restore Mac M1 easily.
2. What is Apple M1 Chip?
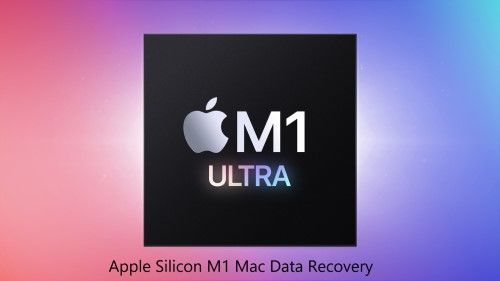
Apple M1 Chip is the latest and most advanced processor that was introduced in November 2020. Presently, Apple uses M1 Chip in MacBook Pro, MacBook Air, Mac Mini, MacBook Air, M1 iMac, and iPad Pro. Before the M1 Chip, Apple used Intel processors, which used multiple chips. Hence, Apple migrated all chips onto a single SoC and hence introduced M1 Chip. Different components are integrated on a single chip that includes CPU, GPU, RAM, SSD controller, neural engine, and more. The new M1 Chip has become more efficient with a quick booting option.
CPU : This M1 Chip includes an 8-core CPU; four cores are used to boost performance, and the other four for efficiency. That's why the Mac with the m1 Chip is efficient in delivering a 20-hour of playback time.
GPU : 8-core GPU is also integrated on the M1 chips that can run about 25,000 threads simultaneously. Apple claims that GPU performance is far better than Radeon RX 560 and GeForce GTX 1050 Ti.
Neural Engine : The neural engine in the M1 Chip can perform 11 trillion operations every second, making it 16x faster than the previous processors.
Battery Life : With 20-hours of playback time, Apple M1 Chip gives an outstanding battery life.
Performance : Compared to previous Macs, the new CPU has increased performance by 3.5x. With high performance, it also works with low power consumption.
3. Why it is Hard to Recover M1 Files?
The new M1 Chip comes with advanced data encryption that increases the security level, making it tough to breach data. Simultaneously, the high-security level makes it a big challenge to restore M1 files in case of a data loss. M1 Chip is offered with hardware-level isolation alongside memory-level encryption. Accessing data files becomes even more challenging than usual with AES encryption hardware. Alongside AES, T2 Chip adds line-speed encryption. It means, in case of data loss, you are totally dependent on external backup to get your files back.
Part 2: How to Recover Data from M1 Mac?
Alough M1 Mac data recovery is hard, but it is not impossible. Below are six ways to restore M1 Mac successfully.
Fix 1: Use the Third-Party Data Recovery Software [Recommended]
Tenorshare 4DDiG Mac data recovery software is a highly recommended data recovery software to restore Mac data (included M1 Mac). Alough there are various data recovery software in the market, not all data recovery software is compatible with M1 Mac. Tenorshare 4DDiG is one of the few software that conquers Mac M1 chip data recovery.
Why you should choose Tenorshare 4DDiG Mac Data recovery software to recover M1 Mac:
- Effortlessly recover from M1-equipped and T2-secured Macs
- Support data recovery from unbootable Mac
- Supports recovery of 1000+ files and formats, such as photos, pictures, videos, document
- Support data recovery from various devices, including HDD, SD card, USB flash drive, and so on
- Includes a easy 3-step process to restore data
- Fast and quick data recover process
- 100% safe
How to Recover M1 data with Tenorshare 4DDiG:
Trustpilot Rating 4.3
100% Secure
Case 1: Recover data from M1 Mac Hard Drives/Trash/External Hard Drive
-
Select a Location like your hard drive to start Mac data recovery. Click "Scan" button.

-
After you get the scanning result, you can preview the scaning files, just choose the specific file types for more details.
![4ddig mac scan files]()
-
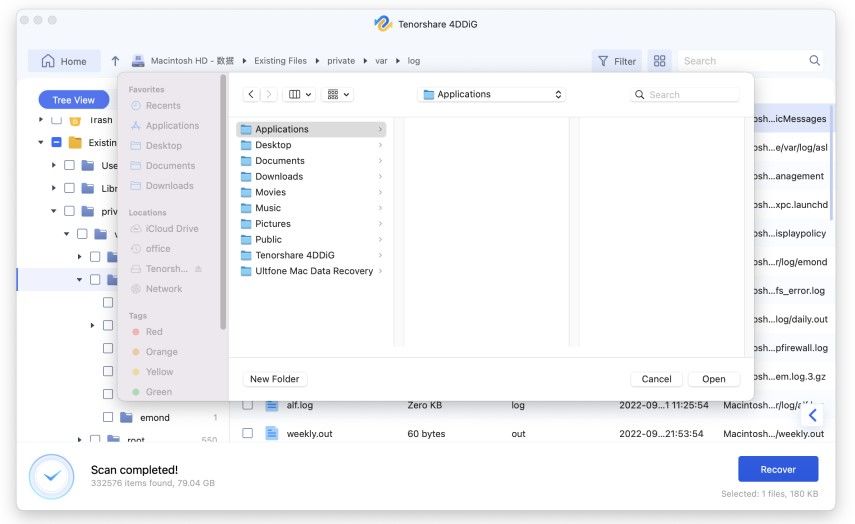
After previewing, choose the files you want and click "Recover" button, then remember choose the data storage location.
![4ddig mac recover files]()
Case 2: Recover from Crashed M1 Mac
-
To recover data from crash M1 mac, you need to set up a working Mac and a USB or external portable hard drive to boot your crashed Mac and recover data. First select "Recover from Crashed System" and then click on Scan.
![4ddig mac select location]()
-
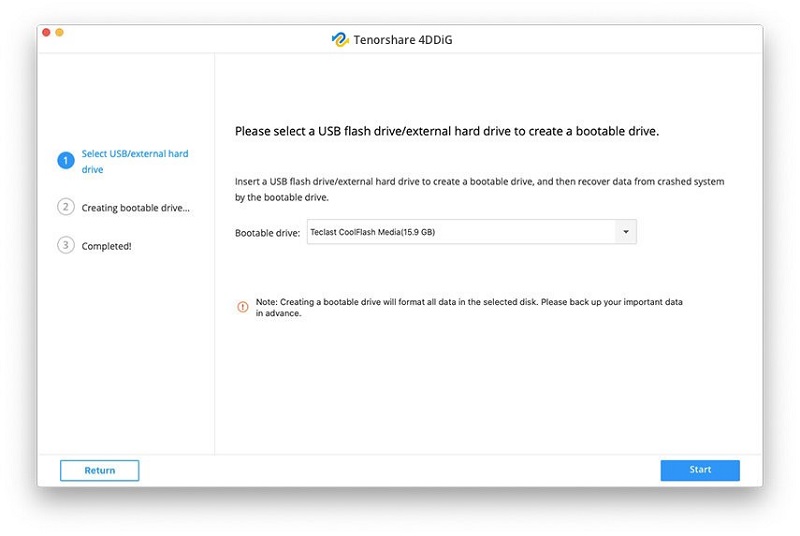
Now connect your USB to the bottable M1 Mac, then go to Mac's "Bootable drive" option, select the bootable drive and then click on Start to process formatted and a bootable drive will be created. Beside, you will get a pop-up windows which remind you to back up data.
![create bootable drive]()
-
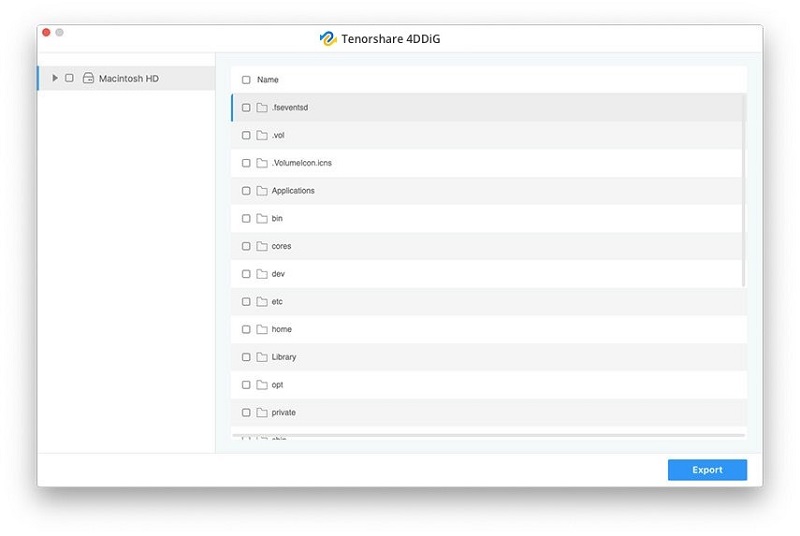
After the bootable drive created, connect it to your crash M1 Mac, then mac will run 4DDiG, you will see the whole files will be list on the interface, just choose the one you want to recover, and click on "Export". You can recover the data on your bootable drive.
![select file to recover]()
Fix 2: Recover M1 Files with the Share Disk Utility
Beside using Tenorshare 4DDiG to recover M1 Mac data, you can also try M1 recovery with Share Disk Utility which is used to transfer files between different Mac devices. With Share Disk Utility, you can access your M1 data from another Mac devices. Below are the steps you should follow.
This method can be used if your M1 mac won't boot. But startup disk usually go with Mac won't boot situation, so even you try to access M1 data with Share Disk Utility, you might unable to access those files due to startup disk are already broken. In this situation, we highly recommand you to try Tenorshare 4DDiG to recover unbootable M1 Mac.
Connect your M1 Mac to another Mac with a Thunderbolt cable.
Shut down your unbootable M1 Mac.
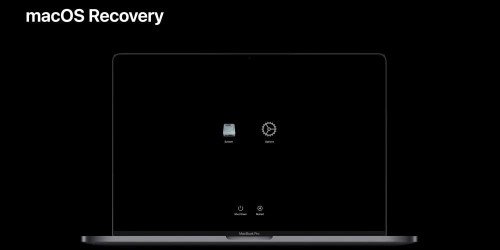
Press the power button until the startup options and the Options gear icon appear.
![recover m1 data with share disk utility]()
Select Options ‘Continue to enter into macOS Recovery Mode’. Enter your password (if asked).
Click on ‘Utilities’ and then select ‘Share Disk’.
Select the startup disk of the M1 Mac and choose ‘Start Sharing’.
Now go to the Mac that used to connected with M1 Mac. Open Finder and click Network under the Locations tab.
Select (Double-click) the detected M1 Mac and select Connect As > Guest > Connect.
If you find some data on your M1 Mac hard drive you can copy it on your healthy Mac. If you can't access the files due to startup drive broken, you can back to the first method .
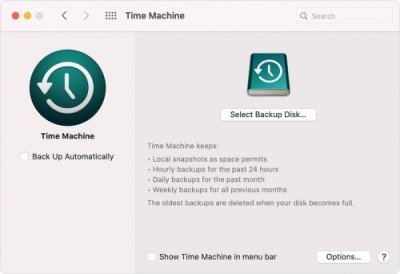
Fix 3: Restore M1 Mac Data with Time Machine Backups
As a Mac users, recover data from Mac with Time Machine is easy. But the recover process will be a little bit different from M1 Mac, since M1 Mac user need to go to the recovery mode. Here are the step by step guide:
Shut Down your Mac and wait until it is completely shut down.
Plug your USB drive with the Time Machine backup.
Press and hold down the power button till the window “Loading startup options” appears.
Click on ‘Options’ > Continue. You will get four options. Choose 1st option i.e. ‘Restore from Time Machine’.
![boot m1 mac into recovery mode]()
Now follow the given instructions on the Time Machine to restore your M1 Mac.
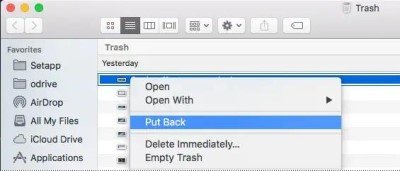
Fix 4: Restore M1 Chip Mac Files from Trash
In case you accidently deleted your files, you can restore them easily.
Double-click the Trash icon.
Search the files that you want to restore.
Step 3 : Select the files and select "Put Back" from right-click options.![recover m1 mac from trash]()
Fix 5: Recover Files from M1 Chip Mac from iCloud Drive
If you have back up your M1 files on iCloud or other device, you can easily recover M1 data from backup.
Go to iCloud.com in your browser and Login your Account.
Click on "Account Settings."
Select "Restore Files" from the "Advanced" section.
![recover m1 mac from icloud]()
Now, select the files that you want to restore and click on "Restore" > "Done."
Fix 6: Recover Lost Files from M1 Mac with Apple Store
You can also reach Apple Support to get some guidance to restore M1 files. Unfortunately, Apple Support isn't made to help you in data recovery. Yet you can visit the Apple Store to get some help. In case of some disastrous data loss, some options like a new connector can help in data recovery. However, this isn't successful in all scenarios.
Part 3: The Things you Should Know after Lossing Data
The first and most recommended option to recover Mac M1 is using third-party data recovery software. However, before using a data recovery tool for M1 recovery, you should note a few points that are listed below:
- Don't add new data to the hard disk after data loss. The recovered files will overwrite your new data during the recovery process.
- No data recovery software guarantees you 100% data recovery. Things like encryption, secure erase, file corruption, etc., can halt your file recovery process.
- Results of using one data recovery tool vary from another.
- Avoid using free data recovery software as they might spread viruses, trojans, or malware.
You can also prefer using Share Disk Utility, Time Machine Backups, Trash, iCloud Drive, or Apple Store to recover your M1 data. These options will definitely help you restore M1 Mac and get your deleted files back. However, some tips will help you restore your M1 Mac data better.
Else, you will continue trying different tools with less or no chances of data recovery. Moreover, with changing data recovery tools, recovery might also become burdensome.
Conclusion
That said, you can now understand the security level of the M1 Chip, which makes the data recovery challenging for the users. That's why people (Mac users) search how to recover deleted files from M1 mac. Third-party data recovery software is highly recommended to get high assurance of getting your files back. Yet, it's tough for first-time users to choose one recovery tool as numerous options are available. If you are looking for a trusted and highly effective data recovery software for M1 Mac, you should definitely prefer using Tenorshare 4DDiG . It has a high success rate in recovering your M1 files.



 ChatGPT
 Perplexity
 Google AI Mode
 Grok
Grok


