If you have ever encountered the frustrating issue of a "USB drive detected but not accessible", you are not alone. This common problem can arise due to various reasons, and it can leave you wondering how to access the files on your USB. In this article, we will discuss the possible causes and solutions for this problem, along with a bonus tip that you won't want to miss. So, if you want to learn how to handle a USB drive not accessible, keep reading till the end.
- Part 1: Why USB Drive Detected but Not Accessible in Windows 11/10?
- Part 2: Fix USB Detected but Not Accessible when It's Shown in File Explorer
- Part 3: Solve USB Detected but Not Accessible when It's Not Shown in File Explorer
- Part 4: Bonus Tip: Recover All Files if Your USB Drive Is Not AccessibleHOT
Part 1: Why USB Drive Detected but Not Accessible in Windows 11/10?
There can be different reasons behind the "USB drive detected but not accessible" problem. These are:
- Corrupt file system.
- The disk driver does not support it.
- USB is not partitioned (a common problem in a new USB).
- Not plugging the right way.
- The USB drive is damaged.
- Virus attack.
- The file system does not support Windows 10 and 11.
- No common drive letter.
USB may face one or a couple of these reasons when you are unable to access it. But the good thing is- you can fix these problems and start using the flash drive again. So, how to fix a USB drive not accessible issue? Continue reading to find out.
Part 2: Fix USB Detected but Not Accessible when It's Shown in File Explorer
When you see a USB drive showing up in File Explorer but not accessible, then you can follow four different fixes. Try one, and if it doesn't work, go for the other one.
Fix 1: Reformat the USB to a Compatible File System
USB that is formatted as Ext2/3/4 file system cannot be opened. The reason is simple- Windows do not support it. It has to be in other file systems like Fat32. Fortunately, you can reformat it to resolve this issue. Instead of relying on basic Windows tools like File Explorer, Disk Management, or Diskpart, we highly recommend using a professional USB format tool like 4DDiG Partition Manager for formatting USB drives. This is due to the advanced disk management features it offers, making the process more efficient and effective.
4DDiG Partition Manager's intuitive and user-friendly interface allows for a seamless USB formatting process, without any concerns about running into operational difficulties. Additionally, this powerful tool supports formatting USB drives to various file systems such as FAT32, exFAT, and NTFS, catering to all your needs. Here's how to do:
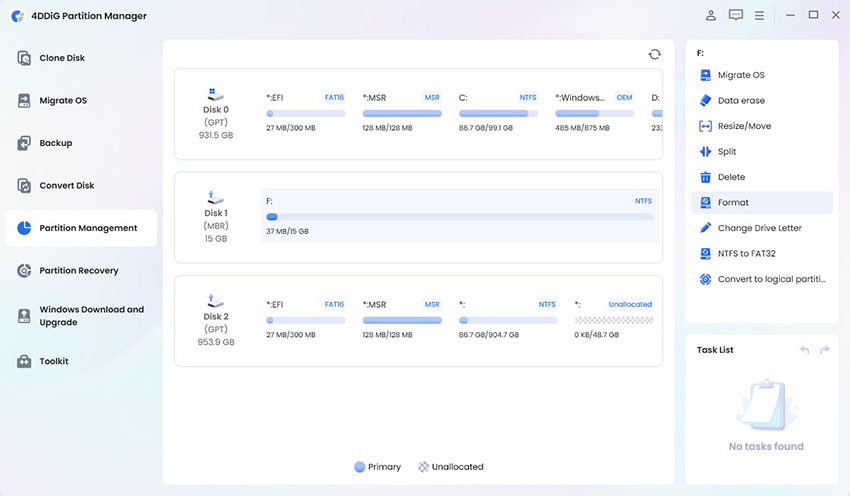
Simply download and launch 4DDiG Partition Manager on your computer. Make sure your USB drive is connected to your computer. Then select "Partition Management" and right-click the USB drive that you want to format and select the Format option.
Free DownloadFor PCSecure Download

Choose the desired file system (such as FAT32 or exFAT) and specify the volume label.

Review the formatting configurations and click the "OK" button to initiate the formatting process.

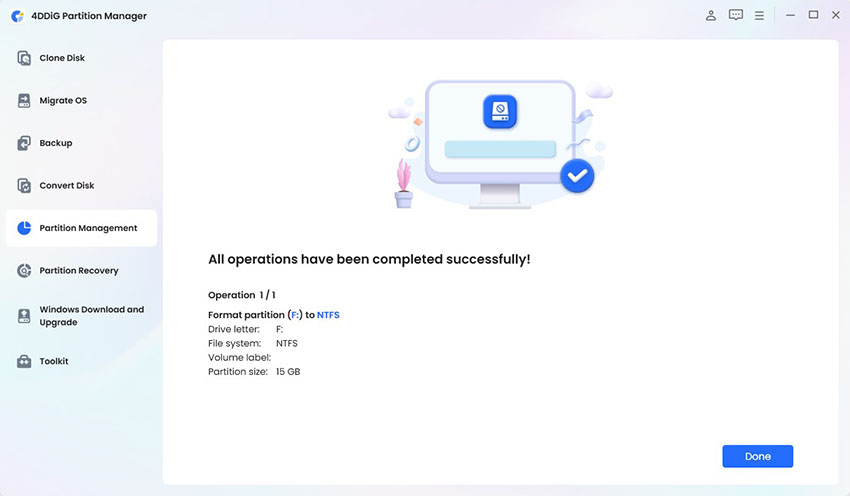
Wait for the process to complete, and once finished, your USB drive will be successfully formatted to to FAT32.

Fix 2: Run CHKDSK to Fix Bad Sectors on the USB
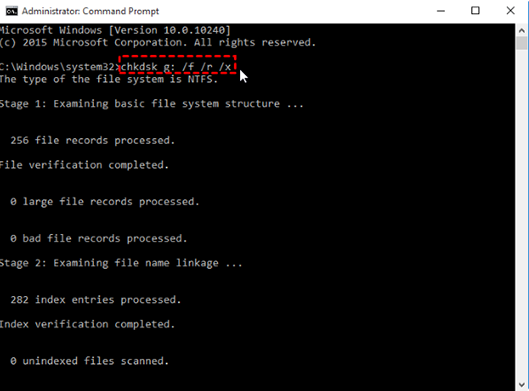
The CHKDSK method is an old one that can fix pendrive access denied problems. However, it is a bit tricky as you will have to enter the drive letter of the flash drive correctly. If you don't, then this method won't fix anything. Here's how to run CHKDSK to fix bad sectors on the USB:
Step 1: On the search, type cmd. You will then see Command Prompt on your screen. Right-click on it and then click on "Run as Administrator."
Step 2: Then, type "chkdsk g: /f /r /x" to start the process. Note that the "g" here should be the letter of your USB.
Step 3: Check again if the USB is now accessible or not.
If it is not, then try other solutions.
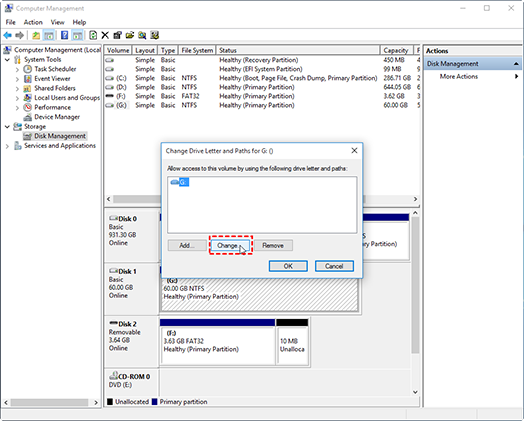
Fix 3: Reassign a New Drive Letter to USB in Disk Management
Sometimes, the drive letter is the reason behind the USB drive not accessible issue. That is why it is better if you reassign a new letter and then check whether the issue is resolved or not.
Here's how to do:
- Press the “Windows icon” and “R” together on your keyboard.
- Type diskmgmt.msc and hit Enter.
- When the disk management opens, click on the ‘USB partition.”
- Next, click on the "Change Drive Letter and Path" to rename the letter.
- Go to Change & Assign. Then, reassign the new letter and recheck if the USB is accessible or not.
Fix 4: Add Authenticated User to the Inaccessible USB Drive
Adding authenticated users can also fix the "USB drive not accessible access denied" issue:
Adding authenticated users can also fix the "USB drive not accessible access denied" issue:
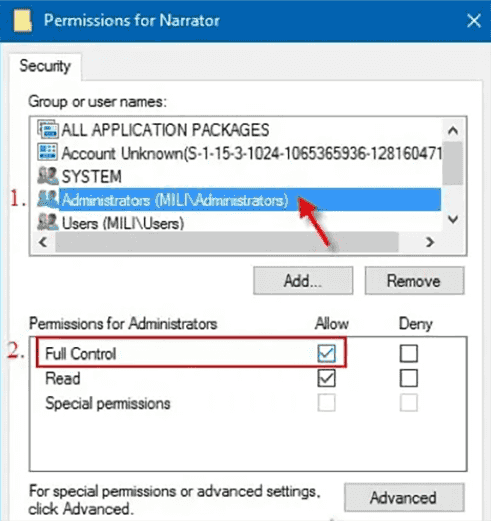
- Start the process by Right-clicking on the USB. Navigate and choose “Properties.”
- Choose “Security Tab.”
- Select “Edit.”
- Choose “Add” and then add a user.
- Confirm by clicking on OK.
- Turn on "Full Control" by clicking the Allow box.
- Click OK, and the new user will be added.
Hopefully, you can now access the USB drive without facing any problems.
Part 3: How to Fix SD Card not Showing Full Capacity
When the USB is not shown in the File Explorer, there is no need to be worried. There are two ways to fix this issue.
Fix 1: Update Device Driver for USB Drive
As mentioned above, an outdated device driver does not allow you to use USB. Therefore, it is super important you update it as soon as possible:
Step 1: Start the process by right clicking on the Start.
Step 2: Choose “Device Manager.”
Step 3: Expand the driver and find the USB.
Step 4: Next, select the disk and right-click on it.
Step 5: Click on “Update Driver Software.”
Step 6: Choose Search automatically.
The driver will then be updated in a few minutes. After this, it is better to restart your PC before you try accessing the USB flash drive again. In most cases, you will now start using USB without facing any more problems. But if you are still unable to open it, then creating the partitions is the only way left.
Fix 2: Create Partitions on the USB Drive
Another way to solve USB inaccessibility is to create partitions. Just follow these steps:
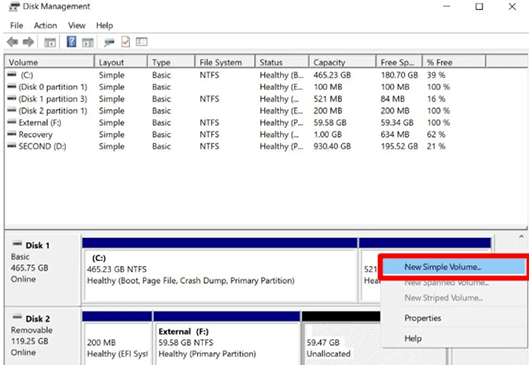
- First, run/open the Disk Manager Software and look for an empty space.
- Right-click on the empty space and choose "Create Partition."
- Adjust the partition size, letter, and system according to what you want.
- Choose “Apply.” That's it.
That's all about how you can fix a USB flash drive when it is not accessible. Now, it's time for a bonus!
Part 4: Bonus Tip: Recover All Files if Your USB Drive Is Not Accessible
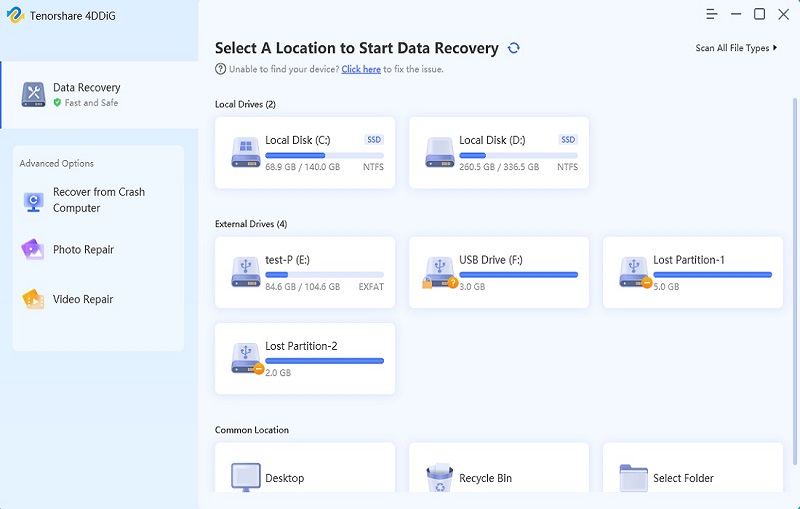
When you are fixing USB, you may lose all the important files in doing so. That is why it is super important you download a data recovery tool in advance so that you can handle the situation easily. Out of all, the topmost recovery software is Tenorshare 4DDiG Data Recovery.
This software has the power to restore files from a USB flash drive in a few minutes. It supports 1000+ file types, so no matter which ones were saved in the USB, it will bring everyone back. Furthermore, It is super easy to use as well as only three clicks will retrieve all the lost data. Also, when it comes to scanning speed, 4DDiG has no match either. It can scan every type of document and display it on your PC's screen in no time. The best part? You can download it on both Windows and Mac. So, everyone should have 4DDiG on their PC's to recover all the deleted files.
- It is capable of recovering all data formats including photos from T2-secured and M1-equipped Mac computers with ease
- It is easy to use as it requires only three clicks to scan, inspect, and recover even without turning off SIP
- 4DDiG is capable of scanning and recovering every piece of lost data from all Mac devices including SD cards, USB, and digital cameras
- It is fast. Expect the recovery process to be done within minutes
- It has a high success rate at recovering lost data which makes it trustworthy
Secure Download
Secure Download
Follow below steps to recover deleted photos on Mac with Tenorshare 4DDiG Mac data recovery software:
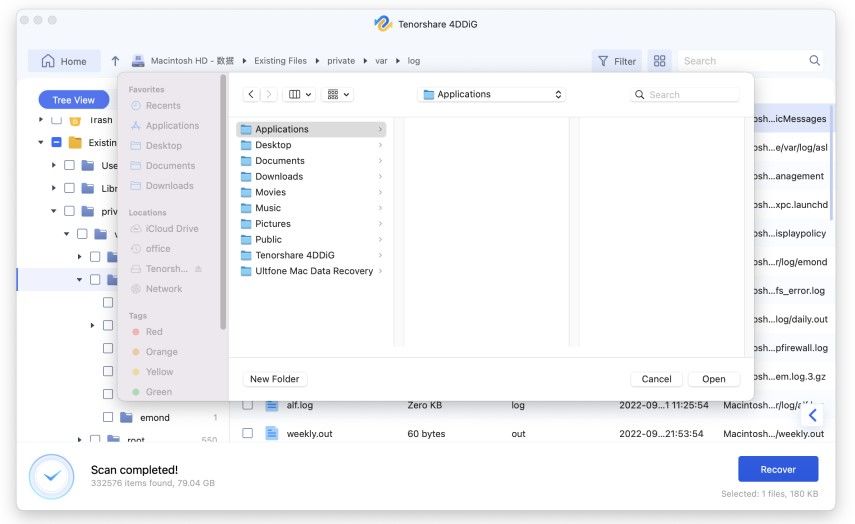
- Install and launch the 4DDiG Mac data recovery software and then choose the location (hard drive) with the missing photos to start the recovery process. Click on “Scan” to begin your search for lost photos.
- After waiting for the scanning process to complete which could take a few minutes, you will be presented with the generated result to preview. Under the “File View” tab, click on “Photos” to search for your lost photos.
- After identifying the lost photos you want to recover, click on the “Recover” button and then choose a secure location to save the recovered photos. Do not save the recovered photos to the same file location where you lost them, doing so may result in permanent loss.


Conclusion
All-Inclusive, “USB drive detected but not accessible” is a problem that can frustrate anyone. In this article, we discussed how you could fix it (whether it is shown in File Explorer or not). If you use 4DDiG Partition Manager to reformat the USB to a compatible file system, you will lose important data in the USB. But you don't have to worry about it, because we provide you with an effective solution-4DDiG Data Recovery. It can retrieve more than 1000 file types in just a matter of a few minutes. It has an easy to understand interface, fast scanning speed, and supports more than a dozen languages. So, download 4DDiG and restore lost files with simple clicks.


 ChatGPT
 Perplexity
 Google AI Mode
 Grok
Grok
