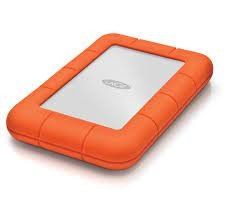
Why is my LaCie hard drive not showing up? LaCie is a famous external disk brand and the primary interface standard for Apple users. Usually, when you connect it to your Mac, it appears on the desktop instantly. But sometimes, you may encounter the “LaCie hard drive not showing up” error on your Mac device. This could be due to many reasons that we’ve discussed below. This article will also teach you nine reliable fixes to make your Mac recognize the LaCie drive. You’ll also learn how to recover data from your LaCie drive if it is corrupted.
- Part 1: What Cause LaCie Hard Drive Not Showing Up on Mac?
-
Part 2: How to Fix LaCie Hard Drive Not Showing Up on Mac?
- Fix 1: Change the Finder Preferences
- Fix 2: Run the Basic Checks
- Fix 3: Run Terminal to Fix LaCie Hard Drive Not Showing Up
- Fix 4: Make Sure your LaCie External Hard Drive Is NTFS Formatted
- Fix 5: Run First Aid to Fix LaCie External Hard Drive Error
- Fix 6: Check the USB Slot and USB Cable
- Fix 7: Make Sure the LaCie External Hard Drive is Mounted on Mac
- Fix 8: Make Sure LaCie Hard Drive File System Is Compatible with macOS
- Fix 9: Reset Mac NVRAM
- Part 3: How to Recovet Data from Problematic LaCie Hard Drive?HOT
Part 1: What Causes LaCie Hard Drive Not Showing Up on Mac?
There are many causes that can make your Mac unable to recognize the LaCie drive. It could be due to the following:
- The USB cable or slot connecting the disk to your Mac is damaged.
- The power supply is not stable.
- Your LaCie drive is corrupted.
- The drive is not compatible with macOS.
- The drive is formatted to the NTFS file system.
Part 2: How to Fix LaCie Hard Drive Not Showing Up on Mac?
Here are nine fixes to resolve the “LaCie external hard drive not showing up Mac” issue.
Fix 1: Change the Finder Preferences
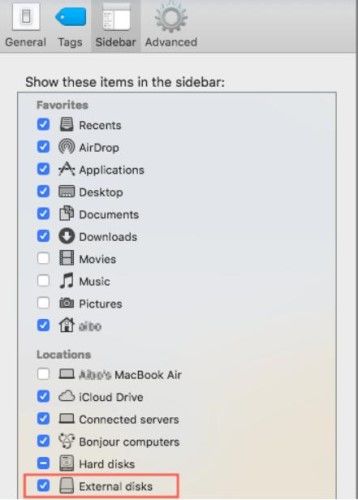
The LaCie drive appears in the Finder in Locations when you connect it to your Mac. But if it isn’t showing in the Finder, you’ll have to change some settings in the Preferences.
Step 1: Head to the “Finder” menu. Choose “Preferences” and open the “General” tab. Choose “External disks.”
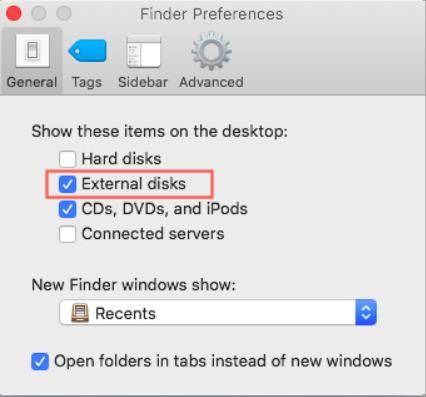
Step 2: Open the “Sidebar” tab. Choose which external disks to show up in the “Finder.”
Fix 2: Run the Basic Checks
Problems like a fluctuating power supply or a damaged USB cable often cause a “LaCie drive not showing up Mac” issue. In such a situation, you can make some basic checks to resolve the error.
- Check the external drive connections with the Mac and ensure it is appropriately connected.
- Check if your USB cable is loose or damaged. Replace it if it is broken.
- If there is no issue with the connections or USB cable, try to plug the drive into another port on the Mac.
- Restart your Mac. Many times a stuck Mac system is the culprit.
- Your LaCie drive may not be formatted for the macOS. Therefore connect it to a Windows PC to check its working.
- Mount the disk in “Apple’s Disk Utility” to make it appear on the Mac desktop.
Fix 3: Run Terminal to Fix LaCie Hard Drive Not Showing Up
If the basic checks are unable to remedy the “LaCie hard drive not showing up Mac” situation, you can use Mac’s inbuilt tool Terminal. Use the commands first to disconnect and then remount the LaCie drive.
Step 1: Navigate to “Finder.” Then open “Applications.” Choose “Utilities.”
Step 2: Launch “Terminal.” And type “diskutil list.” Hit “Enter.” This command will list all the drives connected to your Mac.
Step 3: Locate “dev/disk[number] (external, physical).” The “number” is the digit assigned to your drive.
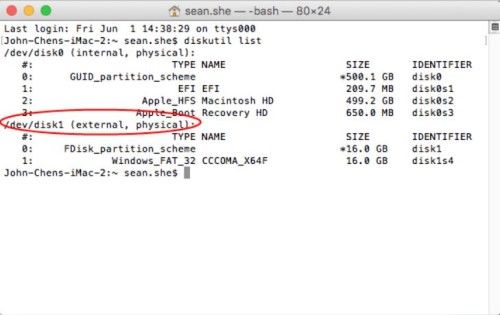
Step 4: Type “diskutil info disk[number].” Replace the number with the assigned digit of your drive. Hit Enter.
Step 5: Type “diskutil eject disk[number].” Hit Enter. This command will dismount the LaCie drive from your Mac.
Step 6: Type “diskutil list.” But this time, the LaCie disk shouldn’t appear in the list.
Now reconnect the drive to the Mac again to check if it appears.
Fix 4: Make Sure Your LaCie External Hard Drive Is NTFS Formatted
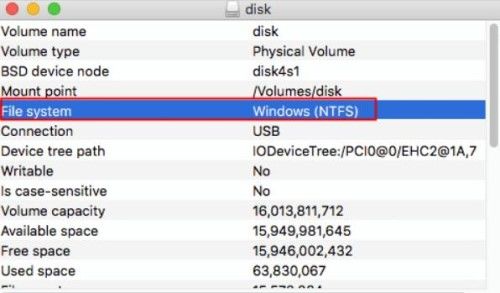
If you face the “LaCie hard drive not showing up on MacBook” issue, it might be because it is NTFS formatted. This file system is not compatible with macOS. First, you should check if it is NTFS formatted.
Step 1: Open the “Spotlight” search, then enter “Disk Utility.” Hit “Enter.”
Step 2: From the top menu bar in “Disk Utility,” choose “Info” for your LaCie external drive.
Step 3: Check to see if it is NTFS formatted. If your LaCie disk is NTFS formatted, you can reformat it to “exFAT,” a macOS-friendly file system.
Fix 5: Run First Aid to Fix LaCie External Hard Drive Error
Another reason behind your Mac being unable to detect the LaCie drive could be corrupt files on the disk. In such a case, you can use the First Aid Utility to repair the files.
Step 1: Open “Disk Utility” and then choose your LaCie drive from the “External” tab in the left panel.
Step 2: Select “First Aid” from the top menu. Then hit “Run.” This will repair your LaCie drive.
Fix 6: Check the USB Slot and USB Cable
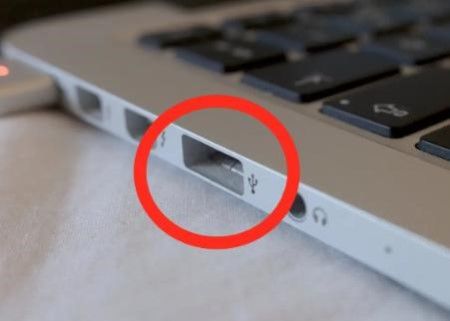
Another reason the “LaCie hard drive not showing up on Mac” error happens is when you insert or pull the drive from the USB port too quickly. The system freezes, and the USB port doesn’t detect the external disk, so it won’t show on Mac. To check whether the problem is with the USB port, try plugging in several devices one by one. If they all fail to appear on Mac, the problem is with the USB port, not your LaCie drive.
Fix 7: Make Sure the LaCie External Hard Drive Is Mounted on Mac
Your Mac won’t be able to detect the LaCie disk if it isn’t mounted. Check its status in the Disk Utility.
Step 1: Open “Disk Utility” and then choose the LaCie drive from under the “External” tab.
Step 2: Press “Mount” in the top menu. This will make your LaCie drive appear on Mac.
Fix 8: Make Sure LaCie Hard Drive File System Is Compatible With macOS
If your LaCie disk is not compatible with macOS, it won’t appear on your Mac device. Therefore, reformat the LaCie drive to exFAT or Mac OS Extended (HFS+) file system, as macOS support both.
Step 1: Launch “Disk Utility” and then choose LaCie drive from under the “External” tab.
Step 2: Select “Erase” from the top menu.
Step 3: Assign the disk name. Choose an appropriate file format. Press “Erase.” This will format your drive to a macOS-compatible file system.
Fix 9: Reset Mac NVRAM
Another way to fix the “LaCie not showing up on Mac” issue is by resetting nonvolatile random-access memory (NVRAM). It’s the smallest memory to store settings regarding display, startup drive choices, Time Zone, etc. Therefore, you can resolve your LaCie drive not appearing on Mac problem by resetting the NVRAM.
Step 1: Shut down your Mac.
Step 2: Reboot it by pressing and holding the “Option, Command, P, and R” keys for 20 seconds.
Step 3: Reset the settings that were disturbed because of the NVRAM reset.
Part 3: How to Recover Data From Problematic LaCie Hard Drive?
If the above solutions don’t fix the LaCie drive not appearing on the Mac desktop issue, the trouble may lie with your disk. Its file system may have been gotten damaged. On such an occasion, you can use a third-party tool like Tenorshare 4DDiG Mac data recovery software to retrieve your valuable data. It’s wiser to stop using the corrupted drive. Instead, try to recover its data before it's too late and you’ve lost it forever. The best part about the 4DDiG-Mac tool is that it can not only recover corrupted files but can also restore permanently deleted data. Check out the key features of this tool:
- Recovers data from Mac-based internal and external disks like LaCie, USBs, SD cards, and digital cameras.
- Supports all the current macOS devices using M1 Max, M1, M1 Pro, T2 chip, and macOS Ventura.
- Extracts 1000+ Mac-based file types, including audio, video, images, and documents from storage media, system crashes, and corrupted partitions.
- Provides a reliable and fast data recovery process.
- Offers high file recovery success.
- Fast scanning and three-click file restoration process.
Follow the instructions below to use the 4DDiG-Mac software to recover corrupted or lost data from your LaCie drive:
For PC
Secure Download
For MAC
Secure Download
- Choose the Problematic LaCie Drive
- Scan for Data Recovery
- Recover Data From the LaCie Disk
Launch the 4DDiG-Mac software on your Mac. Find the LaCie external drive in the interface.

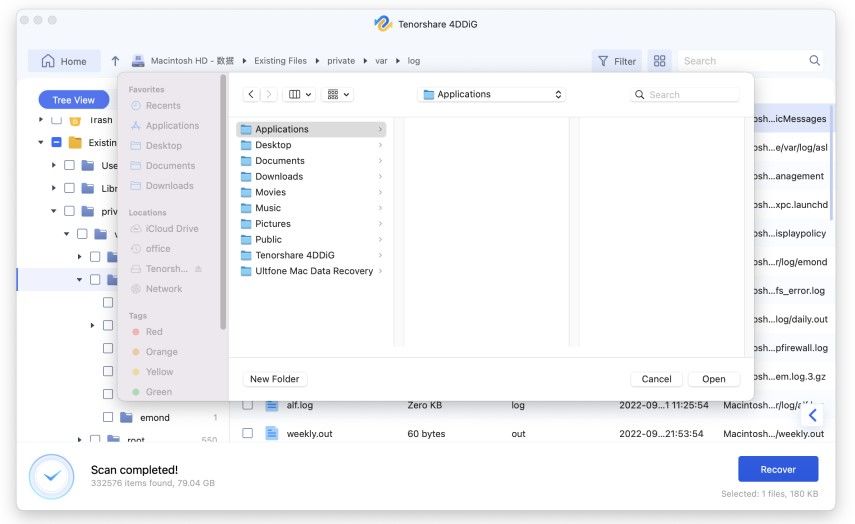
Hover the mouse over the LaCie drive icon, and the word “Scan” will pop up. Press “Scan,” and the 4DDiG-Mac program will look for corrupted data to recover on the disk. You can preview the targeted files by pausing the scan.

Once the 4DDiG-Mac program has restored your LaCie disk, press “Recover” to save all the files on your Mac in a safe location.
Conclusion
Why isn't my LaCie hard drive not showing up? This is a question that, most often, Apple users ask. Although LaCie is a popular disk for Mac users, it goes through the same issues that are part and parcel of storage devices. If you are encountering the “LaCie hard drive not showing up in Mac” error, check our solution to this issue mentioned earlier in our post. After trying out all the fixes, if the issue still persists, try Tenorshare 4DDiG Mac data recovery software to recover your data from the LaCie drive. It is compatible with all the latest macOS devices. Moreover, it can recover formatted, corrupted, deleted, and hidden data from all kinds of internal and external Mac storage devices and offers high data recovery success.
 ChatGPT
 Perplexity
 Google AI Mode
 Grok
Grok
