If you are here then we’ll assume you may have lost valuable photos on your Mac due to one reason or the other, and as such seeking a remedy. Fortunately for you, these photos can be recovered with ease, and in this article, you will find 6 proven ways on how to recover deleted photos on mac alongside some precautionary measures to take to prevent such events.
Part 1: Common Causes of Photo Loss
There are several ways photos can go missing on devices, and the Mac is no exception. Missing photos are most times due to:
- Accidental deletion
- Formatting partitions
- Virus attacks
Many users often find themselves in situations where they accidentally delete important photos from the Photo app, delete a folder full of photos from the Finder App, or lose photos as a result of emptying the Trash bin after some photos go missing. Fortunately, there are remedies for such incidents, and backing up your photos from time to time using the Time Machine will give you an upper hand.
Part 2: How to Recover Deleted Photos on Mac with Tenorshare 4DDiG?
The easiest and fastest way to recover photos on mac is through the use of third-party software. Tenorshare 4DDiG Mac Data Recovery Software is highly recommended as it is easy to use, fast, and reliable. This software is capable of recovering all file types from Mac computers or external disks, these file types include videos, photos, documents, etc.
The features of this software are:
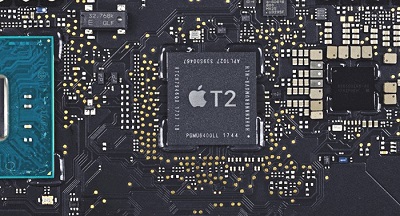
- It is capable of recovering all data formats including photos from T2-secured and M1-equipped Mac computers with ease
- It is easy to use as it requires only three clicks to scan, inspect, and recover even without turning off SIP
- 4DDiG is capable of scanning and recovering every piece of lost data from all Mac devices including SD cards, USB, and digital cameras
- It is fast. Expect the recovery process to be done within minutes
- It has a high success rate at recovering lost data which makes it trustworthy
Secure Download
Secure Download
Video Guide on How to Recover Deleted Photos on Mac
Follow below steps to recover deleted photos on Mac with Tenorshare 4DDiG Mac data recovery software:
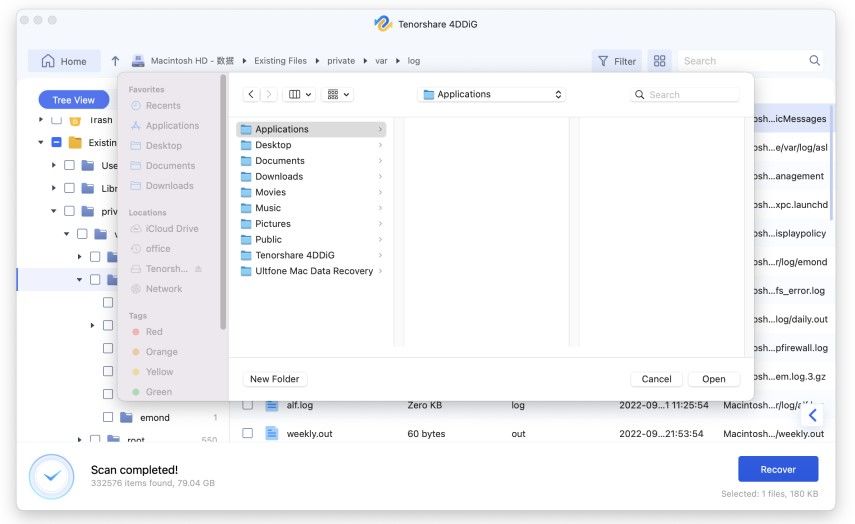
- Install and launch the 4DDiG Mac data recovery software and then choose the location (hard drive) with the missing photos to start the recovery process. Click on “Scan” to begin your search for lost photos.
- After waiting for the scanning process to complete which could take a few minutes, you will be presented with the generated result to preview. Under the “File View” tab, click on “Photos” to search for your lost photos.
- After identifying the lost photos you want to recover, click on the “Recover” button and then choose a secure location to save the recovered photos. Do not save the recovered photos to the same file location where you lost them, doing so may result in permanent loss.


Part 3: How to Recover Deleted Photos on Mac without Software?
In this section, we will take you through the steps of recovering lost photos on Mac without the use of third-party software, throwing more light on the five different methods to do so, and hoping you get all your valuable photos back.
Fix 1: Recover Deleted Photos from Recently Deleted Folder
Your deleted photos may be in the Recently Deleted Folder if they went missing while you were utilizing the Apple Photo app or iPhoto. The Recently Deleted Folder is where files stay for 30 days after deleting them. Restoring photos from this folder is a piece of cake and below are the steps to follow to do so.
Step 1: Launch the Photo app, then click on “Recently Deleted” on the left side of your screen.
Step 2: Identify and select the photos you want to recover. To restore the selected photos click on “Recover”.

Fix 2: Restore Deleted Photos from Trash
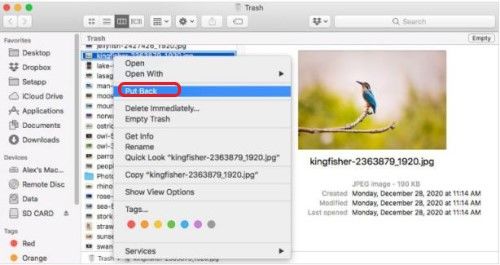
In situations where you can’t find the deleted photos in the “Recently Deleted Folder”, you need to check the Mac Trash Bin. Just like the Recently Deleted Folder, the Mac Trash Bin also stores deleted files for 30 days, within this time frame you can choose to manually empty the bin. To restore photos and any other files from the Mac Trash Bin follow the steps below.
Step 1: Click on the Trash Bin icon to begin, then locate and select the photo you want to restore.
Step 2: To restore your photo to its original location, right-click on it and then click on “Put Back”.
Fix 3: Recover Deleted Photos from Time Machine
Backing up your files (including photos) from time to time is a highly recommended activity as it will give you an upper hand in missing files situations. The Time Machine is an inbuilt backup and restore tool for Mac computers. If you recently initiated a backup before losing your photos getting them back using the Time Machine will be easy. Follow the steps below to recover deleted photos from Time Machine. This method is also how to recover permanently deleted photos on Mac.
Step 1: Insert the USB drive containing the Time Machine backup to your Mac.
Step 2: Launch the Finder window showing the location where you stored the deleted photo(s).
Step 3: Click the Time Machine icon to proceed. You can see it on the menu bar.

Step 4: Make use of the Time Machine’s timeline to search through the backups until you spot the missing photo(s) you want to recover. Select these photos and then click on “Restore”. Go back to their original locations and you will find them there.
Fix 4: Recover Deleted Photos from iCloud
The Apple iCloud is also an effective storage media for Apple device users. Deleted photos can be recovered from the iCloud if they were stored there, this is because files stored in the iCloud stay for up to 30 days after deletion. Follow the steps below to recover deleted photos from iCloud.
Step 1: Log into your iCloud using your Apple ID. Once logged in, navigate to “Photos”.
Step 2: On the left panel, click on “Recently Deleted”. Then choose the photos you wish to recover and then click on “Recover”.

Fix 5: Recover Deleted Images with Terminal
An alternative way to recover deleted photos on Mac computers is through the command-line interface also known as Terminal. Compared to other fixes discussed above, this is the most complicated and comes with limitations. The downside of using the Terminal for file recovery is that a user gets to recover his or her files one at a time, whereas a recovery software like the Tenorshare 4DDiG offers bulk recovery. Furthermore, this method should be a last resort, and to be used only when a user knows the file name of the missing photo. Below are the steps to follow to recover deleted photos with Terminal.
Step 1: Launch the Terminal application by navigating to “Applications”, click on “Utilities” and then “Terminal”.
Stpe 2: Key in “cd. Trash” and then click “Return”.

Step 3: Key in “mv (deleted photo name)/” and then press the “Return” key.
Step 4: Key in “Quit” and then close the Terminal by pressing “Enter” on your keyboard. After following these steps navigate to Finder to see your recovered photo.
Part 4: What People also Ask about Photo Recovery
Below are some of the most frequently asked questions about photo recovery in Mac computers.
How to Avoid Photo Loss on Mac?
Certain precautionary measures can be adopted to minimize or avoid losing photos on your Mac computer. Below are some of the best practices to follow:
Be careful when formatting disk drives and partitions: Before formatting disk drives and partitions, you have to thoroughly think your decision through, and make sure you are selecting the right target. This requires focus and precision to avoid regrets and save time.
Occasional Backups are Necessary: Always endeavor to back up your mac device from time to time. Doing this will save you a lot of unforeseen circumstances such as photo loss in the future. Apple has made this possible through the introduction of the Time Machine, which will require an external disk drive to back up data. If you aren’t already doing this, it is never too late to begin.
Avoid devices with Malware and Viruses: This is one of the primary causes of data loss in Mac computers and other brands. Avoid malware and viruses at all costs by installing reliable antivirus software and stay away from inserting your external devices into computers without antivirus or malware protection.
Where Do the Recently Deleted Photos on Mac Go?
Recently deleted photos from the Photos App in Mac go into the Recently Deleted Folder where they stay for 30 days before permanent deletion. Here you can either go manually delete them completely, retrieve them using the steps provided above, or let them be. At this point you must be wondering how to recover deleted photos on mac after 30 days, this is basically what third-party software are made for.
Conlcusion
It would be really painful not being able to recover photos on Mac due to accidental deletion, virus attack, or other unforeseen circumstances. Fortunately, lost photos can be recovered with ease with or without the use of third-party software. Can you recover permanently deleted photos on Mac? The answer is yes, and again the best way to go about it is by using a third-party software like the Tenorshare 4DDiG Mac Data Recovery Software as it will not only make the process easy, but save time as well.
 ChatGPT
 Perplexity
 Google AI Mode
 Grok
Grok


