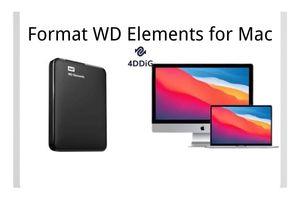
The WD Elements hard drive is a widely used external storage device across the world. First released in 1994, they are produced in a format that’s only supported by computers with the Windows operating system. But due to their enticing characteristics and relevance in the tech world, there’s a consistent rise in demand and also relevance among macOS users, which has birthed to the need to reformat WD Elements for Mac. Here (in this article) is where you will find the best methods on how to format WD Elements for Mac and other devices with ease. You will also learn how to retrieve lost data due to formatting WD Elements hard drives, as well as the precautionary measures to take when formatting these hard drives to a Mac-supported format.
Part 1: WD Elements Overview
What are WD Elements hard drives? These are high-capacity storage devices with USB 3.0 and the ability to produce universal connectivity and fast data transfer rates. They are the best fit for value-conscious users. In this section of this article, we will go through some of the most vital aspects of WD Elements; can they work with Mac? Can they be altered to work with Mac? What are their best and most common formats?
Can WD Elements Work with Mac?
Because WD Elements are of NTFS format by default, they aren’t compatible with Mac computers, and as such cannot be accessed by a Mac user. This format type is compatible with Windows PC and can cause reading problems with the hard drive in Mac computers. This is why it is important to reformat it to a supported format like HFS+. HDDs in HFS+ format can also be gotten from your local tech store.
What Are the Common Formats of WD Elements Drive?
The majority of WD Elements come in NTFS format. And as earlier mentioned, by default, this format is not compatible with Mac computers. Before buying external HDDs, always make sure their formats are supported across a variety of devices. Examples of compatible formats across a variety of devices and operating systems are ExFAT and FAT32.
Can We Make WD Elements Compatible with Mac?
WD Elements can be reformatted to a suitable format that’s compatible with your Mac computer. Examples of such formats are FAT32, ExFAT, or journaled – these formats are compatible with all devices including Mac computers. NTFS is the default format for WD Elements (a very popular hard disk) because Windows computers are the most popular and support this format type.
What Is the Best WD Elements Format for Mac?
Because they are a lot of WD Elements formats supported by Mac, choosing the best when reformatting your hard disk can be challenging as each of them have its pros and cons. For instance, journaled formats are only compatible with Mac devices, FAT32 systems are rare to come by, and the partitions of ExFAT systems are limited and oversized. This is why you must first reassess your requirements to choose a suitable format for your device. The ideal WD hard drive Mac format is the journal format. This is because when it comes to limitations for file sizes and partitions, they have little to none. However, it is advisable to go for this type of format if you primarily make use of macOS devices only. But if you intend to use WD Elements across other devices, you’d want to go with the HFS+ format as it is not only supported by Mac but Windows and Android.
Preparations before Formatting
To successfully format WD hard drive for Mac, there are certain preparations you ought to make. This should be after making up your mind to format your drive. Below are the preparations you should make.
Create backups: It is no news that formatting a hard drive will result in the permanent deletion of every data present. This is why it is important to back up your data to a secure location to allow easy retrieval after formatting your hard drive.
Inspect the connections: USB ports 2.0 and 3.0 are compatible with the WD Elements drive. You can confirm the type of port on your Mac computer by visiting apple.com and inserting your device Serial Number. If the ports on your Mac are not compatible with the WD Elements drive, you can make use of an adapter.
Ensure there’s enough power: Insufficient power may result in failed format attempts and can corrupt your file system. Make sure there’s enough power to complete the process of formatting your WD Elements drive.
Part 2: How to Format WD Elements for Macs?
When it comes to WD Elements reformatting for Mac, there are three ways a user can go about it. One method involves the use of a file format option on a Windows computer, another involves the Disk Utility tool on Mac computers, and the last method involves the use of Command Prompt.
Fix 1: Format WD Elements SE for Mac on Windows OS
With the use of a Windows OS computer, follow the steps below to execute this method.
Step 1: With the help of a USB cable, connect your WD Elements hard drive to your computer and then wait until it is recognized by it. Next, navigate to and click on “This PC” from the left panel of your Windows Explorer.
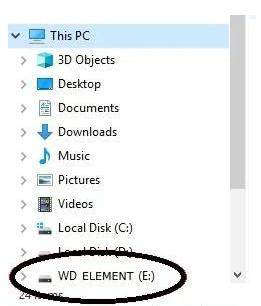
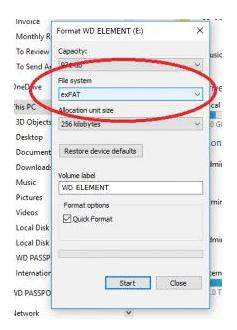
Step 2: From the drop-down menu, right-click on the name that represents your hard drive, and then from the list of options, click on “Format”. On the next pop-up window, select a suitable format of your choice from the list of options under “File System”. Next, key in any name of your choice for the hard drive under “Volume Label”.
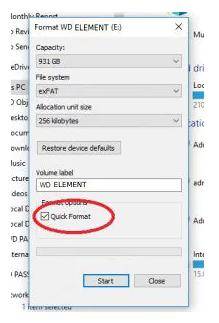
Step 3: Proceed by ticking the box next to “Quick Format” and clicking on “Start” after reviewing your selections. Wait for a while as your drive is being formatted to the format of your choice.
Fix 2: Format WD Element on Mac with Disk Utility
To make use of the Disk Utility in a Mac computer to format your WD Elements drive, follow the steps below.
Step 1: Turn on your Mac computer and then connect the WD Elements hard drive to it. Once your computer recognizes and mounts the drive, an icon in the shape of a hard disk will appear on your desktop.
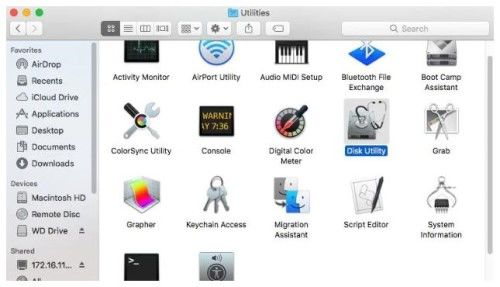
Step 2: Launch Disk Utility from the finder option on your Mac computer. From the Menu bar, select the Go option and then click on “Utilities”. Select the “Disk Utility” application from the utility options available.
Step 3: Select the WD Elements hard drive you connected to your Mac computer and wish to format.
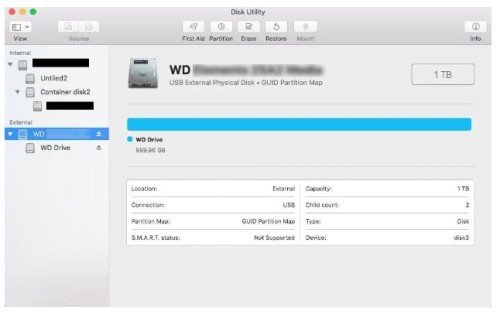
Step 4: From the Disk Utility file menu, click on “Erase” to proceed. On the pop-up window, select the desired format you want for the hard drive and then give it a name.
Step 5: Proceed to format your WD Elements hard drive after reviewing your settings by clicking on the “Erase” option.
Fix 3: Format WD Elements for Mac with Command Prompt
The command prompt can be used to format hard drives and perform other functions. Below is a step-by-step guide on how to format WD Elements with the command prompt.
Step 1: On your keyboard, Press and hold the Windows key and then press the “X” key. From the pop-up menu, select the Command Prompt (Admin) option.
Step 2: Key in “diskpart” and then hit the Enter button on your keyboard. Next, key in “list disk” and then also hit the Enter key.
Step 3: Key in “Select disk #” (# represents the number of disks, e.g disk 2) to highlight the WD Elements hard drive you want to format, and then hit the Enter key on your keyboard to proceed. The size of the disk can also give you an idea of what drive it is.
Step 4: Remove all information on the drive by typing “clean” and pressing Enter on your keyboard.
Step 5: Create a partition by typing “create partition primary” into the command prompt and hitting the Enter key.
Step 6: Proceed to format the partition to a format of your choice by typing “format fs=exfat quick” and hitting the Enter key.
Step 7: Next, assign a drive letter by typing “assign letter=#” (# represents the drive letter) and hitting the Enter key on your keyboard.
Step 8: Exit the Diskpart and Command Prompt by typing “Exit” and hitting the Enter key on your keyboard twice.
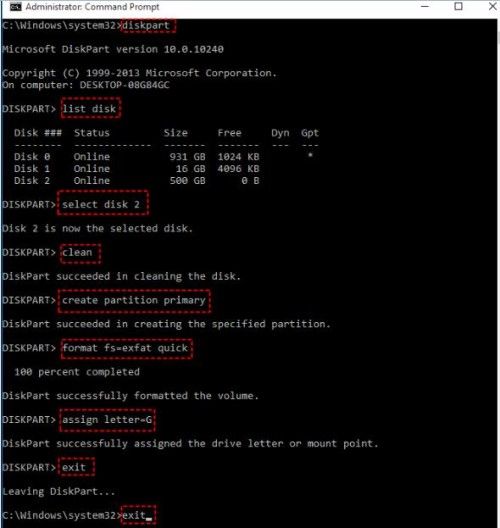
It is important to note that it would be impossible for the Command Prompt to format a partition that’s above 32GB as a FAT32 format. It is highly recommended that you format to ExFAT because of the high capacity of WD Elements Drives.
Bonus Tip: How to Recover your Formatted WD Files on Mac?
Although it becomes almost impossible to retrieve files that were stored in a formatted external hard drive, there is a handful of third-party software that makes the recovery of these files possible, easy, and with a high success rate. To save time and effort, it is advisable to always back up your files to a secure location before formatting hard drives. This way, they become easily accessible after formatting your hard drive to the format of your choice.
What Are the Consequences of Accidentally Formatting WD Hard Drives?
Accidentally formatting a hard drive is so common among users and can lead to a lot of complications such as:
- Losing important files and folders.
- Corrupt or damaged hard drive.
How to Recover Formatted WD Files on Mac:
As earlier mentioned, recovering lost files from a formatted WD hard drive may be challenging but not impossible. The use of third-party software like the 4DDiG Mac Data Recovery software help facilitates the recovery process and increases the odds of fully recovering your lost files.
- It is an all-in-one data recovery software that’s capable of recovering lost files due to formatting, accidental deletion, corruption, lost partition, virus attack, and crashed system, amongst other scenarios.
- It works for both laptops and PCs, as well as SD cards, USB flash disks, external & internal drives, etc.
- It is capable of recovering over 1000+ file types which include documents, photos, audio, and videos.
Follow the steps below to fully recover your lost files from a formatted hard drive using the Tenorshare 4DDiG data recovery software.
For PC
Secure Download
For MAC
Secure Download
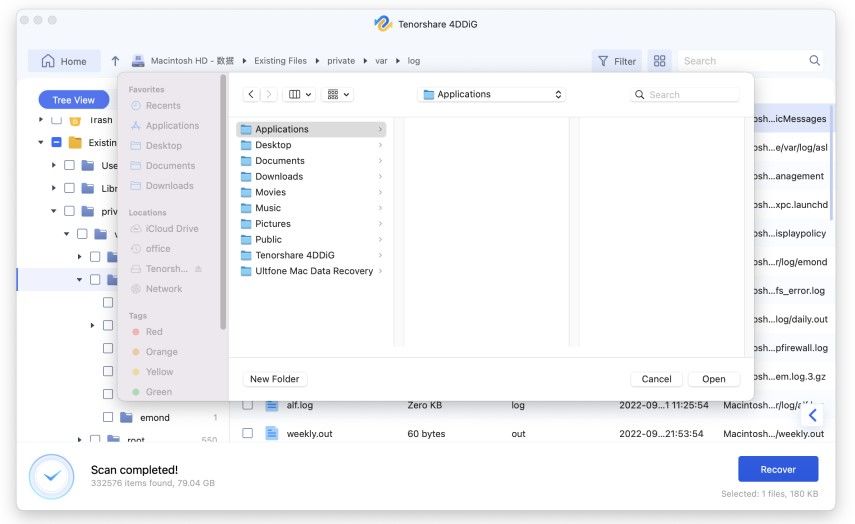
- Launch the Tenorshare 4DDiG software after downloading and installing it and then connect your WD Elements hard drive to your Mac computer. Begin the scan process by selecting the external hard drive with the lost data you just connected to your computer.
- At this point, the software immediately examines the hard drive and scans for missing files. You can either stop or pause this process after identifying the files you are searching for – It is advisable to always let the scan process finish without any interruptions. You will be presented with the results after the scan process has been completed. The result comes in categories such as Existing Files, Deleted Files, RAW Files, Tag Files, and Lost Location, and can be seen under the “Tree View” tab. To check for specific file types such as documents, audio, video, photo, and email, switch to the “File View” tab. Alternatively, you can make use of the filter feature to search for particular files.
- After the scan result has been presented to you, go through it, identify the files you wish to recover, and then retrieve them to a secure location. On no account should you retrieve your newly recovered files to the same partition where they got missing because this can cause overwriting and permanent data loss.


Part 3: Tips for WD Elements Reformatting for Mac
To promote the lifespan and efficiency of WD Elements hard drives, it is important to know certain precautionary measures when formatting them, and also the benefits of doing so.
Why You Should Format your WD Hard Drive
This may come as a surprise, but formatting your hard drive once in a while comes with certain benefits such as:
- Increase in transfer speed and performance.
- Eliminating unwanted files, bugs, glitches, and also viruses/malware.
- Creating space.
Things You Should Know While Changing WD Elements on Mac
Below are a few tips to follow when changing WD Elements on Mac.
- Ensure the right format is selected to allow you to make use of the drive across other devices without limitations. Examples of such formats are ExFAT and HFS+.
- Make sure your computer has sufficient power so as to eliminate interruptions when formatting the hard drive.
- Do not make use of third-party applications to format hard drives as doing so may cause permanent damage.
Conclusion
Although WD Elements hard drives are popular and used by many, their default format is the NTFS which is not supported by Mac computers, thus making it entirely useless to a mac user despite all of their enticing characteristics. To be able to use WD Elements hard drives on a Mac computer, a user must first convert them to a format that’s supported by macOS. And in this article we have elaborated on how to format WD Elements for Mac. Furthermore, forgetting to back up the data stored in a WD hard drive before formatting it should be no cause for alarm as the data can be recovered with ease, and by the use of 4DDiG Mac Data Recovery Software.
 ChatGPT
 Perplexity
 Google AI Mode
 Grok
Grok
