How to Fix Video Card Failure? 4 Easy Ways!
A video card is an important component of a computer that generates and outputs graphical information to the monitor. Also known as a graphics card, it enables you to view visuals on the display. So, when a video card failure occurs, it compromises the computer's visuals and overall performance.
If you are also struggling with the video card failure issue, then you are reading the right article. In this article, we will talk in detail about the signs of video card failure and then the best ways to fix the issue yourself. So, let's get started!
Part 1: Knowledge about Video Card Failure
Before diving deep into how to fix video card failure, it is important to clarify what can cause its failure and what the potential signs of video card failure are.
What Cause Video Card Failure?
A video card failure can occur due to multiple reasons. The reasons can be related to hardware or software. Some of the likely ones are as follows:
- Dust gathering on the video card
- A malfunctioning Power Supply Unit (PSU)
- Poor connections or improper seating of the card on the motherboard
- Bad or low RAM
- Physical damage
- High temperature due to poor ventilation or blocked ventilation outlets
All the above reasons and similar others can cause the video card crashing issue.
How to Tell Video Card Failure?
There are multiple signs of video card failure that can help you quickly identify that there is something wrong with your video card.
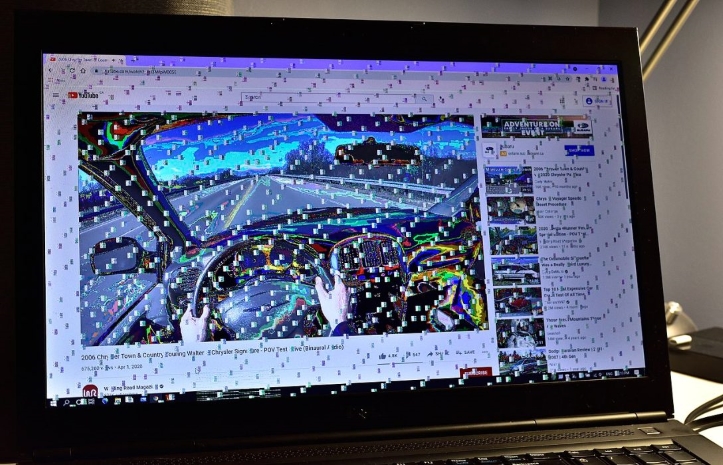
When a video card failure occurs, it will compromise your display performance and likely show distorted visuals. Below are some of the common signs to notice when looking for how to test a video card for failure:
- Computer crash
- CPU overheating
- Loud fan noise
- Error prompts of graphic card failure
- Random colored patterns on the screen
- Freezing/shuttering of the computer screen
- Complete black screen when you turn on the computer
If you detect the above video card failure signs, then it means that your video card is crashing. Now, head to the next part to learn how to fix video card failure with the best solutions.
Part 2: How to Fix Video Card Failure
There are multiple ways to fix the video card failure problem because the source of the problem can vary from case to case. For instance, some users have software-related problems, while others face hardware-related damages.
Out of all the ways to fix video card failure, below we have shortlisted the four best ones that can tackle the problem in most cases:
Way 1: Clean and Re-insert the Video Card
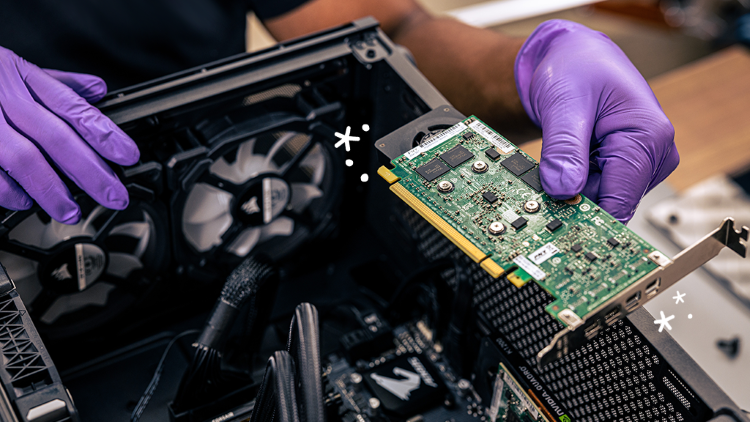
Oftentimes, the video card failure occurs due to improper connection or dust accumulation. So, the first fix you should do is clean and re-insert the video card, as follows:
- Remove the video card from your computer and clean it thoroughly. Make sure you remove all the dust.
Connect the video card back to the graphics slot. It is recommended to connect it to a different slot (if available) because the problem may be due to a malfunctioning PCI card slot.

Other than cleaning the video card, you should also quickly clean the dust around other computer components, especially the RAM and power supply unit. Once done, restart your computer and see if the video card failure issue is resolved.
Way 2: Update or Re-install Your Display Drivers
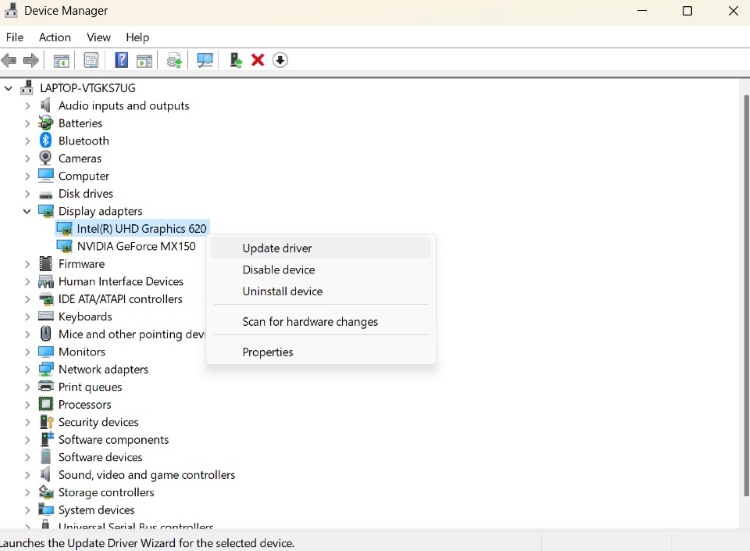
There is a possibility that you may be running an outdated display driver, which is causing the video card failure issue. Therefore, you should update/reinstall your display driver as follows:
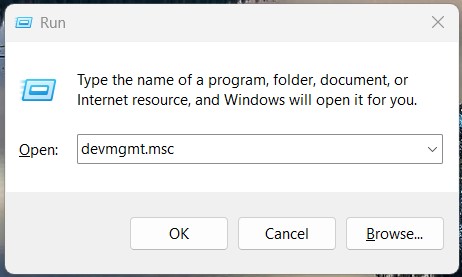
Click the "Windows + R" buttons and type "devmgmt.msc".

Under "Display adapters", right-click the video card and tap "Update driver".

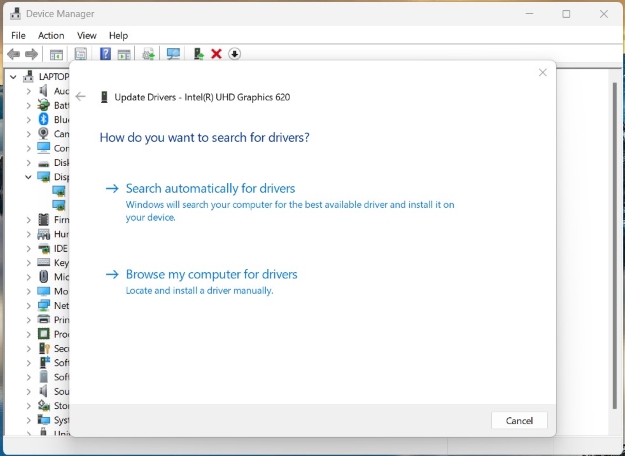
Select "Search automatically for updated driver software".

- Follow the on-screen instructions to complete the display driver update process.
Once the driver is updated, restart your computer and see how your video card responds now. Alternatively, you can also uninstall the display driver and then restart the computer to reinstall the display driver automatically.
Way 3: Test your CPU and RAM
The display issue can also be due to a malfunctioning CPU or RAM. However, you cannot easily detect issues in CPU and RAM unless you put them under high stress, such as playing a high-graphics game.
So, if you don't suspect any video card failure signs, the fault may be in your CPU or RAM. To inspect that, you should put your CPU and RAM on test.
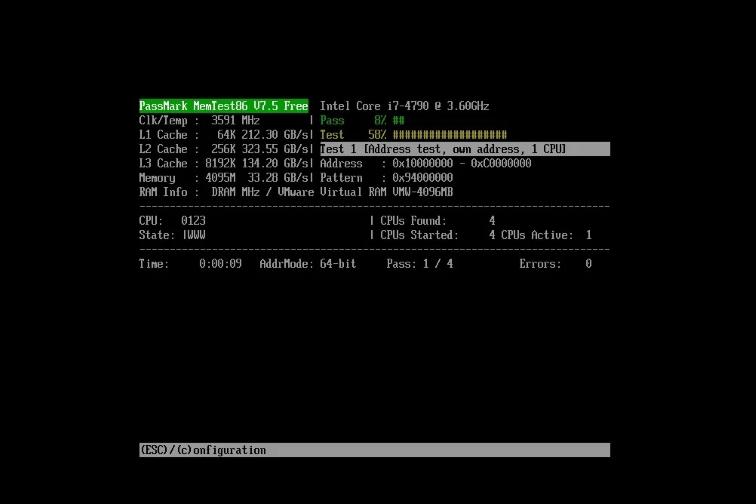
Windows does not offer a built-in method to test the performance of the RAM. For that, you need to either create a bootable disk or use third-party RAM testing tools, such as Memtest86 and DocMemory Diagnostic.
Similarly, you can test the CPU under a reliable system load scenario. You can use any third-party tool of your choice to test the CPU, such as Prime95, OCCT, and similar others.

Way 4: Device Manager on Windows
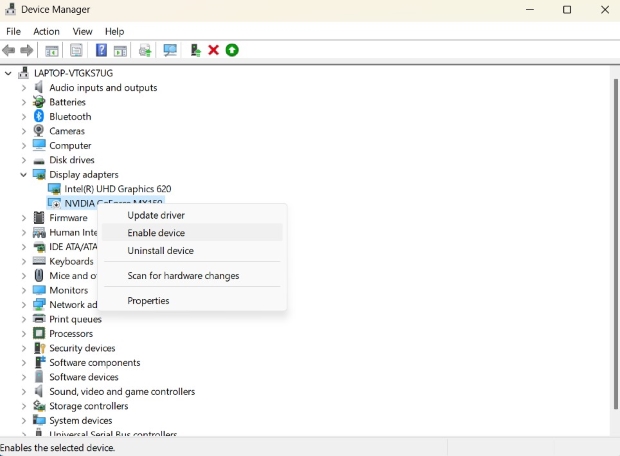
Another possibility of video card failure is that it is currently disabled. To check that, you can see its status in the Device Manager.
Device Manager is a Windows built-in utility to view and manage hardware devices. Follow the below steps to check the video card status from the Device Manager:
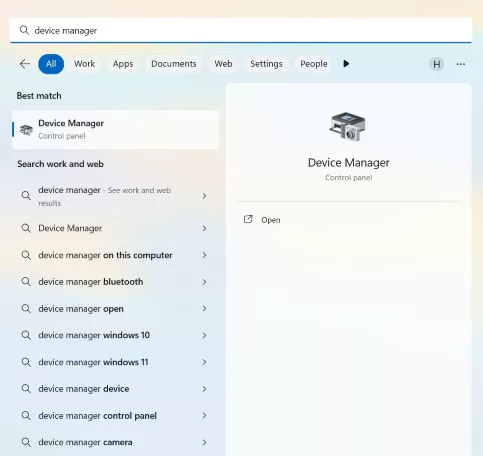
Search for "Device Manager" in the Windows Start menu and click the best match option.

Under "Display adapters", right-click the video card and tap "Update driver".

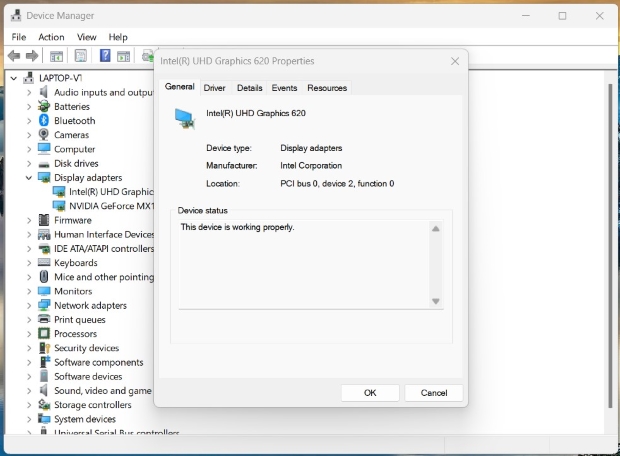
Go to the "Display adapters" category. Look for the video card. If there is no warning, like a red X sign, then it means the video card is working perfectly. You can also verify it by right-clicking the video card and clicking "Properties" to view its current status.

If your video card is disabled, you can enable it by right-clicking it and then selecting the "Enable device" option.

This way, you can utilize Device Manager to verify the current status of the video card and enable it easily.
Bonus Tips: How to Recover Data When Video Card Failure
A video card failure increases the chances of data loss or file corruption. So, if you have experienced data loss/damage due to video card crashing, then don't worry. You can easily recover data with a powerful data recovery tool, and one such tool you can use is 4DDiG Data Recovery Software, which is a powerful data recovery tool that can retrieve lost or inaccessible data from a laptop/PC, USB flash disk, internal/external drive, and other storage mediums.
The key features of the Tenorshare 4DDiG data recovery tool are as follows:
- Recover lost, deleted, or corrupted videos/photos from laptop/PC, USB flash disk, internal/external drive, and other storage mediums.
- Recover 2000+ data types, including images, videos, audio, documents, etc.
- Ultra-fast, deep, and accurate scanning of lost videos/photos.
- Preview-based selective videos/photos recovery.
- Click-based user interface with no learning curve.
- Compatible with both Windows and Mac.
Secure Download
Secure Download
Follow the below simple steps to recover data with Tenorshare 4DDiG:
-
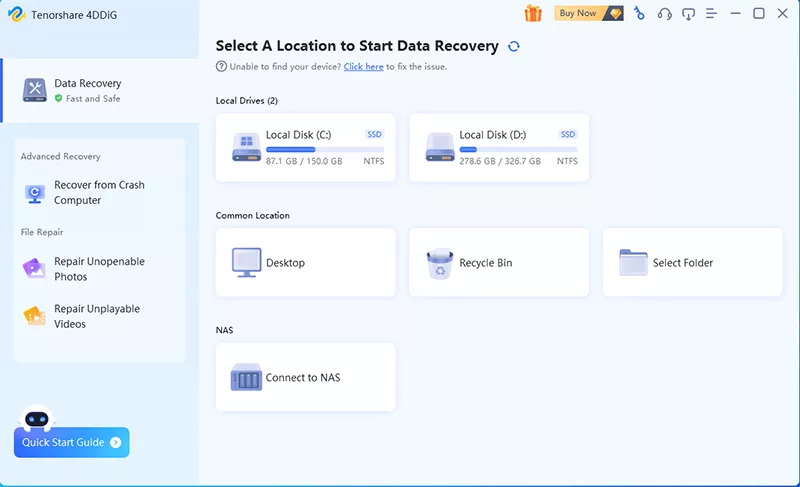
Download and launch the 4DDiG data recovery tool on your Windows/Mac computer. Select the local drive from where you want to retrieve the lost data and click the "Start" button.

-
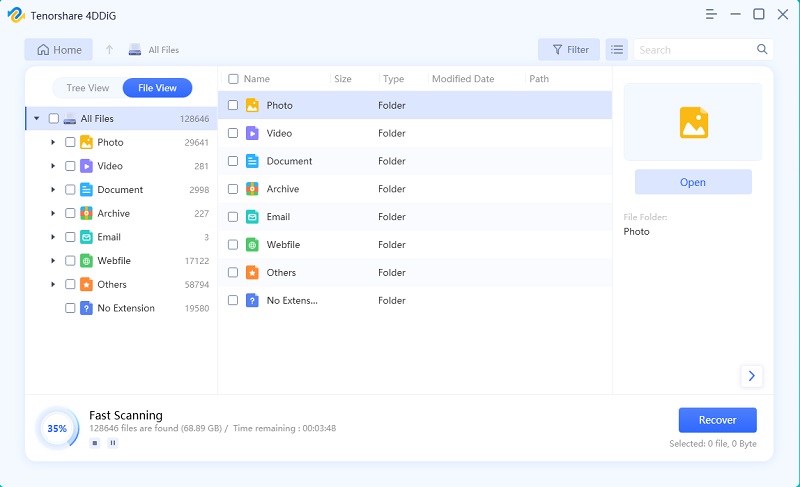
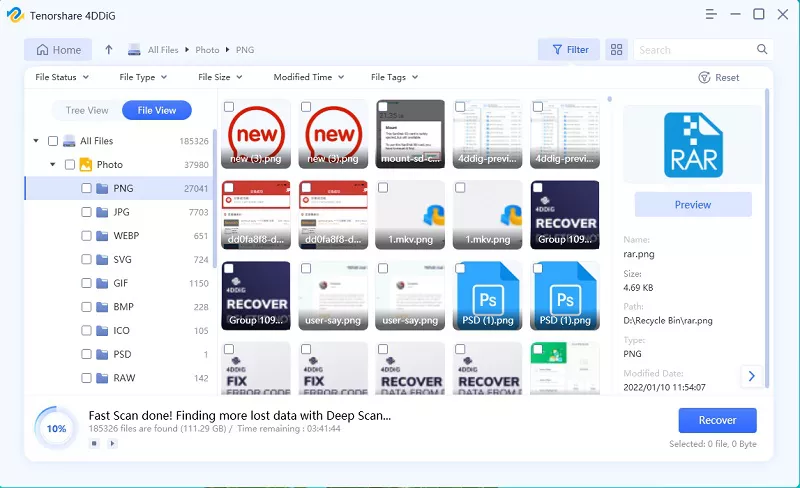
Wait for the tool to scan the entire drive. Once done, you can preview all the recoverable data.

-
Select the files you want to recover and click the "Recover" button from the bottom right corner to save them back in your computer.

That's it! This way, a 3-step process with Tenorshare 4DDiG can let you conveniently recover data when video card failure occurs.
Secure Download
Secure Download
Conclusion
In this guide, we have discussed in detail how to fix video card failure using the four best ways. So, if you suspect video card failure signs, you can follow the above methods one by one and fix the issue before it gets worse.
In addition, you should also leverage the 4DDiG Data Recovery to recover lost data due to video card failure. Its intuitive interface, deep scanning, and preview-based recovery make it ideal for recovering lost/deleted data. Therefore, it's time to take action to resolve the video card crashing issue and recover lost data with 4DDiG.
 ChatGPT
 Perplexity
 Google AI Mode
 Grok
Grok

