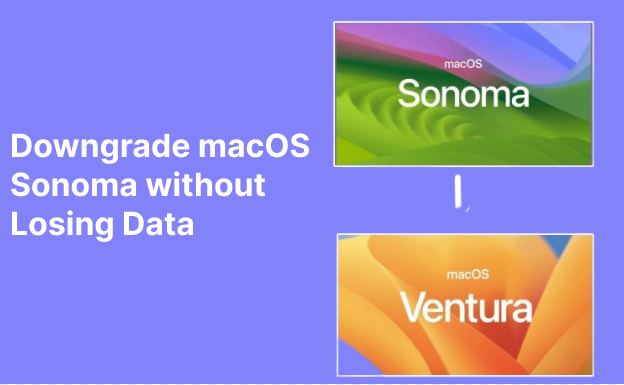
Are you regretting the new macOS 13 upgrade? Want to downgrade macOS Sequoia/Sonoma/Ventura without losing data? Here’s your answer. The new macOS 13 update, Ventura, provides a fantastic user experience with unique features. But it also comes with one downside. Bugs. A whole lot of them are causing the apps to get stuck, freezing screens, slow response, and crashing systems. If your macOS is slowing down after the new update, you can always revert to macOS Monterey from Ventura. But if the downgrade is not done properly, it may result in losing your valuable data. But there is a safe way of downgrading. Just walk through this article to learn four ways of downgrading without any loss.
- Prepare: Losing Data after Downgrading macOS? Recover it Here!HOT
- Part 1: Things you Should Do before Downgrading macOS Sequoia/Sonoma/Ventura
-
Part 2: How to Downgrade macOS Sequoia/Sonoma/Ventura without Losing Data?
- Fix 1: Using Factory Reset to Downgrade macOS Sequoia/Sonoma/Ventura
- Fix 2: Downgrade macOS Sequoia/Sonoma/Ventura to Monterey with Time Machine Backup
- Fix 3: Degrading macOS Sequoia/Sonoma/Ventura Back to Monteret with macOS Recovery Mode
- Fix 4: Use Bootable USB Drive to Downgrade macOS Sequoia/Sonoma/Ventura to Monterey
- Part 3: What to Do if we Lost Data after Downgrading?
- FAQs:
Prepare: Losing Data After Downgrading macOS? Recover it Here!
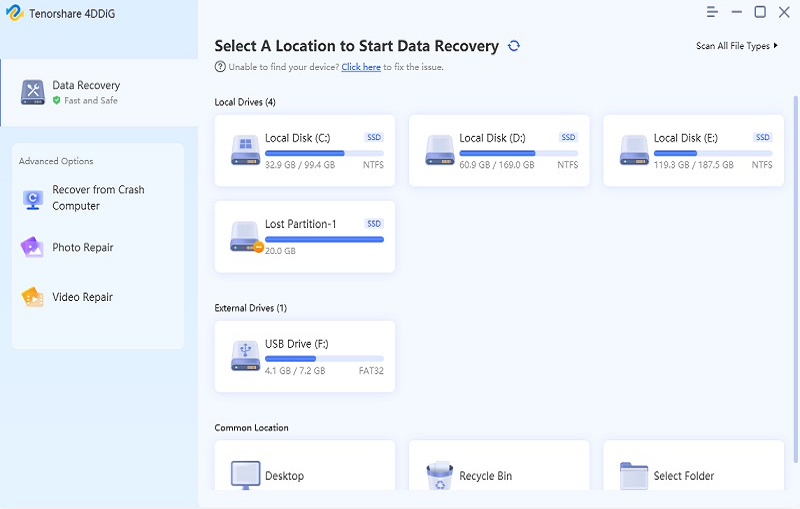
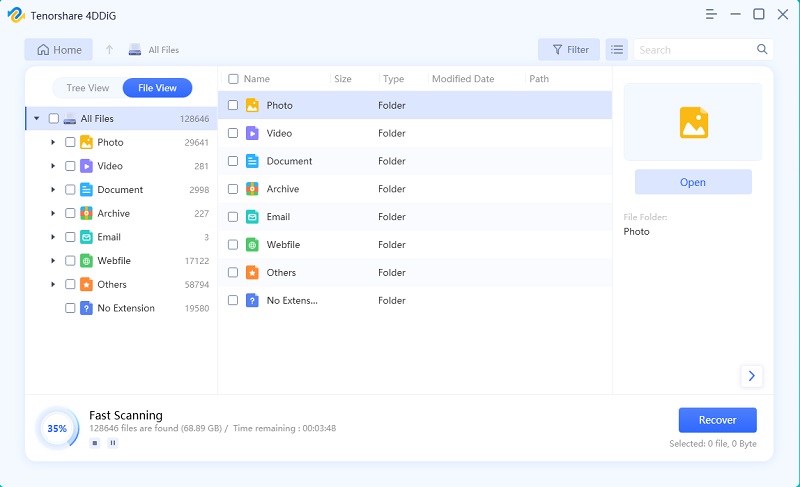
Sometimes even if you have a backup, you may be unable to restore data after a downgrading process due to different situations. Or sometimes, you may lose crucial files after the downgrading process. In such cases, third-party software like Tenorshare 4DDiG Mac Data Recovery software can come to the rescue. It can recover permanently deleted, lost, corrupted, hidden, and damaged files in just three clicks. 4DDiG features include:
- Recover data from internal and external drives, Mac-based devices, USBs, SD cards, and digital cameras.
- Restore files with a high success rate.
- Recover 1000+ file formats, including audio, video, document, and photo files.
- Patent recovery technology for retrieving files from Apple Silicon M1, M1 Pro, M1 Max Macs, and T2-encrypted Macs.
- Advanced AI algorithm to locate hidden files.
- Various preview modes to check file details.
- Fast scan and easy-to-use interface.
Here are the three steps to recover lost files after macos Sequoia/Sonoma/Ventura update/downgrade:
For PC
Secure Download
For MAC
Secure Download
- Download and install the 4DDiG Mac data recoverer software. Open it to choose a location like local drives or where your miss files use to stored to start the recovery process.
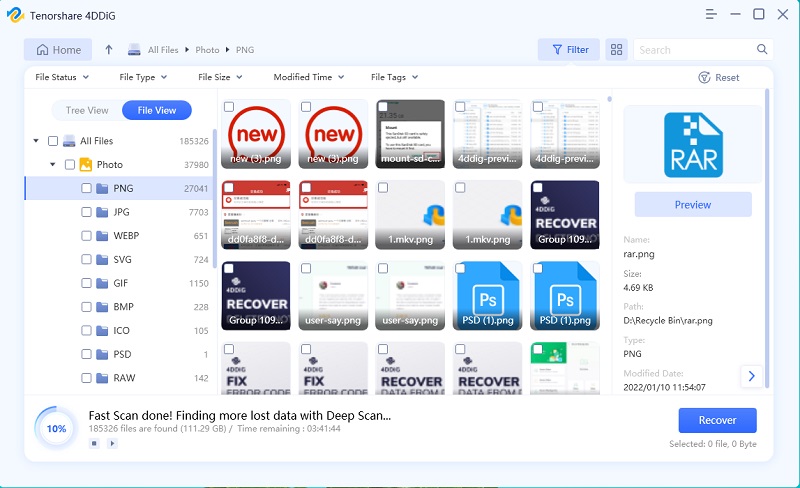
- Hit the “Scan” button to look for lost files. It will take a while for the scan to finish. You can stop or pause mid-scan to preview the details of your targeted files.
- Once the scan is finished, press the “Recover” button to save files in another location. Don’t save them in the same partition where you lost them.
Part 1: Things You Should Do Before Downgrading macOS Sonoma/Ventura
Before degrading macOS Sonoma/Ventura back to Monterey, you must take some crucial steps to prevent data loss from downgrading. Here’s what you need to do:
Tips 1: Backup Your macOS Data
After you downgrade macOS Sonoma/Ventura, all your data will be deleted. So, it's recommended that you create a backup of your data to restore it after downgrading. You can utilize Time Machine on Mac, a cloud service, or an external USB to save your backup.
Tips 2: Make Sure Your Internet is Well Connect
Disruptions in the internet connection will cause an uninstallation/installation failure while you are downgrading macOS Sequoia/Sonoma/Ventura. So ensure that your Mac is connected with a stable WiFi or Ethernet connection to avoid disruption in the downgrading process.
Tips 3: Make Sure your macOS Have Enough Power
Power failure or interruptions in the power supply can cause data loss. Therefore, keep your Mac plugged into a power source so you can downgrade macOS Sequoia/Sonoma/Ventura to Monterey without disturbance.
Tips 4: Do a Last Final Checkup of Your Mac
A downgrade from macOS Sequoia/Sonoma/Ventura to Monterey will take at least one hour. Also, if anything goes wrong during the downgrading process, you may have to start all over. So you must rethink whether it’s possible to fix the issues you are facing with some tweaking. Do a final checkup of your Mac to eliminate any problems in Ventura.
Tips 5: Search Your Mac for Hidden Apps and processes
Sometimes, broken plugins, caches, junk files, invisible app leftovers, and shadow apps can slow down the entire macOS. So that may be the problem with your Sequoia/Sonoma/Ventura. You can remove hidden apps and processes to clean up your system.
Tips 6: Clear that What Mac You Have
Check the type of processor your Mac have. Is it Apple Silicone or Intel? This is crucial to learn because the downgrading steps are different for both processors. You can check your processor type by following the steps below:
Step 1: Choose Apple Menu > About this Mac > More info.
Step 2: Look for whether the process is of Intel or Apple.
Part 2: How to Downgrade macOS Sequoia/Sonoma/Ventura without Losing Data?
Now, as you’ve done all preparations, let's get down to the business of downgrading macOS Sequoia/Sonoma/Ventura to Monterey with no data loss. There are four ways to downgrade.
Fix 1: Using Factory Reset to Downgrade macOS Sequoia/Sonoma/Ventura
If your factory-shipped MacOS version is Monterey, a factory reset is the easiest option to downgrade Sequoia/Sonoma/Ventura. The OS will revert back to the raw macOS build by factory resetting. This step is the same for both Intel and Apple processors on Mac.
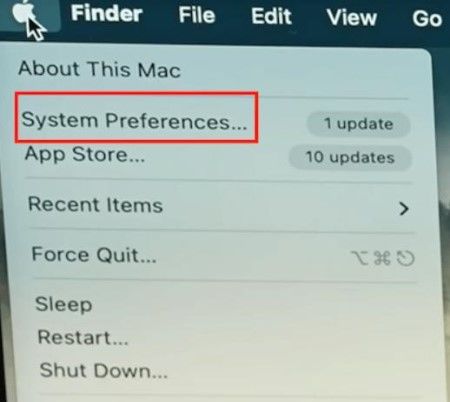
Step 1: Choose “System Preferences” by clicking on the Apple icon at the top left corner of your Mac screen.
Step 2: Select “Erase All Content and Settings” and enter your Mac password for confirmation.
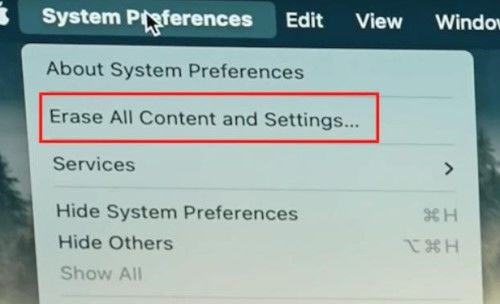
Step 3: Press “Continue” and sign out of your Apple account by entering your password. Select “Erase All Content & Setting” and begin the factory reset process.
Now the downgrading process to Monterey will start. Wait for the language interface to appear, and you can install Monterey.
Fix 2: Downgrade macOS Sonoma/Ventura to Monterey with Time Machine Backup
If your OS was not originally macOS Monterey. You shouldn’t do a factory reset. You can use another method like Time Machine to downgrade macOS Sonoma/Ventura to Monterey without losing data. But there is one condition to using Time Machine. You can only use it if you enable it before upgrading your macOS to Venture. Otherwise, follow the steps in the next two fixes.
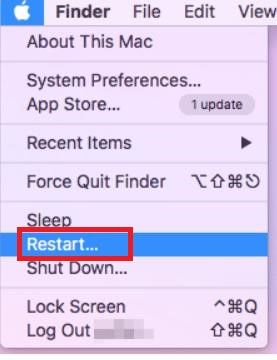
Step 1: Connect the external Time Machine backup drive with your Mac, then open the Apple menu and select Restart.
Step 2: Now enter a startup combination key.
For Mac With an Intel Processor
Press down the “Command and R” keys together when the Apple logo appears.
For Mac With an Apple Silicone Processor
- Press the “Power” button until the startup screen pops up. Then choose Options > Continue.
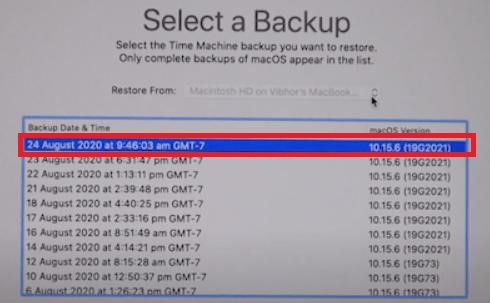
- Choose the “Restore From Time Machine Backup” option. Now select the backup you want, and your macOS Sequoia/Sonoma/Ventura will be downgraded.
Fix 3: Degrading macOS Sequoia/Sonoma/Ventura Back to Monterey with macOS Recovery Mode
The macOS recovery mode will reinstall Sequoia/Sonoma/Ventura to restore it to the old macOS version. You can even restore your MacOS to the factory-shipped OS. This step is the same for Intel and Apple Silicone-based processors on Mac. Here’s how to downgrade macOS Sonoma/Ventura with macOS recovery mode:
Step 1: Shut down your Mac and press the Power button and quickly press one of these key combinations:

- Command + R to reinstall the current version of Sequoia/Sonoma/Ventura on your Mac.
- Shift+Option(Alt)+Command+R to reinstall the factory-shipped macOS.
- Option+Command+R to upgrade to the latest macOS.
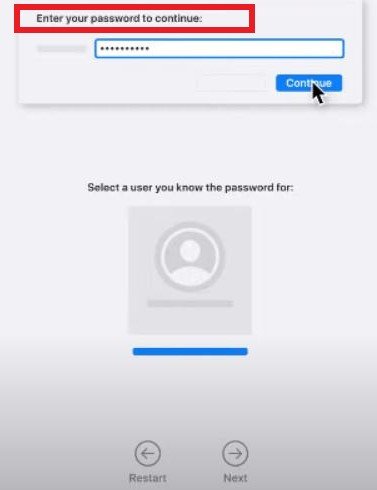
Step 2: Now enter your password and press Continue > Next > Reinstall macOS.
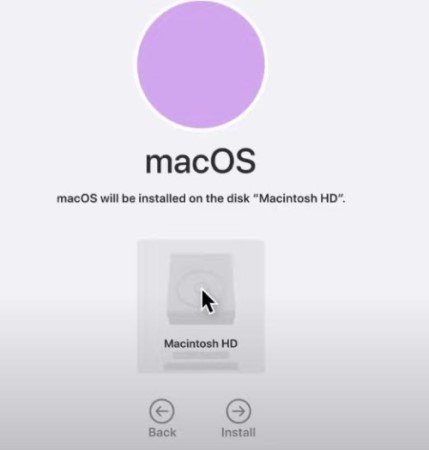
Step 3: Now select the disk and wait while the macOS installs automatically.
Fix 4: Use Bootable USB Drive to Downgrade macOS Sequoia/Sonoma/Ventura to Monterey
You can boot your Mac with an installer if you don’t have a backup or Monterey macOS on an external device. The installer is previously copied on a USB or an external device.
Things you should prepare before using Bootable Drive to Downgrade macOS
There are some things you must consider before preparing for a macOS downgrade by using a bootable drive. They include:
- You must have a USB drive with at least 16GB or above storage space.
- A stable internet connection will help to download macOS Monterey.
- If your Mac has a USB-C port and you possess a USB 3 pen drive, use a connector to link the drive with the port.
3 Steps to Downgrade macOS with Bootable USB
Here’s how to downgrade macOS Sequoia/Sonoma/Ventura without losing data by using a bootable USB drive in three steps:
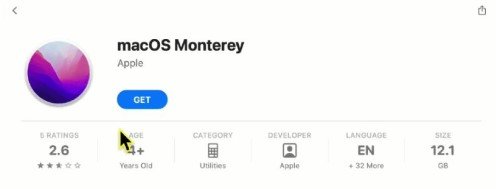
Step 1: Open Mac App Store and search for the macOS Monterey installer. Download it on Mac. It will be saved in your Mac Applications Finder folder. Leave it for later use.
Step 2: Next, erase the hard drive and prepare for a bootable drive and connect a USB drive to your Mac device.
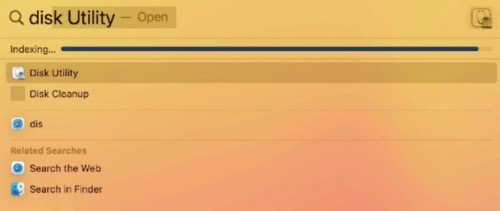
Step 3: Open Disk Utility by using Spotlight. Then select the drive on the left side panel under “External” and choose “Erase” from the top menu bar.
Step 4: Choose the format “Mac OS Extended (Journaled)” in the dialogue box and hit the “Erase” button. Now your USB drive will be created. Hit the “Done” button when a message box appears.
Step 5: Copy and paste the “sudo /Applications/Install\ macOS\ Monterey.app/Contents/Resources/createinstallmedia --volume /Volumes/USB --nointeraction” command in the Terminal. (The name “USB” represents the USB drive name. You can change it accordingly).

Step 6: Enter your user account password to delete the Mac drive and press “Ok” to allow access to your USB drive.
Step 7: The Terminal will now copy the macOS Monterey installation files to the USB drive. Close the Terminal once the process is completed. Next, switch off your Mac and boot it into recovery mode.
Step 8: For Intel based-Mac, press the “Option” key to verify your installer disk. For Apple Silicone-based Mac, press the “Power” button to see the installer disk.
Step 9: Select “Install Monterey OS” and hit “Continue.” Then choose “macOS Beta” and hit the “Next” button to enter your password.
Step 10: Install macOS Monterey by following the installation prompts given by your Mac system.
Once the installation finishes, your system will be downgraded from Sequoia/Sonoma/Ventura to Monterey macOS.
Part 3: What to Do if we Lost Data after Downgrading?
As stressed earlier, a backup is necessary to prevent data loss during downgradation. But due to some circumstances, you might be unable to restore data from the backup or lose it due to disruptions during the downgrading process. So what can you do to restore your valuable data?
Among numerous third-party software on the internet, Tenorshare 4DDiG Data Recovery tool for Mac can be your top choice. It has the capability to recover lost and corrupted data from M1-equipped and T2-secured Macs. You won’t have to disable SIP to use it. 4DDiG can retrieve data due to a plethora of situations such as malware attacks, power disruption, downgradation, upgradation, formatting, and system crash. With an easy-to-use interface and intuitive algorithm, you won’t have to be equipped with professional knowledge or make heavy-duty retrieval efforts to recover your data.
FAQs:
Can I Downgrade my macOS without Losing Data?
Yes, you can downgrade your macOS without losing data if you have a Time Machine backup or a backup on an external device. During the downgrading process, your Mac will ask to copy files from the backup. You can select that option to restore your data.
Can We Downgrade a Mac that Shipped with Sequoia/Sonoma/Ventura?
You can downgrade any Mac that is factory shipped with Sequoia/Sonoma/Ventura to Monterey. But the installation process will differ for Apple Silicone and Intel-based Macs. Follow any of the fixes mentioned above to downgrade your macOS to Monterey.
Which One is Better, macOS Monterey or macOS Sequoia/Sonoma/Ventura?
Currently, Sequoia/Sonoma/Ventura is the best macOS for the latest generation of Macs. Its highlighted features include Stage Manager to switch between windows, live text in the video, mail, messages, clock app, etc. However, if you feel there are bugs or issues in Ventura, you can always downgrade it to macOS Monterey.
Can We Uninstall Sequoia/Sonoma/Ventura on Mac?
You can uninstall Sequoia/Sonoma/Ventura on Mac, but you'll lose all data if you don’t have a backup. So prepare a backup beforehand with Time Machine.
Can We Degrade to the Previous macOS?
You can degrade to the previous macOS. But reverting to the earlier version is safer than an old version which might not support the latest software updates.
How Much Time Does it Cost to Downgrade macOS Sonoma/Ventura?
The time it will cost you to downgrade to Sonoma/Ventura depends on your data, USB type, and Mac model. On average, it can take around one hour to downgrade. But the time spent will also depend on whether you restore data from the Time Machine backup while installing macOS Monterey.
I Can't Downgrade from macOS Sequoia/Sonoma/Ventura to Monterey
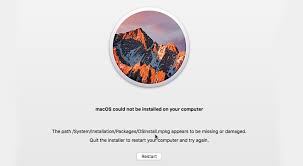
If your file format is not compatible with the drive, you may face macOS could not be installed on your computer. Make sure to check your file format as mentioned above in “3 Steps to Downgrade macOS with Bootable USB.”
Why the Volume Cannot be Downgraded from macOS Sonoma/Ventura?
If you are receiving an error “The Volume cannot be Downgraded” during your downgrading process, it’s due to incompatibility or technical issues. In such a scenario, erase your Mac drive and install Monterey, as mentioned in Fix 4.
Conclusion
If you are not satisfied with the latest macOS Sonoma update or feel it has bugs or is slowing down your system, you can always downgrade to macOS Monterey. Most probably, our above post was able to answer your query, “how to downgrade macOS Ventura without losing data?”. Choose any of the above downgrading methods according to your situation, but remember to keep a backup. If some files are missing after the downgrading process, try the Tenorshare 4DDiG Mac Data Recovery software to rescue them back with high success.
 ChatGPT
 Perplexity
 Google AI Mode
 Grok
Grok
