If you are here then chances are you’ve tried updating your macOS but keep receiving the “macOS could not be installed on your computer” type of error. Well, there are a handful of reasons why this error keeps popping up, and in this article, we will be shedding more light on them and how to fix this type of error.
- Part 1: What Are the Common Cause of macOS Couldn't Be Installed on Your Computer Error?
- Part 2: Thing You Should Do Before Fixing macOS Installation Problem
-
Part 3: How to Fix Your macOS Couldn't Be Installed on Your Computer?
- Fix 1: Restart the Mac and Reintall
- Fix 2: Check your Mac Date and Time
- Fix 3: Free Up Space for macOS to Install
- Fix 4: Download a New One to Replace
- Fix 5: Set the PRAM and NVRAM Again
- Fix 6: Run First Aid on Disk Utility
- Fix 7: Reinstall macOS with macOS Recovery
- Fix 8: Erase your Startup Disk and Reinstall macOS
- Bonus Tip: How to Recover Data from Unbootable Mac?HOT
Part 1: What Are the Common Cause of macOS Couldn't Be Installed on Your Computer Error?
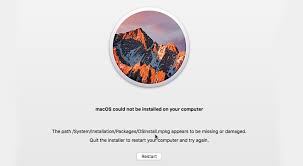
There are a handful of reasons for this type of error when updating your macOS, and the difficulty level in fixing this error depends on the details of the error message itself. It will be a lot easier if the error message came with information regarding where the problem lies, this way troubleshooting becomes more effective as you’d know where to focus on. For example, “macOS could not be installed on your computer the path /system/installation/packages/osinstall.mpkg”, which indicates a damaged or missing installation path is the cause. Or “macOS could not be installed on your computer - the installer resources were not found”
A few of the most common causes of this error are, but are not limited to:
- The installer files are corrupted
- The hardware is incompatible
- Your Mac’s startup disk is faulty
- There isn’t enough free storage
- Damaged or missing installation path (/System/Installation/Packages/OSInstall.mpkg)
Whichever of the above-mentioned causes is responsible for the error, fixing it is quite easy and does not require you to become tech-savvy to do so.
Part 2: Things You Should Do Before Fixing macOS Installation Problem
Before fixing the macOS installation error there are a few safety measures you’d want to take into consideration to prevent data loss and any other abnormalities in the process. An incomplete macOS installation may lead to consistent auto-launch of the installer each time your PC restarts, amongst other scenarios you don’t want to encounter, and as such the below listed precautionary measures are necessary.
1. Boot your Mac into the Safe Mode
This step will see to it that programs stop auto-launching each time you boot your PC, and the macOS installer will be one of them. If you boot your Mac into the Safe Mode programs that run in the background without authorization will cease to do so.
Booting An Intel-based Mac computer into Safe Mode
Hold down the “Shift” key while you reboot your Mac computer. As soon as it powers on and you hear the startup sound or see a display of the Apple logo do release the “Shift” key. Select “Safe boot” from the login screen.
Booting An Apple Silicon-based Computer
After shutting down your computer, press the power button and hold till the startup options are displayed on the screen. Choose a startup disk, while holding the “Shift” key click on “Continue in Safe Mode”.
2. Use Time Machine to Make Backups
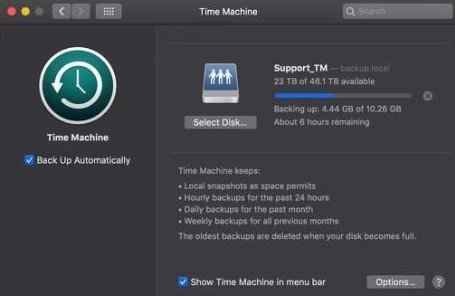
It would be a wise decision to back up your computer before attempting a major Mac update because it is most likely to overwrite your operating system’s core files. And in case something goes sideways you’d have no problem with entirely erasing your PC to initiate a fix. It will require connecting an external drive to create a backup using the Time Machine. Time Machine will see to it that all your data is protected during progressive backups. With this, a user can access and retrieve data from certain dates instead of a system where the data is overwritten by the current version.
3. Check Mac's Compatibility in App Store
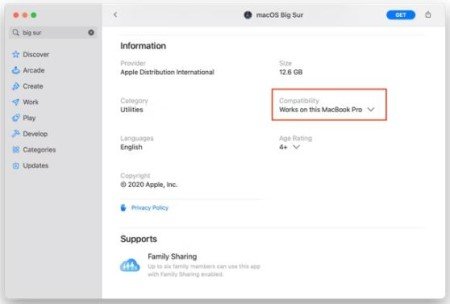
In times like this, a little research to see if the latest macOS version is compatible with your computer is vital and will save you time and a whole lot of stress. To check for your Mac’s compatibility do visit the official website for support, identify the macOS version you intend to install, and click on it to see its requirements. Compare these requirements to your Mac by navigating to the menu bar and clicking on the “Apple” logo and then “About This Mac”. Do not attempt to install it if it isn’t compatible.
Part 3: Fixing “Your macOS Couldn't Be Installed on Your Computer” Error
After taking the above-mentioned precautionary measures like backing up your computer and making sure the intended macOS update is compatible with your device, let’s dive into the next phase of this article. Because the causes of this error are many, below are a few suggestions that may resolve the problem. We will begin with initiating the easiest and quickest fix, gradually advancing into the more complicated ones to save time as it is precious.
Fix 1: Restart the Mac and Reinstall
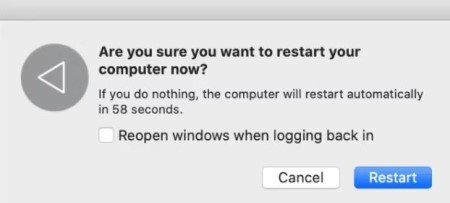
Most times, restarting your Mac and reinstalling the update could be all it takes to get rid of the “macbook air macOS could not be installed on your computer” errors. To do so restart your computer from the “Apple” menu. In scenarios where your Mac is not responsive due to this error, hold down the power button to forcefully shut down. However, do not try when the installation process has already begun to prevent damaging your operating system’s files.
Fix 2: Check your Mac Date and Time
An incorrect date and time could make connecting to Apple’s servers impossible. Potentially this alone could be responsible for unsuccessful macOS update installation. If your date and time are incorrect you’d want to set this straight. Correct it by going to “Date and Time” in “System Preferences”. To ensure your date and time are always updated, click on the lock icon, key in your password if any, and then select “Set date and time automatically.

Fix 3: Free Up Space for macOS to Install
A minimum of 20GB of free space on your device is required to successfully initiate a macOS update. The macOS installer alone requires a free space of about 4 to 5GB on your device. The extra 15GB is necessary because files and folders will be unpacked and added to your Mac. When there is less storage space this process becomes impossible, and as such could be the reason behind the macOS error.
Step 1: From the “Apple” menu, navigate to “About This Mac” and then “Storage” to see if you have enough free space for the installatiom.
Step 2: If you don’t have enough space for the installation, go to “Manage Storage”, here is where you will find what’s taking up the most space on your Mac.
Identify and delete what you no longer need to free up space and then restart the installation process.
Fix 4: Download a New One to Replace
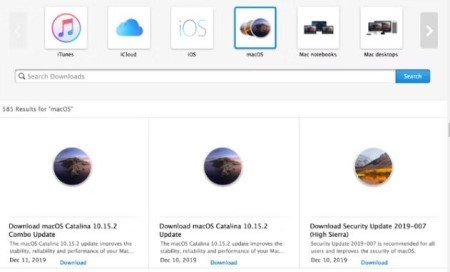
A corrupted macOS installer may be responsible for the error message. If at this point the error persists try replacing the macOS installer by downloading a new one. Download the macOS installer from a trusted source like Apple’s support website, compared to downloading from the App Store or System Preferences, the support website offers a full combo installer, whereas the former offers a smaller version. However, newer versions (macOS Monterey) may require downloading the installer from the app store.
Fix 5: Set the PRAM and NVRAM Again
All kinds of settings and preferences like display resolution, screen brightness, and sound volume are stored in the PRAM and NVRAM of your Mac. Problems arising from PRAM or NVRAM may be responsible for the macOS errors you are getting on your Mac. As luck would have it, resetting is easy and will not result in losing any personal data. To reset you have to first restart your computer. Turn in on and hold on to “Option+Cmd+P+R” while it boots. Then release these keys once you hear the second startup sound or see the second “Apple” logo.
Fix 6: Run First Aid on Disk Utility
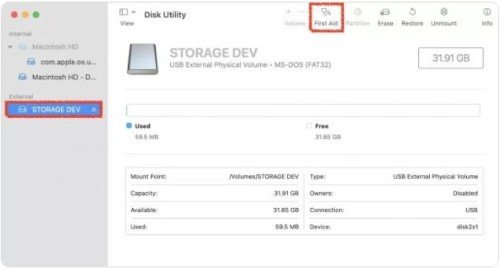
At this point, the macOS installation error should already be a thing of the past, but if it isn’t then you’d want to try out this fix. Make use of the pre-installed Disk Utility app on your current macOS to run a first aid check on your disk utility to ensure there are no disk permission errors. To do so, navigate to the "Application", "Utility folder", and then launch the “Disk Utility”. In the sidebar is where you will find Mac’s startup disk (Macintosh HD), click on it, and then click on “First Aid”. Initiating a first aid check will scan your Macintosh HD for possible errors and fix them.
Fix 7: Reinstall macOS with macOS Recovery
Reinstalling the current operating system may be necessary if the above-mentioned fixes still won’t work. This can be done with macOS Recovery. However, the process differs with Apple silicon and Intel-based Macs.
For Apple silicon models
First shut down your PC, press the power button, and hold until you see start options appear on your screen. Proceed by clicking on “Options” and then “Continue”.
For Intel-based Macs
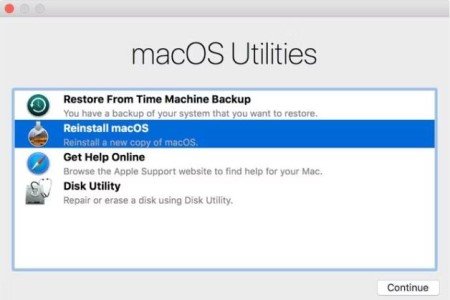
Reboot your PC, press “Option + Cmd + R” and hold as it boots. When you hear a startup sound or see the “Apple” logo release these keys, after which the “macOS utility window will be displayed. Proceed to reinstall the latest macOS version with macOS Recovery by clicking on “Reinstall macOS”. Installation may take some time since the new software needs to be downloaded first.
Fix 8: Erase your Startup Disk and Reinstall macOS
Erasing a startup disk and reinstalling macOS is usually the last resort for software-related problems such as. So long as you initiate a Time Machine backup recovering your data should be a piece of cake. If you proceed with erasing your startup disk to reinstall macOS without backing up your data you’ll lose them all.
Bonus Tip: How to Recover Data from Unbootable Mac?
If at this point you are still unable to resolve the “macOS could not be installed on your computer” error but still want access to the data in the unbootable macOS, the easiest way to do so is through the use of third-party software. Tenorshare 4DDiG Mac data recovery software is the recommended software for this process. The 4DDiG Mac data recovery software allows a user to recover missing, deleted, or damaged files. This is possible because when a user deletes files, they don’t just go away entirely as they’ll still be present on the hard drive unless another file saved to the same location overwrites them.
Below are some of the features of the 4DDiG Mac data recovery software:
- It completely recovers all the lost data from your mac and other mac-affiliated devices such as digital camera, SD card, USB, etc
- The 4DDiG Mac data recovery software coverage is broad and capable of recovering from T2-secured and M1-equipped Macs
- It is trustworthy and reliable
- Easy to use with just three clicks to begin the process
- Support data recovery without need to disable SIP
Below are the using steps to successfully retrieve lost data using the 4DDiG from an unbootable Mac due to a macOS installation error.
Secure Download
Secure Download
- It will require a functioning Mac and an external hard disk or USB to recover lost data from an unbootable Mac. Install the 4DDiG software on the working Mac and then click on “Recover Data from Crashed System” on the displayed home window of the software.
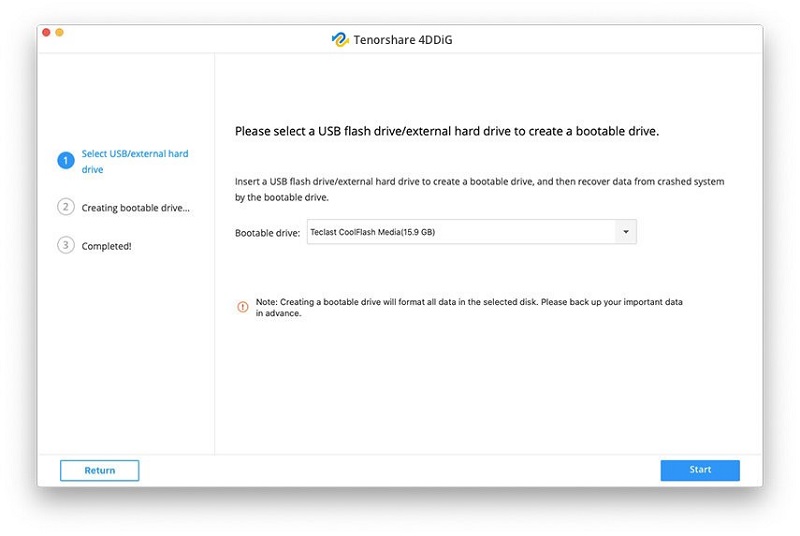
- It will also require a bootable USB drive at this point to proceed. To create one, on the functioning Mac’s “Bootable drive” option, insert the USB and click on “Start” to proceed. You will receive a notification asking you for a data backup after which the bootable drive will be generated.
- On the unbootable Mac, insert the generated bootable drive, and then press and hold the “Option” key while on the loading screen. After the options window appears release the key and choose “4DDiG for Mac Data Recovery”. At this point, your data can be recovered by clicking “Export”.

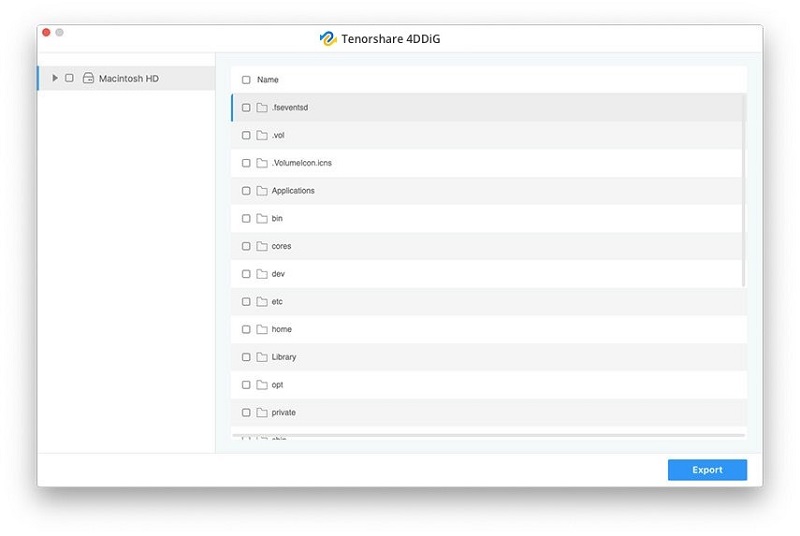
Video Guide on How to Recover Data from Unbootable Mac in 3 Minutes:
Secure Download
Secure Download
Conclusion
The above-mentioned fixes are sure to help you resolve the “macOS could nott be installed on your computer” error. In cases where they don’t work which are very rare, reinstalling your current macOS should do the trick as this can resolve the majority of Software-related problems. However, always remember to back up your data before proceeding. Stuck with an unbootable Mac due to difficulties in resolving the macOS error but still need to access the data on your PC? You’ll need a third-party software to do so, and there’s no other better than the Tenorshare 4DDiG Mac data recovery software.
 ChatGPT
 Perplexity
 Google AI Mode
 Grok
Grok
