How to Free Up Space on MacOS Sonoma

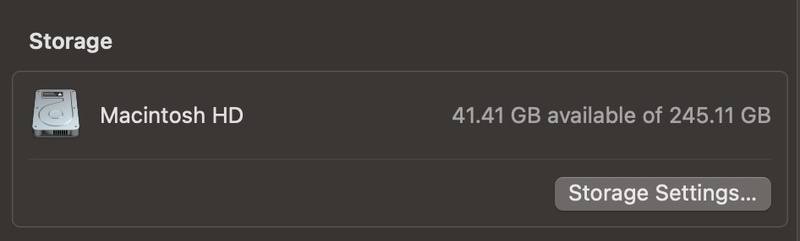
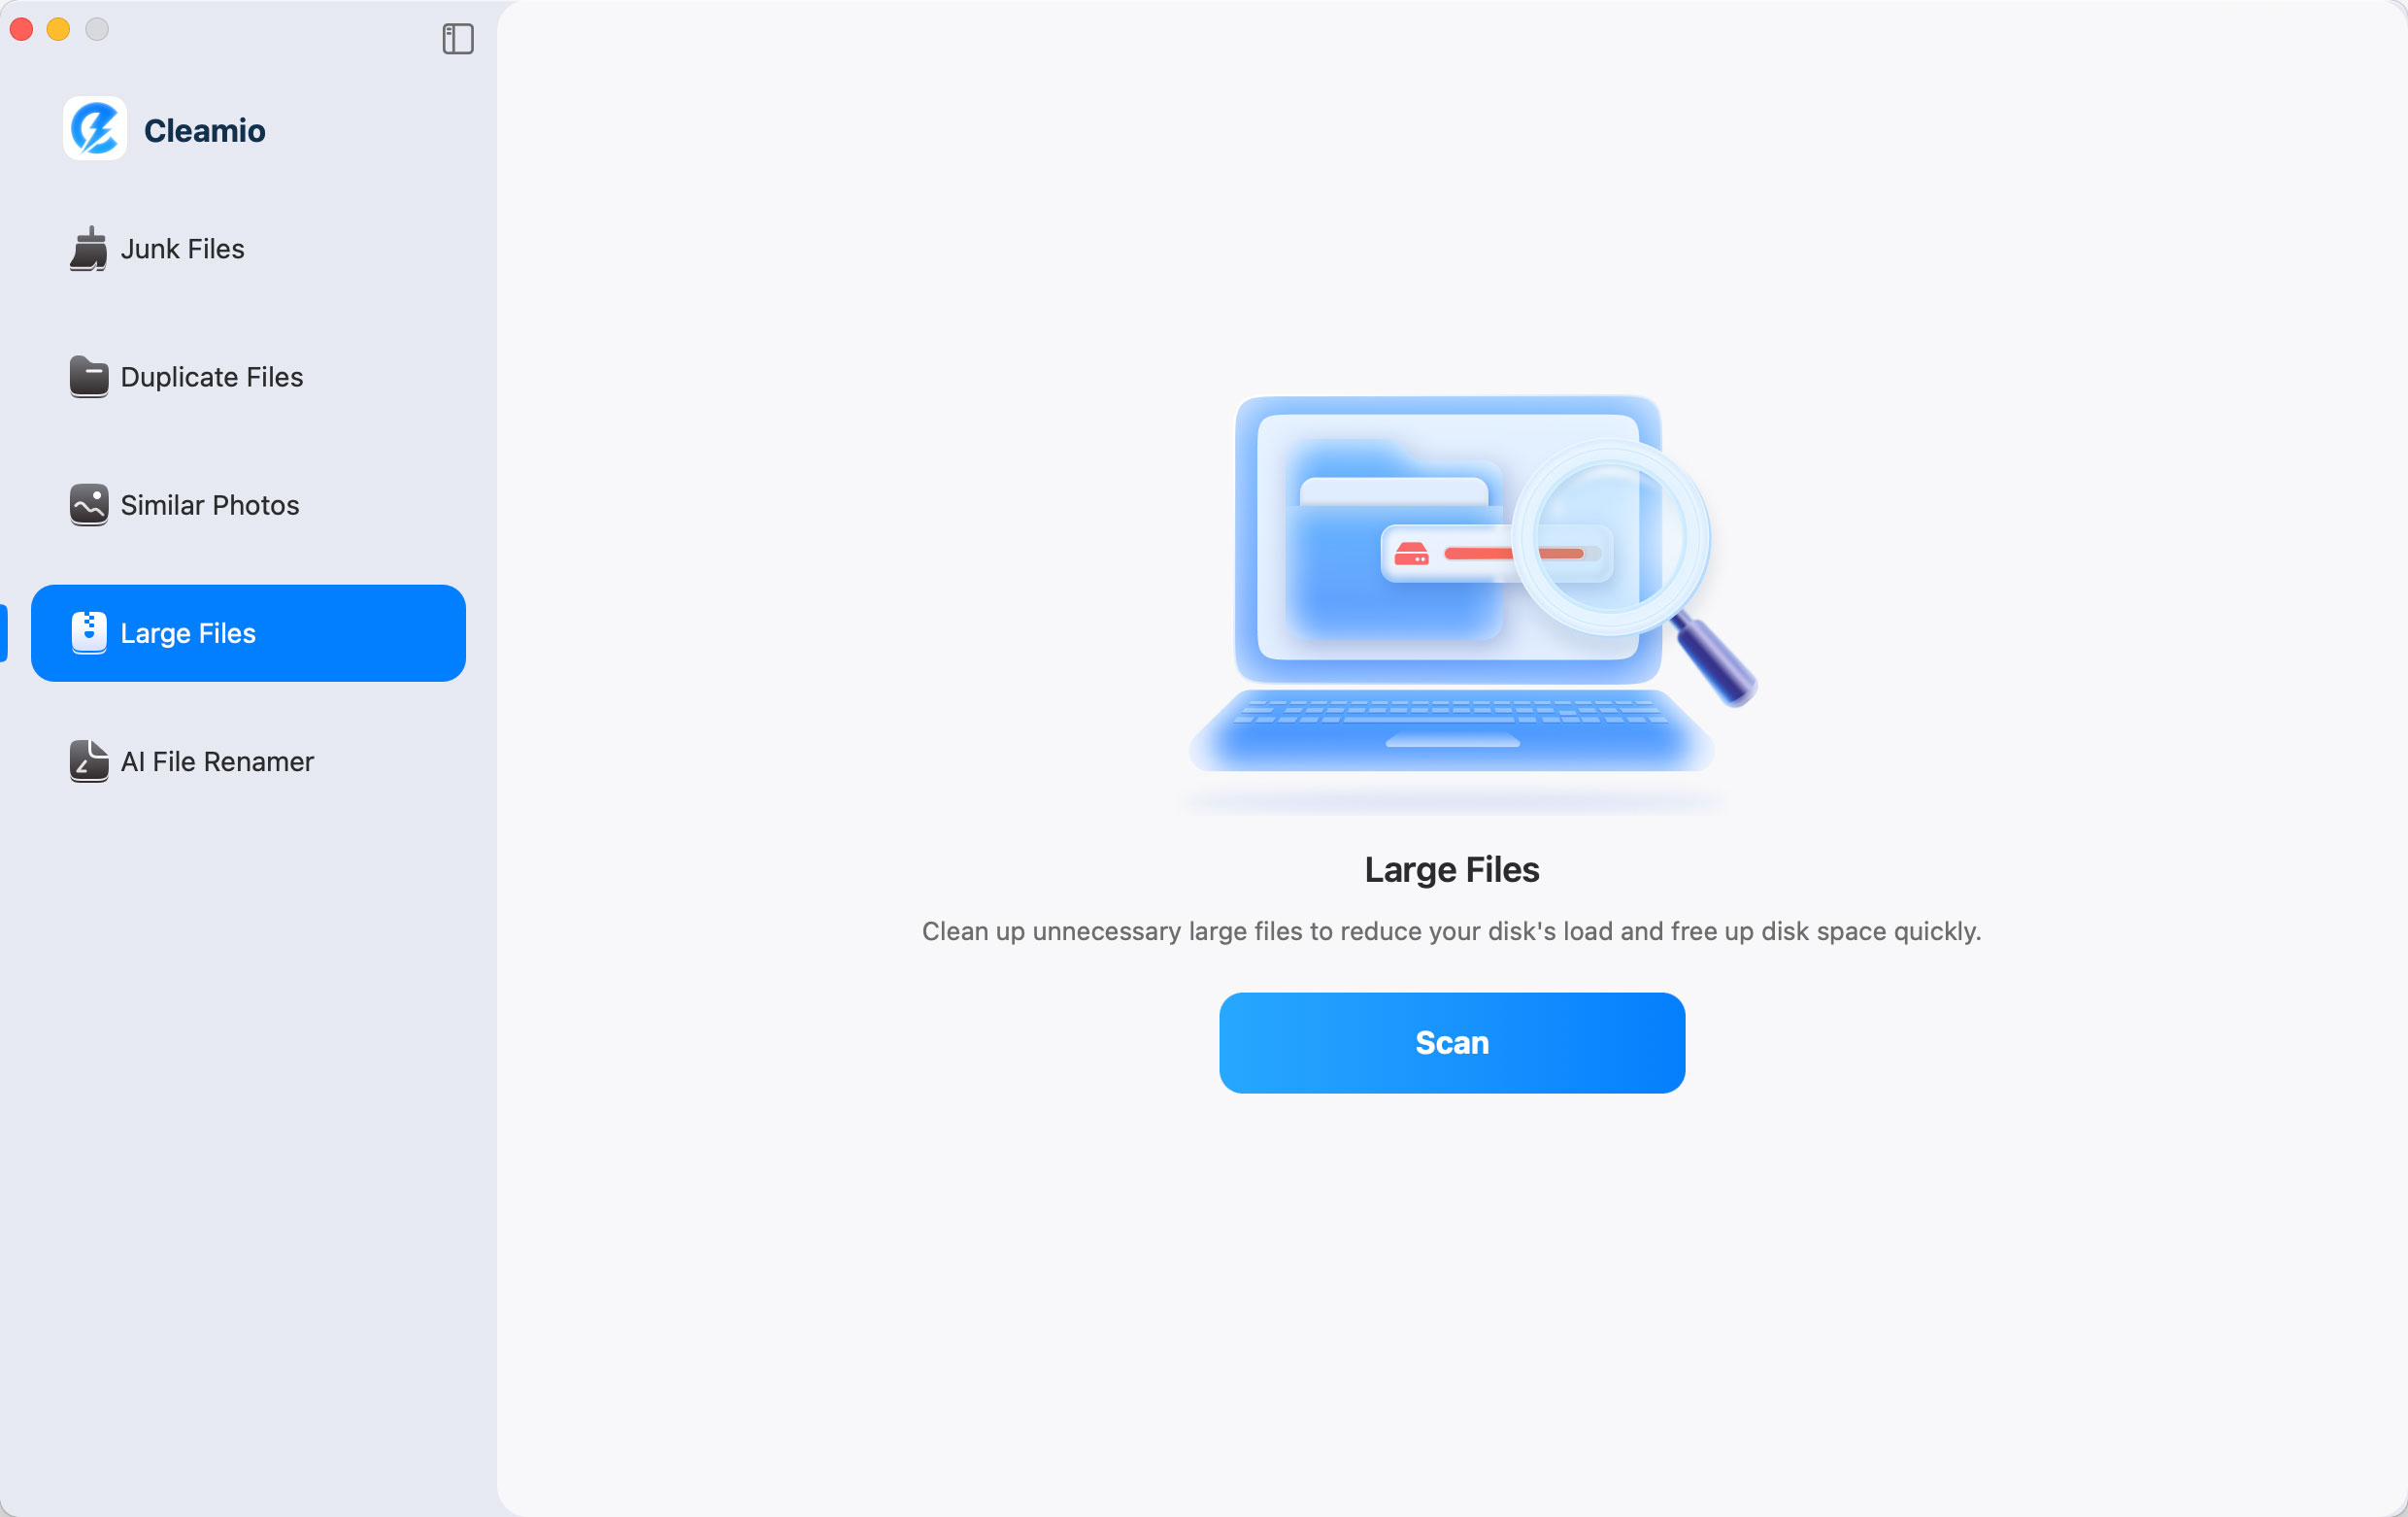
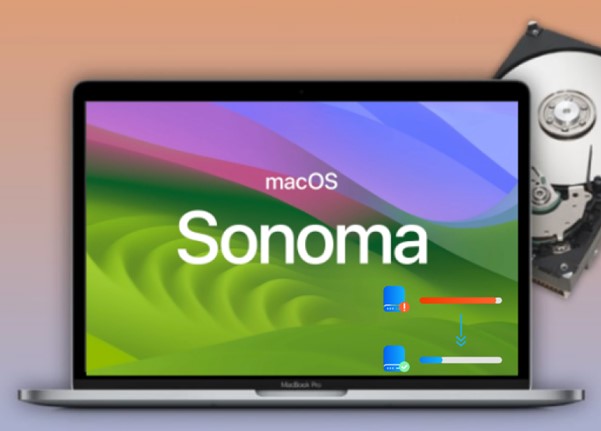
Maximize Mac space on MacOS Sonoma with these tips: assess usage, use tools like 4DDiG Duplicate File Deleter, and adopt smart storage practices.

5 mins read

Updated on 2024-04-17 15:10:23 to Remove Duplicates

How to free up space on mac? As technology advances, the capabilities of our devices expand, but so does the accumulation of data that takes up valuable storage space. It is particularly true for MacOS Sonoma, Apple's cutting-edge operating system that offers a range of powerful features. However, with great features comes the need for more storage. Your Mac is running low on disk space, don't worry – we've got you covered. This article will delve into effective strategies on how to free up disk space on mac? From checking your storage and using specialized tools to managing partitions, we'll walk you through various methods to ensure your Mac runs smoothly without storage constraints.

free up space on mac

Part 1: How to Check Storage on MacOS Sonoma

Before you embark on the journey of freeing up disk space, it's essential to understand how your storage is being utilized. The following are some possible categories for your storage:

  • On your drive, there are files, downloads, and documents.
  • Apps include programs, add-ons, and extensions.
  • Your unnecessary caches, temporary files, and app localizations.
  • Your full installation of macOS takes up that much space.

    check storage on macos

MacOS Sonoma provides a straightforward way to check your storage status.

  • Click on the Apple menu, select "About This Mac," and click "Storage."
  • It will display a breakdown of your storage usage, showing what's taking up the most space.

Part 2: How to Free Up Space on MacOS Sonoma

Way 1: Use 4DDiG Duplicate File Deleter

How to free up more space on mac? Duplicate files can silently occupy a significant portion of your disk space. It is where the 4DDiG Duplicate File Deleter comes to your rescue. This tool identifies and removes duplicate files, freeing up valuable storage. The user-friendly interface and advanced scanning algorithms make the process swift and efficient. Choosing 4DDiG Duplicate File Deleter means opting for a hassle-free way to regain storage space without the risk of accidentally deleting important files.

FREE DOWNLOAD

Secure Download

FREE DOWNLOAD

Secure Download

  • Quickly remove duplicates from google drive.
  • Remove duplicates from folders or storage devices, such as SD cards, external hard drives, etc.
  • Easily boost performance and Free up disk space.
  • Download and Remove 15 duplicate files for free.
  • Launch this program and click to select a folder or partition to start scanning.

    interface
  • Set Scan Mode and Start Scanning. Click the gear button to customize your file searching. Under the General tab, you can set file size for serching.

    general settings
  • Once the scan completes, all the duplicate files will be listed on your screen. Select all the files you want to delete and click on the delete button and you'll be free of all the duplicate files.

    preview to remove

Way 2: Delete System Junk

System junk, an assortment of temporary files, caches, and logs, accumulates on your Mac over time. These files, intended to enhance system performance, often morph into space hogs. These storage invaders can significantly impact your device's responsiveness and available storage. By eradicating system junk, you declutter your system and create room for smoother operations and additional files. Much like cleaning a cluttered room, this process removes the excess and fosters an organized environment.

  • Access the Apple menu by clicking the logo in the top-left corner.
  • Opt for "About This Mac" from the dropdown.
  • Navigate to the "Storage" tab, revealing a comprehensive storage breakdown.
  • Proceed to the "Manage" option to access Storage Management.
  • Explore the left sidebar and select "System" to pinpoint sizable system files.
  • Choose unwanted system files and liberate space by clicking "Delete."

    delete system junk

Way 3: Clear Chrome Cache

As you surf the web, browsers like Google Chrome accumulate caches, including cached images and files. Over time, these caches balloon, consuming precious storage space. Clearing the cache is akin to decluttering your digital browsing history, enhancing your browser's efficiency. This process also mirrors cleaning dusty windows, allowing you to perceive the digital world better. Here is how to free up disc space on mac:

  • Initiate Google Chrome on your Mac.
  • Open the menu by clicking the three vertical dots in the top-right corner.
  • Move to "More Tools" and unveil the submenu.
  • Select "Clear Browsing Data" from this submenu.
  • Select the time range to "All Time" for a comprehensive cache clearance.
  • Engage "Cached images and files" to select cache data.
  • Broaden the sweep by selecting other data types like browsing history and cookies.
  • Select the cache clearance by clicking "Clear Data."

Way 4: Transfer Photos/Videos to External or Cloud Storage

The charm of visual memories captured as photos and videos often comes at the cost of storage consumption. These media files gradually amass, demanding an expanding chunk of your storage pie. Transferring them to external or cloud storage offers a two-fold advantage: It safeguards your cherished moments while unclogging your Mac's memory. Think of this as rearranging your keepsakes into a dedicated storage room while leaving your living space uncluttered and open. Steps for External Storage:

  • Connect an external storage device to your Mac and access the Finder application.
  • Locate the media files you wish to transfer.
  • Execute the transfer by dragging and dropping the files onto the external storage icon within the Finder sidebar.

Steps for Cloud Storage (using iCloud as an example):

  • Invoke System Preferences via the Apple menu.
  • Navigate to "Apple ID" and delve into the "iCloud" section.
  • Enable the "Photos" option, thereby activating iCloud Photos.
  • Witness the migration of your media files to iCloud's secure haven.

    transfer photos

Way 5: Delete Unnecessary Downloads

How to free up disk space on a mac? The Downloads folder often transforms into a graveyard of digital ephemera - files downloaded with good intentions but eventually forgotten. This repository of obsolete items clutters your system's memory. By purging this space, you ensure your Downloads folder houses only files of immediate value, tidying up your digital workspace.

  • Launch a Finder windo and access the "Downloads" folder in the sidebar.
  • Sort through the contents, identifying expendable files.
  • Select files for removal by holding the "Command" key while clicking them.
  • Engage the context menu by right-clicking on the selected files.
  • Remove all unnecessary files by choosing "Move to Trash."

    delete unnecessary downloads

Way 6: Compress Your Files

As your digital collection burgeons, the need for efficient storage becomes paramount. Compressing files, like packing items into a suitcase, condenses them into smaller sizes without sacrificing content. This strategy optimizes space, allowing you to house more files in the same memory real estate.

  • Locate the file or folder destined for compression and select the item you want to compress.
  • Reach the context menu and select the "Compress" option.
  • Wait for the creation of a compact ZIP file in the same location as the original entity.

Way 7: Clean Up DMG Files

When you install applications on MacOS, disk image (DMG) files are often employed to facilitate the process. However, these DMG files are frequently overlooked, lingering in your system post-installation. Similar to discarding packaging after unwrapping a new item, removing DMG files after software installation unclutters your digital realm.

  • Open the Finder, your digital gateway.
  • Navigate to the "Applications" folder housing your installed applications.
  • The application usually relocates from the DMG file to the Applications folder upon installation.
  • To conclude the DMG's role, eject it by clicking the eject icon within the Finder sidebar.
  • Remove the DMG file by dragging it into the Trash.

    clean up dmg files

Way 8: Empty Trash to Free Up Space on Mac

Much like clearing out your physical trash can, emptying the digital Trash is vital to liberating your Mac's space. Files you've deleted but haven't permanently eradicated still consume space until you take this final step. This is how to free up space on mac:

  • Locate the Trash icon nestled within the dock - your digital waste bin.
  • Look for the the Finder menu and choose "Finder."
  • From the dropdown menu, select "Empty Trash."
  • Confirm your decision by clicking the "Empty Trash" button.

    empty trash

Part 3: How to Organize Mac Partitions on MacOS Sonoma

Partitioning your Mac's storage involves dividing your hard drive into separate sections, or partitions, each of which acts as an independent storage unit. This organization provides benefits such as isolating your operating system from personal files, facilitating multiple operating systems on a single Mac, and improving data management. Proper partitioning requires careful planning to allocate the right amount of space to each partition based on your needs.

Before making any changes to your partitions, it's crucial to back up your data. Partitioning involves resizing and moving data, potentially leading to data loss if not done correctly. Disk Utility is the built-in tool for managing disks and partitions on MacOS.

  • To open it, go to "Applications" > "Utilities" > "Disk Utility."
  • In Disk Utility, you'll see a list of drives and volumes on the left. Select your main drive (usually labelled "Macintosh HD" or something similar).
  • Once your drive is selected, click on the "Partition" button in the toolbar at the top.
  • To add a new partition, click the "+" button below the pie chart representing your current partitions.
  • A new partition will appear. You can adjust its size by dragging the resizing handle or entering the size manually. Make sure to leave enough space for your main macOS partition.
  • After adjusting the size, you can name the partition and choose its format. For compatibility with MacOS, choose "Mac OS Extended (Journaled)." If you plan to use the partition for Windows or other systems, consider using "ExFAT."
  • Once you're satisfied with the new partition's size, name, and format, click the "Apply" button. Disk Utility will warn you about data loss, so ensure your backup is ready.
  • Disk Utility will start the partitioning process. It might take some time, depending on your drive's size and the changes' complexity.
  • If you want to create more partitions, repeat steps 5 to 9 for each new partition.
  • If you want to resize existing partitions, click on a partition in the pie chart and drag its resizing handle. Remember that resizing might require moving data, so back up your data before attempting this.
  • To delete a partition, select it in the pie chart and click the "-" button. Be cautious, as deleting a partition will erase all stored data.
  • Once you've made all the desired changes, close Disk Utility.

Conclusion

How to free up space on mac? Navigating the challenges of limited disk space on MacOS Sonoma doesn't have to be daunting. You can ensure your Mac operates smoothly and efficiently by understanding your storage usage, leveraging specialized tools like 4DDiG Duplicate File Deleter, and adopting smart storage management practices. Regularly performing these steps and staying mindful of your storage habits will free up valuable space and contribute to a seamless and enjoyable computing experience.

William Bollson (senior editor)

William Bollson, the editor-in-chief of 4DDiG, devotes to providing the best solutions for Windows and Mac related issues, including data recovery, repair, error fixes.

(Click to rate this post)

You rated 4.5 ( participated)

You May Also Like