Keeping your Mac up to date is essential for its improved performance and for enjoying the benefits provided by new features. However, sometimes a new update doesn’t go as you have planned. There have been some situations where Mac users lost valuable data after an upgrade. Apple’s latest operating system, macOS Sonoma, comes with a modern design and unique features. But after updating to Ventura, many Mac users face deleted or missing file issues. In this post, we’ll provide you with four proven ways to recover deleted files on macOS Sonoma. You’ll also learn what causes missing files after the Ventura upgrade.
Part 1: macOS Sonoma Overview
Before you think about recovering data from macOS Sonoma, let’s have a brief outlook on what’s new about this Mac operating system upgrade:
Brief Introduction of macOS Sequoia/Sonoma
macOS Sequoia/Sonoma introduces a host of new features and apps to improve your Mac experience. It has a cleaner and more modern design than its predecessor operating systems. Sonoma allows you to develop a Shared with You section to send a video or an article into your app. It also introduces new improvements to the Mail and Calendar app and Safari browser, making your Mac perform faster.
What Cause Missing Files After macOS Sequoia/Sonoma Upgrade?
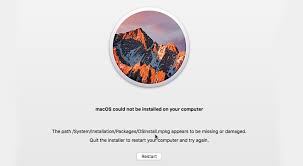
The macOS Sequoia/Sonoma update itself doesn’t delete the Mac files, but several reasons cause missing file issues after the upgrade. We have listed them below:
- Any disruptions, such as an unstable internet connection or a power cut during the upgrade process, can cause deleted file issues.
- Storing files in a location incompatible with Sequoia/Sonoma can result in data loss.
- Data was simply lost during the upgrade process.
- Downloading the update from an unreliable third-party source.
- Drive got corrupted during the update process, and you formatted it.
- The update was broken or corrupted.
Part 2: 4 Ways to Recover Deleted Files on macOS Sequoia/Sonoma
Now you’ve known the reasons behind data loss after the macOS Sequoia/Sonoma upgrade, let’s get back to the recovery process. Here are the four ways to recover files from macOS Sonoma:
Way 1: Recover Deleted Files on macOS Sequoia/Sonoma from the Trash
The easiest way to recover deleted files is from Trash if you haven’t deleted them permanently. Here’s what to do:
Step 1: Open the Trash folder on your desktop.
Step 2: Select the files you want to recover by right-clicking on them and choose “Put Back.”
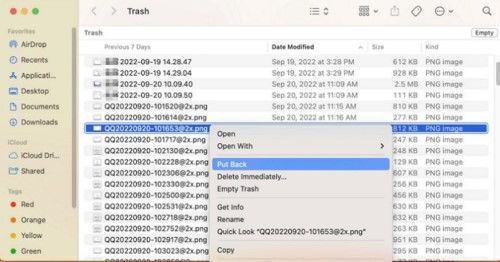
The files or folders will be restored to their original position.
Way 2: Recover macOS Sequoia/Sonoma Deleted Files with Tenorshare 4DDiG
If your Mac files are permanently deleted, and you don’t have a backup, it’s impossible to recover them without third-party recovery software. Here you can try the 4DDiG Mac Data Recovery tool to retrieve deleted, corrupted, hidden, or broken files. Even if you emptied your Trash bin or deleted the files permanently from your storage device, it can recover data with a high recovery rate. The top-notch features of 4DDiG include the following:
- Retrieves data from internal & external drives, Trash bin, SD cards, USB, Mac-based devices, and digital cameras.
- It uses an advanced algorithm that makes recovering deleted or hidden files a piece of cake.
- Intuitive interface that offers maximum usability.
- No issue of pop-ups, ads, or hidden viruses.
- Retrieves 1000+ file formats, including audio, video, images, and documents.
- Recovers data from all or encrypted macOS versions.
Here’s how to recover deleted files on macOS Sequoia/Sonoma with the 4DDiG tool in three easy steps:
For PC
Secure Download
For MAC
Secure Download
- Select the Deleted Files Drive
- Scanning for Deleted Files
- Recover and Save Files
Open 4DDiG-Mac and select the drive where your deleted files once resided.
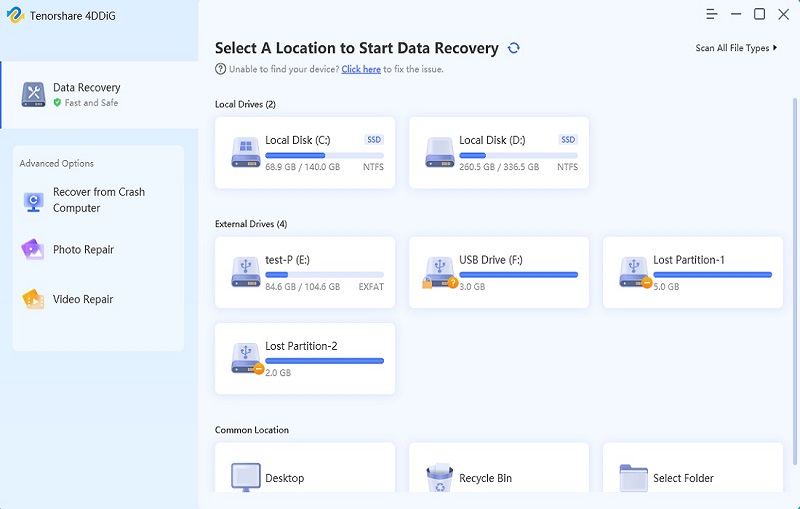
Choose “Scan,” and 4DDiG will start scanning for deleted files. You can preview your targeted files mid-scan to check their details.
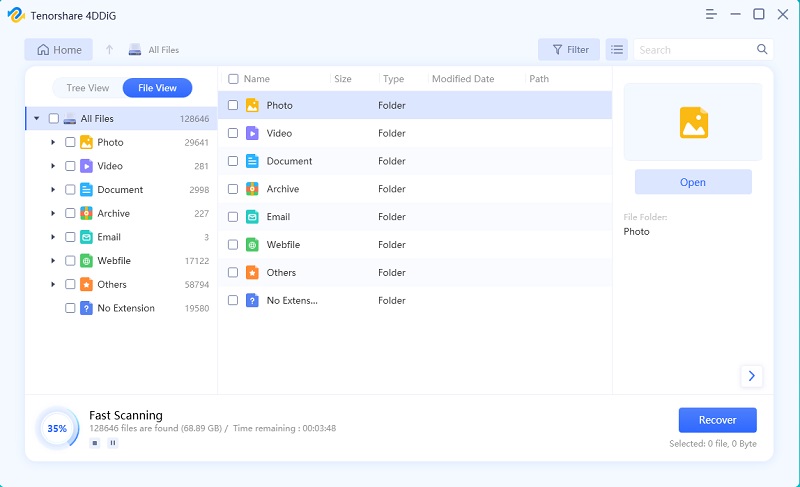
Once the scan is finished, you can recover the files by pressing the “Recover” button. Choose the path where you want to save files.

Way 3: Use Terminal to Retrieve Deleted Files in macOS Sonoma
If you have emptied the Trash, follow the steps in “Way 2” If you haven’t emptied the Trash, you can also use Terminal to restore deleted files on macOS Sonoma. However, you’ll have to type the command exactly and recover files one by one.
Step 1: Open the “Terminal” app from the “Utilities” section. You can locate utilities in the “Applications” folder in “Finder.”
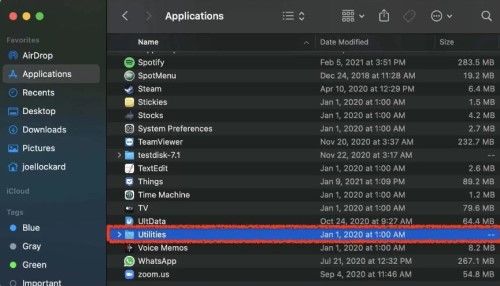
Step 2: Type the “cd .Trash” command in Terminal and hit the “Return” key. Then enter the “mv xxx../” command but replace xxx with your deleted file name. Now hit the “Return” key again.

Step 3: Type “Quit” and exit the Terminal app, then your deleted file will be restored.
Way 4: Restore Deleted Files on macOS Sequoia/Sonoma with Time Machine
If you keep a regular Time Machine backup, it can help you in macOS Sequoia/Sonoma data recovery. You can recover all your deleted files or folder from the backup.
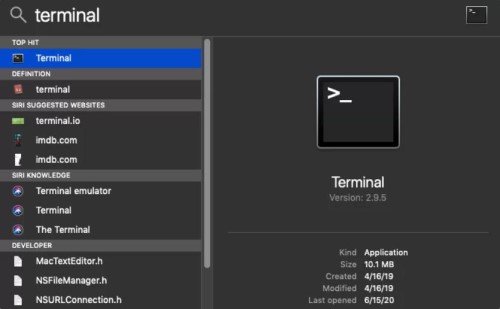
Step 1: Use “Spotlight” to locate “Time Machine” and launch it on your Mac.
Step 2: Preview the specific files you want to recover using the “Spacebar.”
Step 3: Choose the backup you want and hit the “Restore” button to restore files to their original position.
FAQs:
Can you Get Back Permanently Deleted Files from your Mac?
Even if your files are permanently deleted from your Mac, they are still not completely erased from your drive. So, you can recover them by using a third-party tool like 4DDiG Mac Data Recovery software that offers a high recovery rate.
How can I Recover Permanently Deleted Files from Recycle Bin Mac?
You cannot recover files from the Trash if you’ve permanently deleted them. So, there is only one possible way. You can use the Tenorshare 4DDiG Data Recovery tool for Mac to retrieve permanently deleted files in just three easy steps.
How do I Find Recently Deleted Files on Mac?
You can find recently deleted files in the Trash folder on Mac. They will remain in the Trash until you empty the Trash bin.
How to Fix Mac Time Machine won't Complete the First Backup?
Sometimes you may be unable to create a Time Machine backup because it won’t complete the first backup. To fix this issue, you must:
Step 1: Cancel the backup progress and restart to backup again.
Step 2: Run First Aid on the drive that contains the Time Machine backup.
Step 3: Don’t include the affected directories for the backup.
Step 4: For the first backup, run your Mac in Safe Mode.
Step 5: Format the drive to APFS that contains the backup.
How to Download the macOS Sonoma Beta Version?
You can download the macOS Sonoma Beta Version by:
Step 1: Visiting the Apple website with Beta Software Program.
Step 2: Choose the Account tab and log in with your developer account.
Step 3: Scroll down in the Downloads section and find the macOS 13 Beta Version.
Step 4: Select the Install Profile to download the Beta Version.
Conclusion
It’s essential to keep your macOS updated, but sometimes the upgrade doesn’t go as planned. Hopefully, you’ve read our provided ways to recover deleted files after the macOS Sonoma upgrade. However, you may not be familiar with using command lines on the Terminal or don’t have a Time Machine backup. In such case, your best chance to recover deleted files on macOS Sequoia/Sonoma is with a third-party tool. No matter the condition of your files, 4DDiG Mac Data Recovery software is your best bet at recovering lost files with high efficiency. It has a user-friendly interface, requires no learning curve, and uses an advanced algorithm to recover permanently deleted files.
 ChatGPT
 Perplexity
 Google AI Mode
 Grok
Grok
