How to Import PST File into Microsoft Outlook?
4DDiG Email Repair helps you repair corrupt or damaged Outlook PST files with ease. After you've successfully repaired your Outlook data files and save them to your computer, the next step is to import the repaired PST files into Microsoft Outlook so that you can access and continue working with the data. Below, we'll the easiest steps to import an PST file into various versions of Microsoft Outlook.
How to Import a Repaired PST File to Outlook?
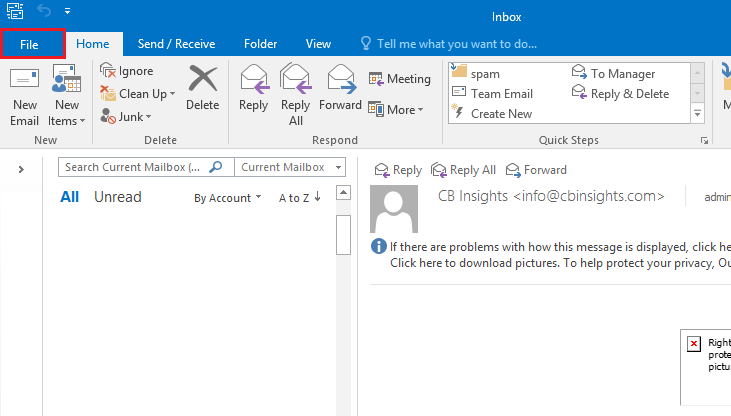
Step 1. Start by launching Microsoft Outlook in your system, then go to the top left corner of the Outlook window and click on the "File" tab.
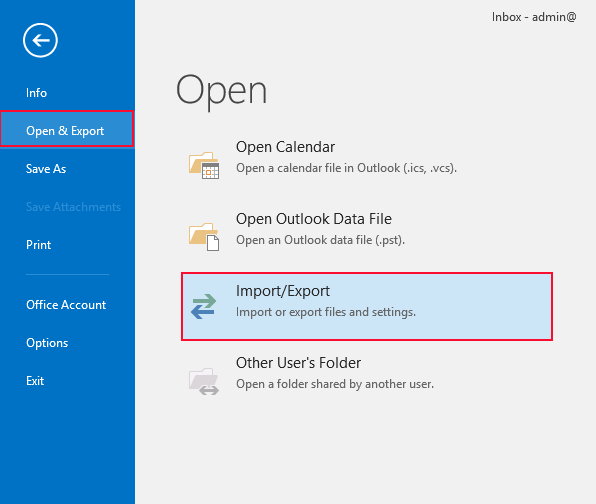
Step 2. Select "Open & Export" from the left navigation pane and click on the "Import/Export" option.
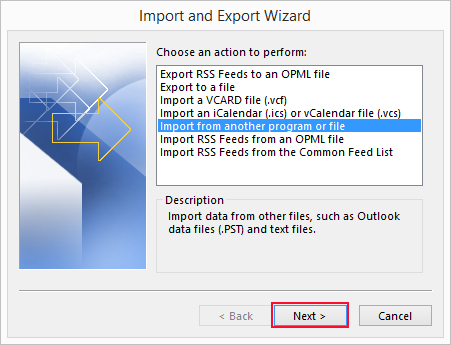
Step 3. Select the "Import from another program or file" option in the dialog window and confirm with "Next."
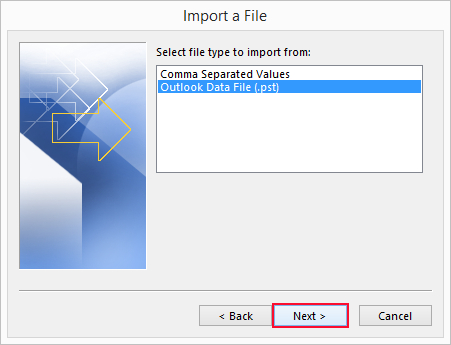
Step 4. Select "Outlook Data File (.pst)" and click "Next."
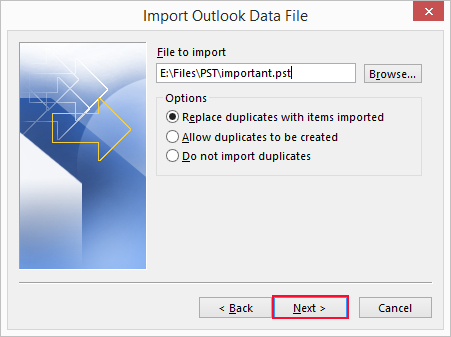
Step 5. Click on "Browse" to find and choose the PST file that you want to import, and if necessary, set options like "Replace duplicates..." to avoid importing duplicate items. Afterwards, click "Next."
Step 6. Select the folder where you want to import the PST file data. You can either choose to import everything into the existing folders or select a specific folder. Make sure to check the box labeled "Include sub-folders." Then, click "Finish" to start the import process.

That's it! Wait for the process to be finished and you will be able to view the imported data in your Outlook folders.