How to Format USB to FAT32 on Mac?
How to format USB to FAT32 on mac to use it? In this guide, we'll show you two methods to format USB to FAT32 on Mac. Importantly, you 'll get to know how to recover data from formatted USB drive.
When it comes to formatting a USB flash drive, FAT32 is one of the most widely used file systems due to its compatibility across multiple devices and operating systems. If you're looking to format USB to FAT32 on your Mac, then you are in right place. In this guide, we'll show you exactly how to format USB to FAT32 on Mac, ensuring that your drive is ready for use with various devices. Whether you're transferring large files or preparing a drive for a fresh start, this article covers all the steps you need to format USB to FAT32 quickly and easily.
Part 1: How to Format USB to Fat 32 on Mac?
If you’ve ever wondered how to format USB to FAT32 on your Mac or faced the frustrating message “can’t format USB to FAT32,” you’re not alone. In this section, we’ll walk you through the easy steps on how to format USB to FAT32 on Mac
Method 1: Format FAT32 on Mac Using Disk Utility
The simplest and native method for mac FAT32 format is using disk Utility. And in most cases, this process will work for you. If you have an issue with your flash drive or in System Disk Utility then this process might not work for you in which case you can opt for Method 2.
Here are steps on how to format to FAT32 on Mac using Disk Utility
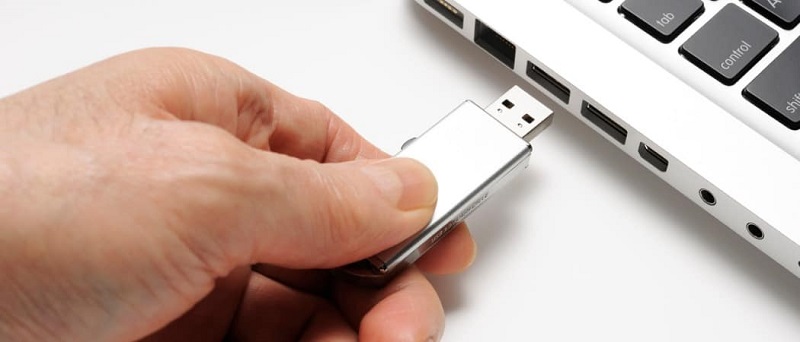
- First plug in your USB drive in your Mac system. And choose “Application”, opening “Utilities”. Then, click “Disk Utilities”.
- Now in the Disk Utilities, you can see all your devices in the sidebar. Click on the USB drive you want to format to FAT32. And select “Erase” from the toolbar.
- In the “Format” box, select the option “MS-DOS FAT” from the drop-down menu. Then click "Erase".
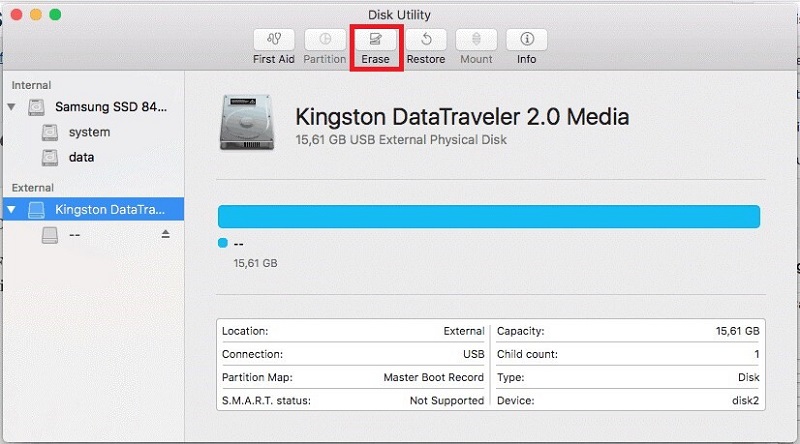
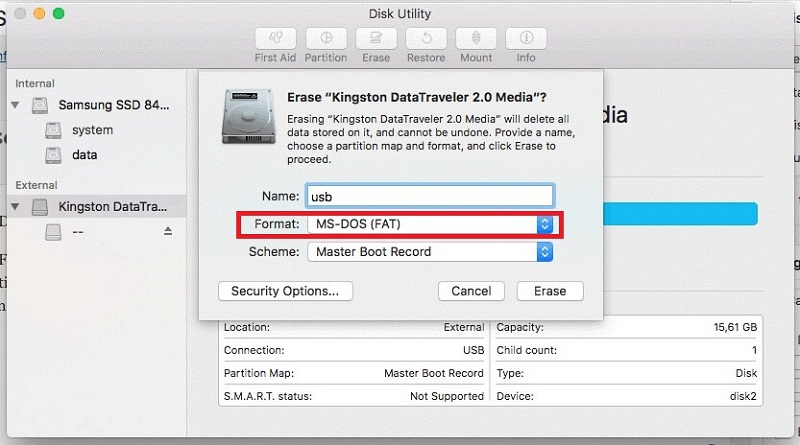
It will take some time and after it is done it will show you the done button, then click done. And just like that, you can format your USB drive to FAT32 on mac using Disk Utilities.
Method 2: Format FAT32 on Mac Using Terminal Command Line
If for some reason you cannot convert a flash drive to FAT32 using Disk Utilities, this method will work for you. It is because if you have any problem in your system Utilities, using the command prompt you can easily bypass that and format your USB to FAT32 on Mac using Command-Line.
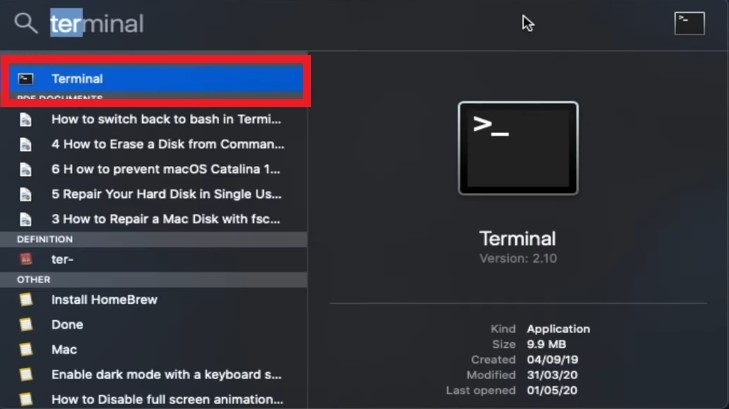
- Turn on your system and connect your USB Drive to your Mac system, then press “CMD + Space Bar.”
- Now type terminal and open “Terminal.”
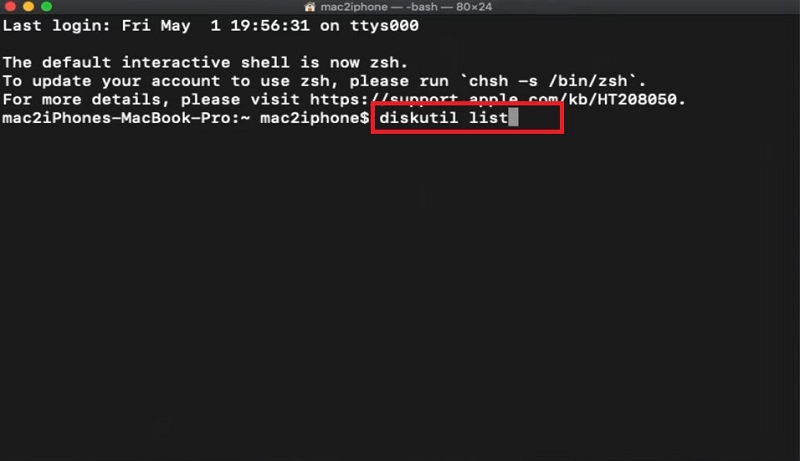
- Now here type command “diskutil.”
- It will open the list of all disks that are connected to your mac.
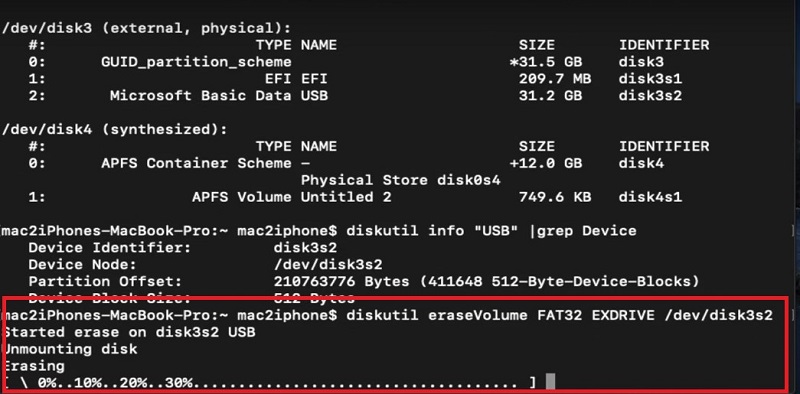
- Now type in the command. diskutil erasedisk FAT32 MBRFormat /dev/disk3s2 (disk identifier).
- Now it will start formatting your disk. It will also be showing you the progress.

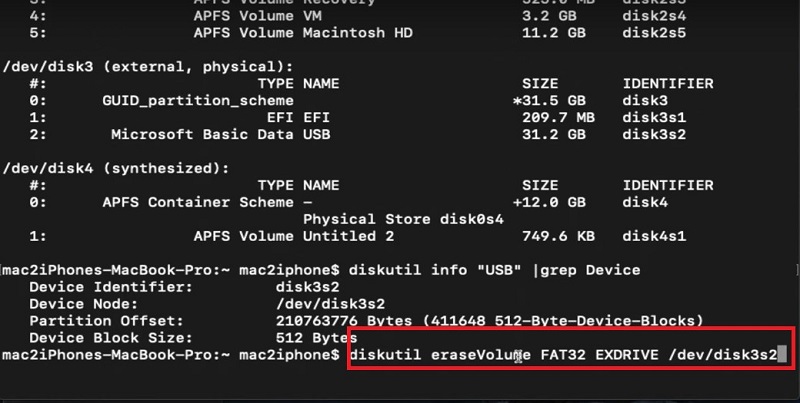
Make sure you type in the disk name and identifier correctly or else you might end up formatting some other disk. You can also use the command “diskutil info “USB” | grep Device” to check the info about your disk if you are looking for a disk identifier.
Part 2: How to Recover Data from Formatted USB?
If you've recently format USB to FAT32 and found that important files were lost during the process, don’t worry. Formatting a USB drive often results in the loss of valuable data, but with the right tools and steps, you can still retrieve those files.
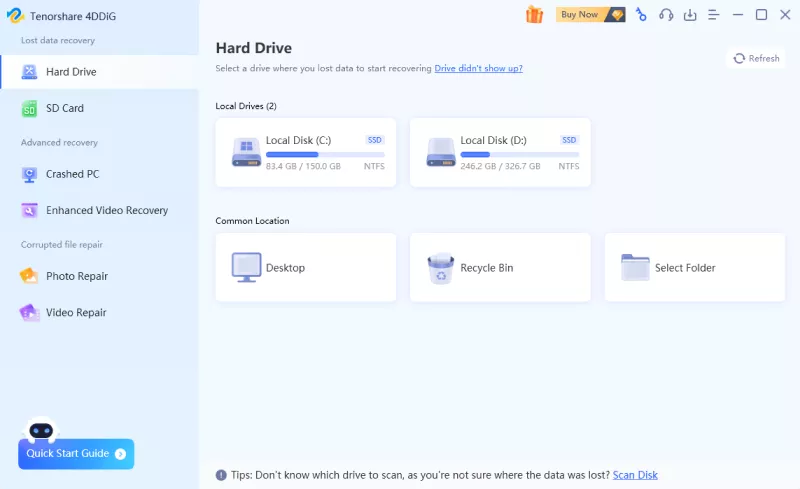
Tenorshare 4DDiG Mac is the magic software that can save your day in any situation. You can recover all the data that you lost in your formatted USB or due to any other reason. You can recover all types of files using Tenorshare 4DDiG Mac whether it’s documents, videos, pictures, songs, and audios, etc. You can also recover files from your internal storage using Tenorshare 4DDiG Mac.
Secure Download
Secure Download
-
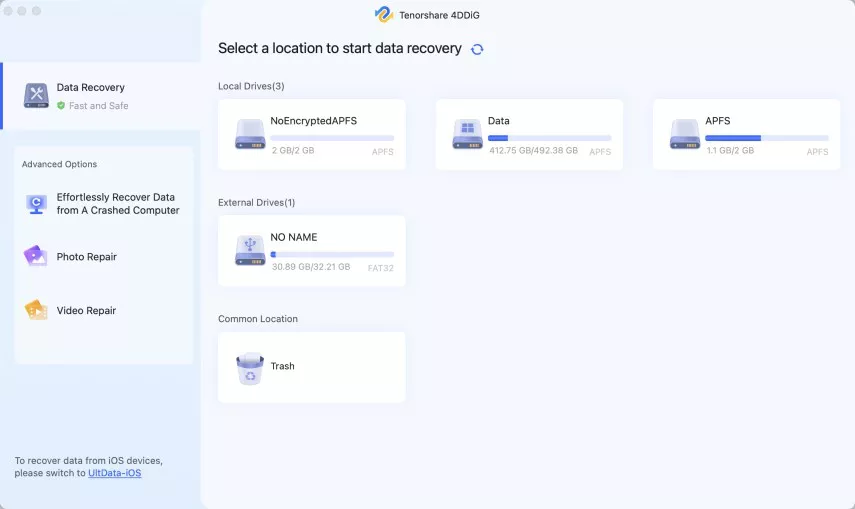
After installing Tenorshare 4DDiG Mac, open the software. Select the location (your USB drive) from where you lost your data. You can also scan any internal drive for data recovery.

-
After selecting that drive, click “Scan”. It will take some time for Tenorshare 4DDiG Mac powerful scanning tool to scan for all the files from formatted USB drive. When the scanning is done, it will show you a report where you can preview all the files that can be recovered. You can also click and preview the individual files for more details.

-
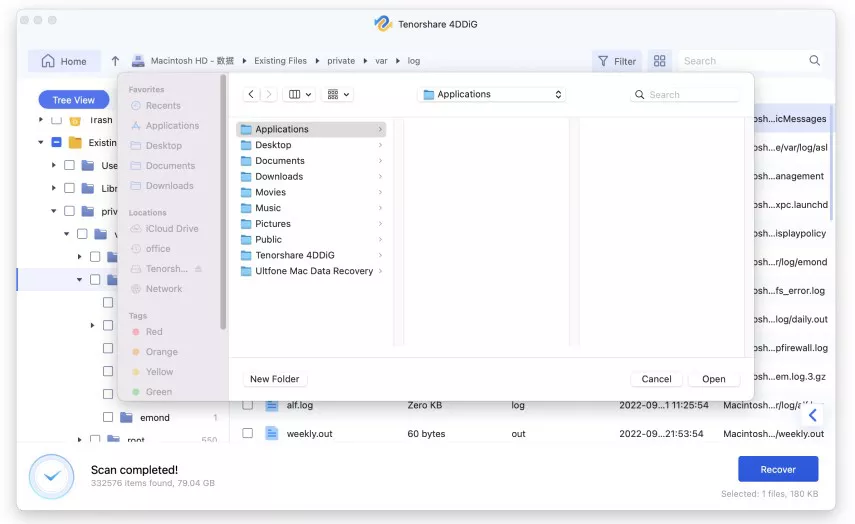
It will ask you to choose the location where you want to recover your files. It is recommended to save them in internal storage or some other external directory than from the one you are recovering. Now select all those files that you want to recover and then click on the “Recover” button.

More FAQs about How to Format USB to FAT32
Here are some of the most asked questions about FAT32 format and their answers to help you if you have any confusion.
Q1: Why should I format the USB flash drive to FAT32?
The advantage of the FAT32 format is that it has universal compatibility, which means if your USB drive is FAT32 format you can easily use it on your PC, Mac, PlayStation, Xbox, and so on.For example, Mac can't copy to NTFS drive since it is not compatible with NTFS
Q2: How do I know if my USB is formatted to FAT32?
In the Terminal, you can use the command “diskutil” to make sure that your USB drive is formatted to FAT32.
Q3: Why can't I format my USB drive to FAT32?
This problem can be due to many reasons including, error ins System Utility or even maybe your USB drive is corrupt. So first make sure that your USB drive is responding. To make sure that the USB drive is good, you can plug it into some other system and see if it responds there or not. After that try Method 1 to format your USB drive to FAT32 using the Disk Utilities. If this does not work, this means that there can be a problem with the Disk Utility. You can now go for Method 2 to format your USB Drive using the Terminal. If you are still unable to format your USB and it is responding, this means there might be some error with your Mac system. Try formatting it on a PC or some other Mac System.
If none of the above methods works, this means that your USB drive is corrupt.
Q4: What is the best format for a USB drive on Mac?
The best format for a USB Drive on Mac is FAT32. The reason behind this is that FAT32 is one of those formats that’s very powerful and with Universal compatibility. Use can use these USB drives on your PC, PlayStation, and other devices and transfer files from one device to other with convenience. You can also transfer games, movies, music, pictures, etc from your Mac to your PC or phone using FAT32 formatted USB Drive. The only drawback is that it does not support individual files larger than 4GB size on Mac.
For that reason, the best alternative to FAT32 is ExFAT, which also supports the files transfer between Mac and PC with an added support of larger size files.
Conclusion:
This was all about how you can easily format your USB to FAT32 on Mac and how you can recover all your lost data from USB using Tenorshare 4DDIG Mac on Mac. This software is the answer to all your problems. If you have any other questions about Tenorshare 4DDIG Mac, feel free to leave your quarries in the comment section below and we will be more than happy to help you out. Till then, Stay safe and Peace.

 ChatGPT
 Perplexity
 Google AI Mode
 Grok
Grok

