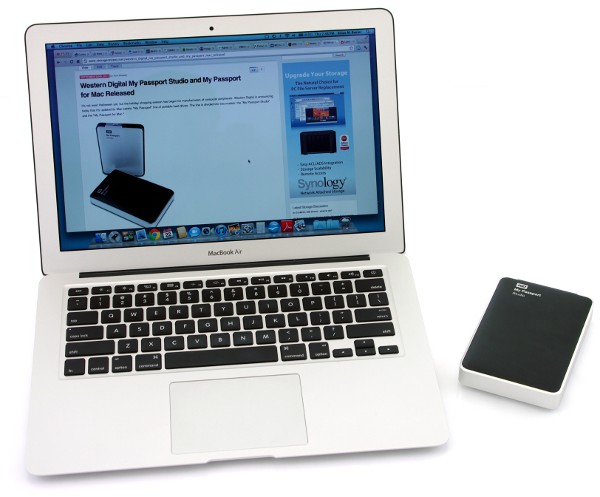
I’ve recently bought a WD My Passport drive for your Mac. But how do you format WD My Passport for Mac? For Windows users, this disk is easy to use. They don’t need to format it to plug and play. However, for Mac users, the process is complex because of the difference between the default operating systems of Windows and Mac. But this article will show you how to format WD My Passport for Mac. Plus, it also covers everything you need to know before formatting the drive and tips on using it safely. You’ll also learn how to recover data if you’ve lost it due to formatting. So, Simply read below to learn.
- Part 1: How to Format WD My Passport for Mac
- Part 2: Why Do We Need to Format WD My Passport for Mac?
- Bonus Tip: Why My Data Lost after Formatting WD My Passport for Mac and How to Fix?HOT
- Part 3:What You Should Know Before Formatting WD My Passport? Part 4: WD My Passpoprt Overview
- FAQs about Format WD My Passport for Mac:
Part 1: How to Format WD My Passport for Mac
Here’s how to format WD My Passport for Mac computer, MacBook, or iMac:
Step 1: Connect WD My Passport drive to your Mac.
Step 2: Search for the drive icon on your Mac. It should appear on the desktop.
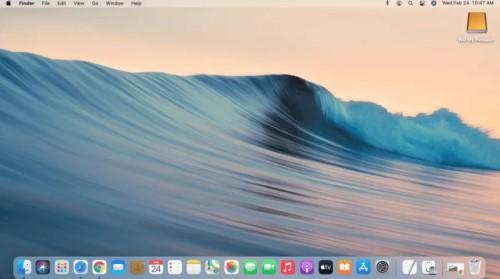
Step 3: If, for some reason, the WD My Passport drive icon doesn’t appear, launch Finder. Choose the “Preferences” in the Finder. Check the ‘External Disk’ box in the General tab in the Preferences window.
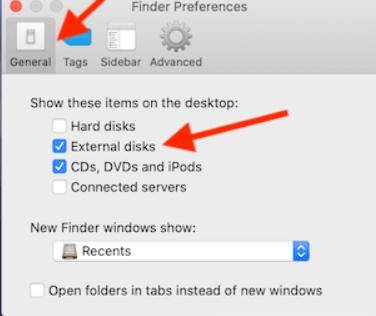
Step 4: Now, your WD My Passport drive icon should now appear on your Mac desktop. Next, open the Disk Utility from Spotlight Search.
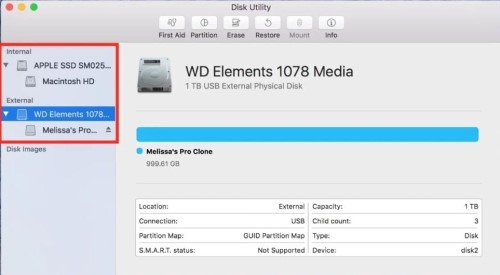
Step 5: You will find the list of internal and external drives in the left panel of the Disk Utility. Under the “External” option, you can view your WD My Passport drive. If you are unable to see the drive disconnect your WD My Passport drive, shut down your Mac, and restart it. This should sort out the problem.
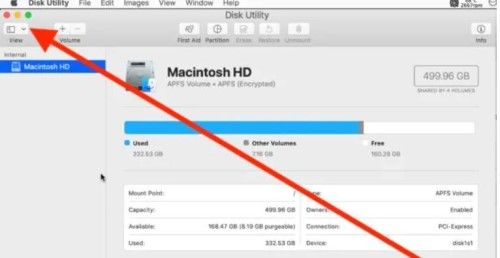
Step 6: Follow the above steps. When the WD My Passport drive appears under the External option from the top left menu, choose “View” and select show all devices.
Step 7: Again from the top menu, pick the “Erase” option to reformat My Passport for Mac. In the pop-up window, choose the Format options by giving the drive a name and selecting the format type. Set Mac OS Extended (Journaled) as the Format type and “GUID Partition Map” for the scheme.
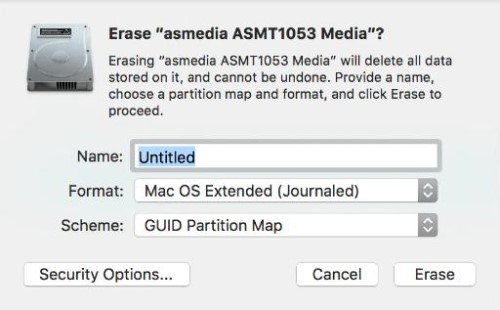
Hit “Erase,” and the WD, My Passport format for Mac, will start. Once the formatting is finished, close the Disk Utility. The newly formatted WD My Passport drive icon will appear on your Mac desktop.
Part 2: Why Do We Need to Format WD My Passport for Mac?
Depending on your WD My Passport drive type, you may or may not need to format it. There are two versions available for this drive. The NTFS and the Mac versions.
The NTFS Version
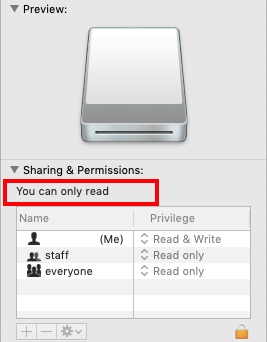
The NTFS version of the WD My Passport drive comes preformatted and is cheaper to buy. You can plug it into your Windows PC, and the system will allow you to copy files from or to the drive. However, if connected to your Mac, the NTFS version will only allow you to read files and not copy from or to the disk. You’ll need to reformat WD Passport for Mac.
The Mac Version
The Mac version of the WD My Passport drive is only designed for Mac users. It comes preformatted with a Mac OS Extended (Journaled) file system. It is also the default file system on Mac. So, if you want to reformat the Mac version of your WD My Passport drive, do it on a Mac. Otherwise, the formatted drive may give you issues.
Bonus Tip: Why I Lost Data After Formatting WD My Passport for Mac and How to Fix It?
If you reformat WD Passport for Mac, the formatting will erase any data present on the drive. For instance, if you’ve bought the NTFS version of this drive, its software will only work on a Windows PC. But if you want to format it for Mac, it’s wise to copy all your personal files and software on a Windows PC first before formatting the drive. However, if you don’t have a backup and lose your data somehow, don’t worry. You still haven’t lost it permanently, as your files are hidden somewhere on the disk. So, you can easily recover it with a third-party tool like Tenorshare 4DDiG Mac data recovery software. In three simple steps, it can recover formatted, damaged, hidden, or lost data.
What you’ll get with the 4DDiG-Mac tool:
- It can recover data from Mac-based drives, USBs, SD cards, and cameras.
- A high recovery rate for retrieving permanently deleted, formatted, hidden, or corrupted data.
- Securely recovers Mac files, including audio, video, archives, emails, documents, and images.
- It is compatible with macOS Ventura, T2 chip, M1, M1 Pro, and M1 Max.
- Restores lost data due to update or CPU failure, crashed system, lost partition, and malware attack.
Let’s find out how to recover data lost due to formatting a WD My Passport drive with 4DDiG-Mac in three easy steps:
For PC
Secure Download
For MAC
Secure Download
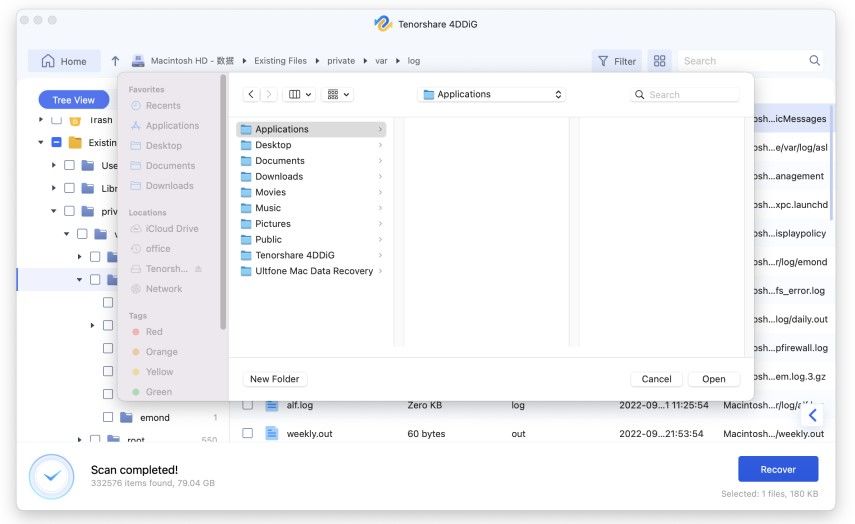
- Open 4DDiG-Mac after installation and choose the formatted WD My Passport drive. Hover the mouse over the disk, and the word “Scan” will appear at the bottom right corner. Press that button, and the tool will look for lost data in the drive.
- Wait for the scanning to be over. But you can also pause mid-scan to preview details of your targeted file types.
- Hit the “Recover” button to save the files you’ve recovered from the formatted WD My Passport drive.


Part 3: What Should You Know Before Formatting WD My Passport?
- To transfer your data between your Mac and Windows system, format the WD My Passport drive to FAT32 or ex-FAT file systems.
- Before selecting a file format, check if you want to read and write Digital Camcorders and Sony PlayStation programs to the drive. These programs need FAT32 or ex-FAT file systems to perform operations on a drive.
- The FAT32 file system can support up to 8 Terabytes of maximum volume and up to 4 Gigabytes of maximum file size. In contrast, ex-FAT can support up to 1 Petabyte of maximum volume and 16 Exabytes of maximum file size. This means you should choose the ex-FAT format instead of the FAT32. The latter has many limitations affecting your Windows PC and Mac’s performance.
- Check if your third-party programs support the ex-FAT format before formatting the WD My Passport drive. As the ex-FAT file system is uncommon, many programs don’t support it.
- A word of advice is to back up your data regularly before sharing the drive between Windows and Mac systems. Due to being used on different operating systems, your WD My Passport for Mac is more prone to a corrupted file system.
Part 4: WD My Passport Overview
Advantages of Using WD My Passport
There are several advantages to using WD My Passport drive:
- The 1 TB size of the drive offers plenty of storage space, especially if you want to store large video, music, and Digital SLR data files.
- It is manufactured by the Western Digital Company, a trusted company that has been manufacturing drives for over 20 years.
- The drive weighs about 0.44 pounds, making it portable enough to carry and fit inside your bag or trouser pocket.
- It doesn’t need an additional power cord, nor it makes grinding noises which are very common with many drives.
- It supports USB 3.0 port which can access and save files 3x times faster than a USB 2.0 port.
Tips You Should Know About Using WD My Passport for Mac
Here are some tips for using WD My Passport drive safely:
- Plug the wall power bar and connect one end of the USB cord to the drive.
- If your Mac system has a USB 3.0 port, plug the other end of the cord into that port. It will provide faster access and transfer of files.
- On your Mac, you can see the WD My Passport drive named “My Book” in “My Machine.”
- Double-click it and choose "Create WD Applications" to initiate backup installation. Look for the “WD Apps for Mac” folder if you are unable to find “WD Apps Setup.”
- Only follow the prompts by the Program Setup.
FAQs about Format WD My Passport for Mac:
What Format Should My WD Passport Be for Mac?
If you want to format My Passport for Mac only, format it with the Mac OS Extended (Journaled) file system. It is also the default file format for Mac OS. But if you want to share the drive between Mac and Windows PC, format it with the ex-FAT file system, which is compatible with both operating systems.
How Do I Format a WD Hard Drive for Mac?
We have mentioned all the instructions earlier if you want to know how to format WD Passport for Mac. Follow every step mentioned in “Part 1: Steps to Format WD My Passport for Mac” in the exact sequence.
Conclusion
So, there you have the process to format WD My Passport for Mac if you’ve bought this drive but don’t know how to format it. Hopefully, our above tips will help you. If you’ve lost data on the disk due to formatting and don’t have a backup, don’t worry. We have your back. Consider Tenorshare 4DDiG data recovery software to retrieve formatted, hidden, lost, or corrupted data from the WD My Passport for Mac. It has a high recovery rate and can restore all Mac-based files in a short time.
