Comment réparer SSD externe non reconnu ou non détecté ?
Votre SSD externe ne s'affiche pas ? Ne paniquez pas ! Explorez nos 6 méthodes simples pour le réparer et retrouver l'accès à vos fichiers.
Les disques SSD sont les disques les plus utilisés et les plus fiables de nos jours. C’est un casse-tête lorsque vous faites face à un irritant comme votre le SSD externe ne s’affiche pas sur votre ordinateur. Ce problème peut être dû à De multiples raisons y compris : les problèmes matériels et les conflits logiciels. Heureusement, quelle que soit la raison, vous pouvez facilement identifier et le résoudre. Il vous sera demandé de suivre des étapes très basiques pour rendre votre disque SSD à nouveau accessible. Ici, nous allons discuter des 6 meilleures façons de résoudre le problème de votre SSD qui ne s’affiche pas.
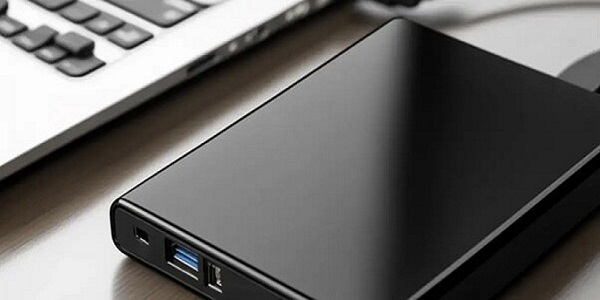
Partie 1 : Pourquoi mon SSD externe ne s’affiche-t-il pas ?
Il existe plusieurs raisons pour lesquelles un SSD externe ne s’affiche pas. Vous pouvez vérifier les raisons ci-dessous pour identifier vôtre.
- La première chose à faire est de vérifier votre connexion USB. Vous devez voir que le câble doit être correctement connecté à votre SSD externe et le port USB. S’il est correctement connecté, vérifiez si le port USB fonctionne Beau ou pas. Vous pouvez tester en connectant un autre appareil. Si le port spécifique ne fonctionne pas, vous pouvez choisir un autre port et insérez-y le câble. Surtout, si le problème est le même et que votre SSD ne s’affiche pas vers le haut, essayez de connecter votre disque à un autre ordinateur. S’il s’affiche, cela signifie que le problème provient de votre port. Sinon, cela peut être dû à d’autres problèmes.
- Les pilotes jouent un rôle essentiel dans la connexion des périphériques à votre ordinateur. Des pilotes obsolètes ou manquants peuvent entraîner incompatibilité entre les appareils, et finalement, votre appareil externe cessera de s’afficher. Si vous vous sentez C’est le problème, vérifiez les mises à jour et, le cas échéant, téléchargez et installez les versions les plus récentes des pilotes.
- Les paramètres du BIOS peuvent également empêcher votre SSD de s’afficher. Le BIOS joue un rôle important ; sans elle, vous ne peut pas utiliser les fonctions de l’ordinateur de manière appropriée. Si le port USB n’est pas configuré avec précision, vous pouvez faire face à ce problème. Les paramètres du BIOS déterminent la connectivité entre l’ordinateur et les périphériques externes. Léger Les ajustements des paramètres peuvent résoudre ce problème de SSD externe qui ne s’affiche pas en un rien de temps.
Partie 2 : Comment réparer le SSD externe qui ne s’affiche pas ?
Après avoir compris presque toutes les raisons possibles pour lesquelles le SSD ne s’affiche pas, il est temps de passer à la suivante pas. Ici, vous découvrirez les différentes méthodes de fixation qui peuvent générer des résultats instantanés. Quel que soit le raison du problème, vous finirez par pouvoir le résoudre. Tout d’abord, vous devez regarder le matériel composants, tels que le câble USB et le port USB, et l’état de votre disque. Une fois que le problème est résolu, vous pouvez Allez vérifier la méthode mentionnée ci-dessous qui vous convient le mieux.
Méthode 1 : Récupérer les données d’un SSD externe
Vous perdez l’accès à votre SSD externe à ce stade, qui est la seule source de vos données confidentielles. Il peut devenir gênant pour vous. Parfois, vous avez un besoin urgent de données et votre SSD externe s’arrête se présenter. Cela peut être une expérience pénible. Heureusement, vous pouvez récupérer les données de votre disque dur externe Si les données sont formatées ou si le disque tombe en panne soudainement. Tout vous need est un puissant outil de récupération, et Tenorshare 4DDiG est la solution idéale pour vous.
Il dispose d’une option de réparation, donc même si le disque tombe en panne, vous pouvez toujours avoir de l’espoir. Vous pouvez facilement récupérer de différentes partitions de votre disque. Il offre une analyse approfondie, ce qui assure une récupération maximale des données. Vous pouvez également Prévisualisez les données avant la récupération pour garantir leur authenticité.
Téléchargement Sécurisé
Téléchargement Sécurisé
Étapes pour récupérer des données à partir d’un SSD externe
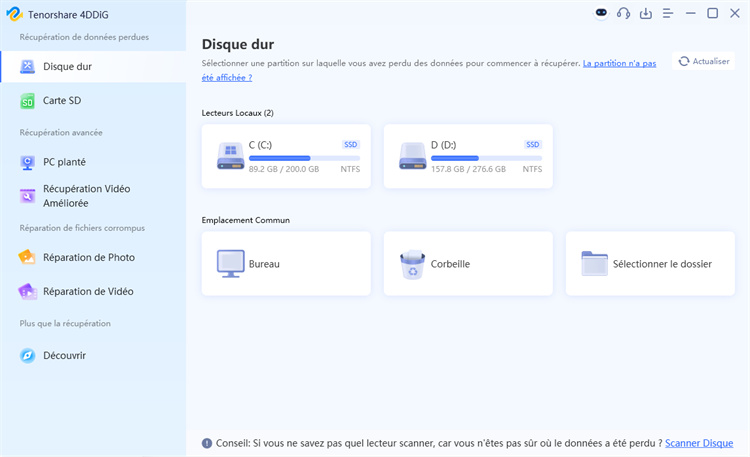
Téléchargez et installez l’outil de récupération Windows 4DDiG à partir de son site officiel et lancez l’application. Vous obtiendrez l’interface d’accueil. Vous devez également connecter votre SSD externe à votre ordinateur via le port USB.
-
Sélectionnez votre SSD externe
À partir de l’interface d’accueil, vous devez sélectionner le SSD externe. Si votre Le SSD s’affiche, sélectionnez-le et passez à l’étape 2. Sinon, suivez les méthodes mentionnées ci-dessus pour obtenir votre SSD qui apparaît. Une fois que vous avez sélectionné le lecteur SSD, cliquez sur Démarrer pour commencer la recherche.
-
Analysez le SSD sélectionné
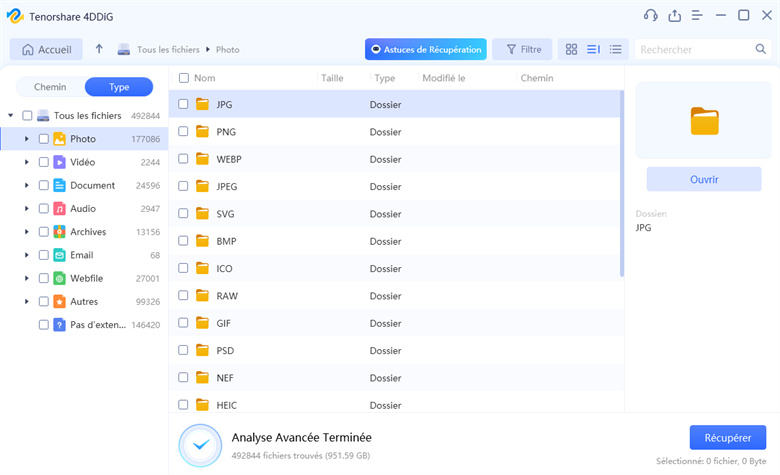
L’analyse commencera et vous commencerez à obtenir les fichiers trouvés à partir du SSD sur votre écran. Vous pouvez voir que si les fichiers souhaités sont disponibles, vous pouvez arrêter l’analyse. Autrement Vous pouvez le laisser continuer et attendre la fin du processus.
-
Prévisualisez vos données et récupérez-les après satisfaction
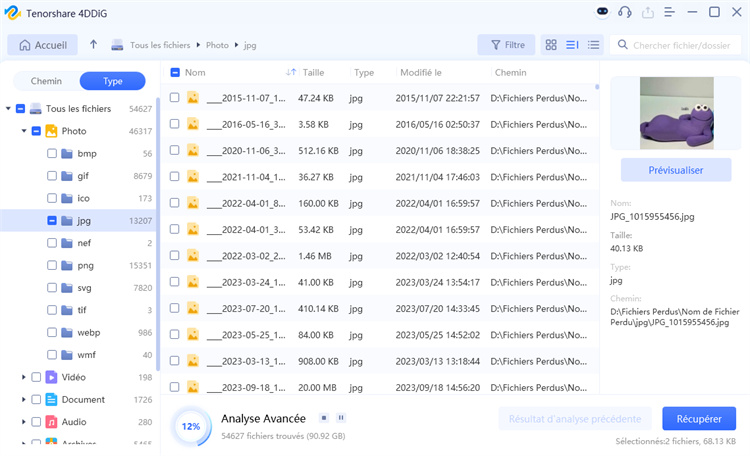
Toutes les données seront devant votre écran afin que vous puissiez le prévisualiser avant de passer à l’étape de récupération. Vous pouvez organiser vos données dans Différentes vues selon le type de fichier, les données de modification, etc. Après la prévisualisation, lorsque vous êtes satisfait du résultat, sélectionnez vos données et cliquez sur Récupérer pour terminer le processus de récupération.
4DDiG vous demandera un emplacement pour stocker vos données récupérées. Choisissez judicieusement un emplacement et il devrait être autre que votre SSD externe. Maintenant, terminez simplement le processus car vous avez récupéré vos données à l’aide de la récupération de données 4DDiG logiciel.
Méthode 2 : Vérifiez la connexion du câble
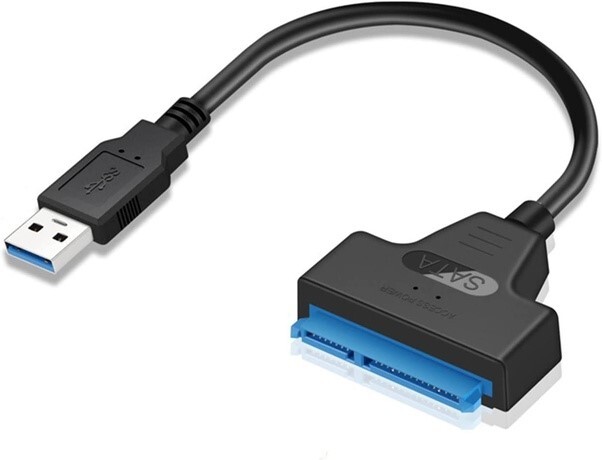
Le câble UB relie le SSD externe à l’ordinateur. Vous ne pouvez pas vous connecter si le câble ne fonctionne pas. C’est vrai Il est recommandé de vérifier d’abord le câble pour voir si votre SSD ne s’affiche pas.
Vous pouvez retirer le lecteur une fois et réessayer de vous connecter. Vous pouvez également essayer un autre port pour insérer le lecteur. Parfois, les ports se desserrent et les ports lâches ne peuvent pas connecter les périphériques. De plus, certains SSD externes sont livrés avec un bouton d’alimentation ; Vous devez vérifier s’il est allumé ou non. Vérifiez attentivement le câble et changez-le s’il en a dommages physiques.
Méthode 3 : Activer le montage automatique pour réparer le SSD externe qui ne s’affiche pas
Le montage automatique consiste à attribuer un nom de lecteur à chaque lecteur connecté au système. Cependant, dans certains cas, cela doit être fait manuellement lorsque le le SSD externe ne s’affiche pas sur Windows 10. Vous peut le faire en à l’aide de CMD.
- Cliquez sur les touches Windows + R, et la fenêtre Exécuter s’ouvrira.
- Type cmd et ouvrez l’invite de commande avec les privilèges d’administrateur en appuyant sur Ctrl + Maj + Entrer Clés.
-
Dans l’écran affiché, tapez mountvol /E et appuyez sur Entrer. De cette façon, vous activerez l’option Fonction de montage.

- Il est recommandé de redémarrer votre ordinateur, puis d’essayer de connecter votre SSD externe pour voir s’il commence à apparaître.
Méthode 4 : Initialiser le disque dur externe
Si vous connectez un nouveau disque externe, vous devez l’initialiser avant de l’utiliser. Sinon, vous continuerez à obtenir Error invite à initialiser le disque.
Pour initialiser, suivez les étapes indiquées :
- Ouvrez la gestion des disques à partir de l’icône Démarrer-Windows.
-
Faites défiler vers le bas pour trouver les disques durs connectés. À partir des disques fournis, faites un clic droit sur le SSD externe et cliquez sur Initialiser le disque.

-
Sélectionnez un style de partition basé, puis cliquez sur D’ACCORD.

- Faites un clic droit sur l’espace libre et cliquez sur Nouveau Volume Simple.
- Continuez à suivre les instructions à l’écran, attribuez une lettre à votre lecteur et formatez le volume.
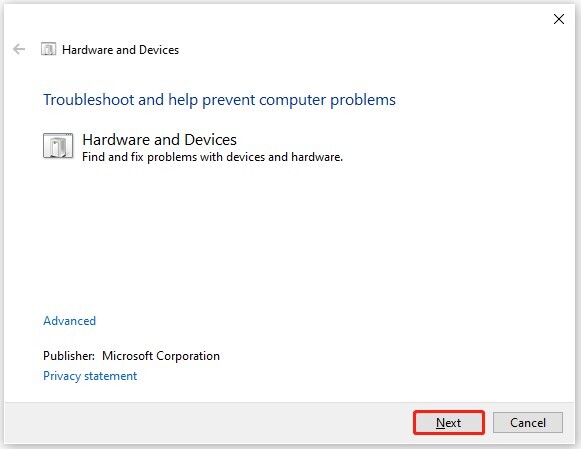
Méthode 5 : Utiliser l’utilitaire de résolution des problèmes de matériel et de périphériques
Par défaut, les systèmes Windows disposent d’un utilitaire de résolution des problèmes de matériel et de périphérique. Il est utile pour résoudre les problèmes liés à matériel. Si un SSD externe ne s’affiche pas en raison d’un problème matériel, voici comment résoudre ce problème.
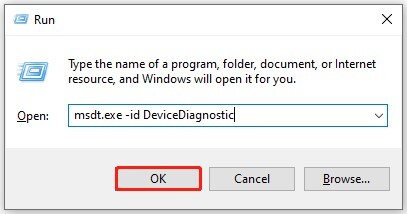
Ouvrez la boîte de dialogue Exécuter avec les touches Windows + R.
Tapez la commande msdt.exe -id Device Diagnostic, puis cliquez sur OK.

Cliquez sur Suivant ; il exécutera le dépanneur.

L’utilitaire de résolution des problèmes diagnostiquera et résoudra les problèmes liés au matériel et aux appareils et fournira des suggestions.
Méthode 6 : Mettre à jour le pilote du disque dur
Le problème du SSD externe qui ne s’affiche pas peut se produire en raison d’un pilote de disque dur obsolète ou manquant. Vous pouvez vérifier et le mettre à jour.
- Ouvrir le Gestionnaire de périphériques
- Double-cliquez sur les lecteurs de disque et développez-les.
- Sélectionnez le pilote requis et cliquez sur l’option de mise à jour du pilote.
- Maintenant, vous devez choisir si vous souhaitez mettre à jour les pilotes automatiquement ou en parcourant mon ordinateur Pilotes. Choisissez une option et cliquez sur OK.
- Attendez la fin de l’installation du pilote.
Partie 3 : FAQ sur la réparation d’un SSD externe qui ne s’affiche pas
Q1 : Comment puis-je faire en sorte que Windows reconnaisse mon SSD externe ?
Si vous souhaitez que Windows reconnaisse votre SSD externe, vous devez vérifier quelques points avant de passer à la technique Pièces:
- Vérifiez le câble de connexion
- Mettre à jour ou réinstaller les pilotes
- Monter le disque
- Initialiser le lecteur
Si vous avez effectué toutes ces étapes et que vous ne voyez toujours pas votre SSD, vous devrez peut-être formater votre disque. Après formatage, une fois que le lecteur commence à apparaître, vous pouvez facilement récupérer ses données grâce à un , 4DDiG Windows Recovery. Il vous aidera à placer vos données devant votre écran dans un court laps de temps.
Q2 : Comment réinitialiser un disque dur externe ?
La réinitialisation implique le formatage du disque. Il supprimera toutes les données et rendra votre disque vierge. N’oubliez pas de faire une sauvegarde de vos données.
- Allez dans la gestion des disques.
- Localisez votre SSD externe dans la liste
- Faites un clic droit sur la partition du lecteur et sélectionnez le formatage.
Laissez le processus se terminer. Votre disque dur est maintenant prêt à stocker de nouvelles données et commencera certainement à apparaître.
Q3 : Comment faire fonctionner mon SSD externe ?
Vous pouvez suivre différentes méthodes pour faire fonctionner le SSD externe.
- Connectez le disque en toute sécurité.
- Vérifiez l’état de santé du conducteur.
- Dépannez et résoudre le problème
Si aucune des méthodes ci-dessus ne fonctionne, formatez le lecteur et récupérez vos données avec l’outil de récupération Windows 4DDiG.
Q 4 : Pourquoi Windows ne voit-il pas les autres SSD ?
Le SSD externe ne s’affiche pas dans Windows 11 pourrait être dû à des connexions défectueuses, au mauvais câble, Un problème matériel avec le lecteur, ou des pilotes manquants.
Conclusion
Faire face à un le SSD externe ne s’affiche pas peut être difficile. Vous pouvez résoudre ce problème en en utilisant la méthodologie appropriée. Vous devez vérifier si le lecteur est neuf, vérifier l’initialisation et monter la solution du type lecteur. Je dépanne les signaux vers la connexion, puis je recherche le matériel problèmes dans le câble et le port USB. Vous devez avoir un œil attentif sur chaque détail pour obtenir votre conduite visible. En suivant les correctifs mentionnés ci-dessus dans l’article, vous pouvez résoudre votre problème. Toutefois, si l' reste intact, vous pouvez formater le disque et récupérer ses données avec un outil de récupération professionnel. Tenorshare 4DDiG peut être une décision intelligente car il a le pouvoir de récupérer des données à partir de Disques SSD corrompus avec options de réparation.
