[Full Guide] How to Use 4DDiG Windows Boot Genius
4DDiG Windows Boot Genius is a multifunctional tool that can fix Windows blue/black screen, boot the cannot start computers, reset Windows local and domain password, recover data from unbootable hard disk, and manage your partition. Now learn how to use this multifunctional tool with this comprehensive guide.
Prearation 1: Create a Bootable Disk
Secure Download
-
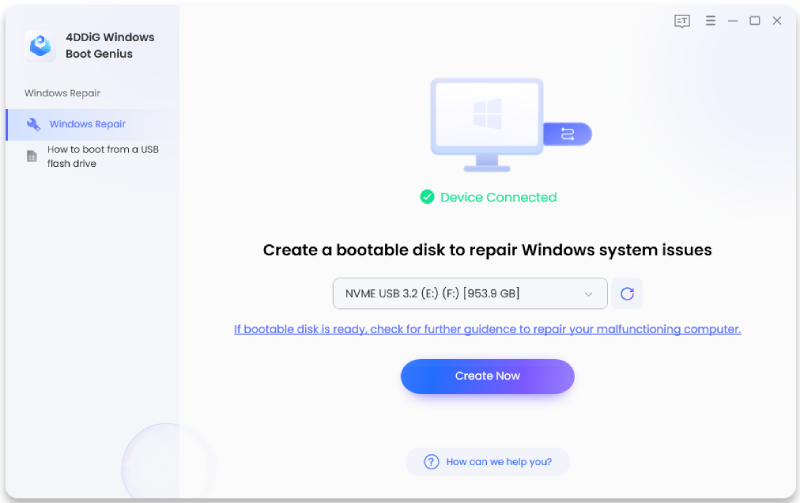
Step 1:On another available computer, run the program and insert prepared CD/DVD disk into the CD-ROM drive or connect USB flash drive into a USB port on computer. Then click "Create Now" to start burning repair disk.
-
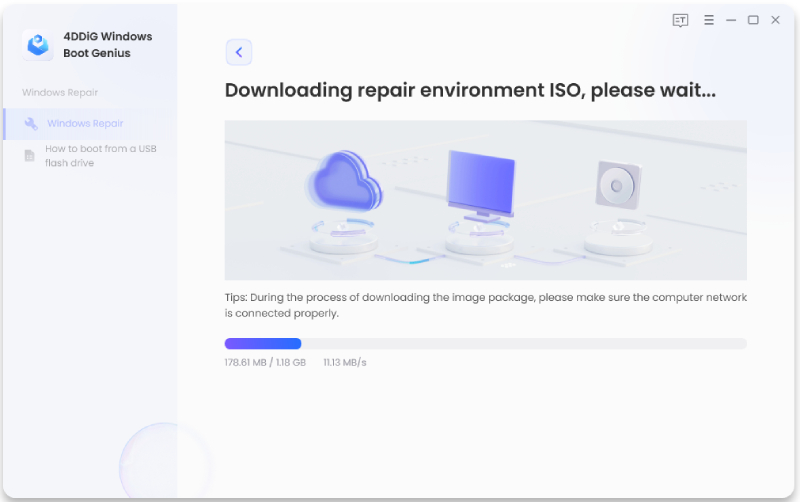
Step 2: Now, wait for Windows Boot Genius to burn a repair environment ISO to the drive. Make sure you're connected to a working network.
-
Step 3: After the boot disk is created successfully, turn to your dead computer and follow the on-screen instructions to start booting it.
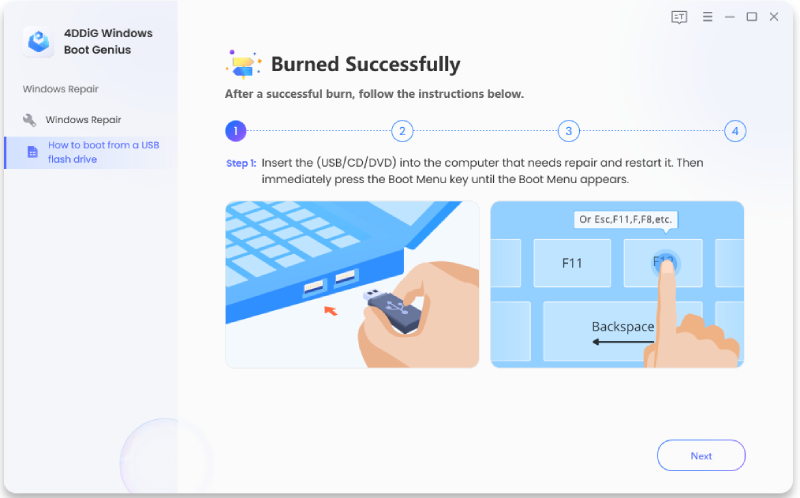
Make sure to back up important data on your USB/CD/DVD first as they will be erased during the process.
Preparation 2: Boot Windows System from CD/DVD/USB
Secure Download
-
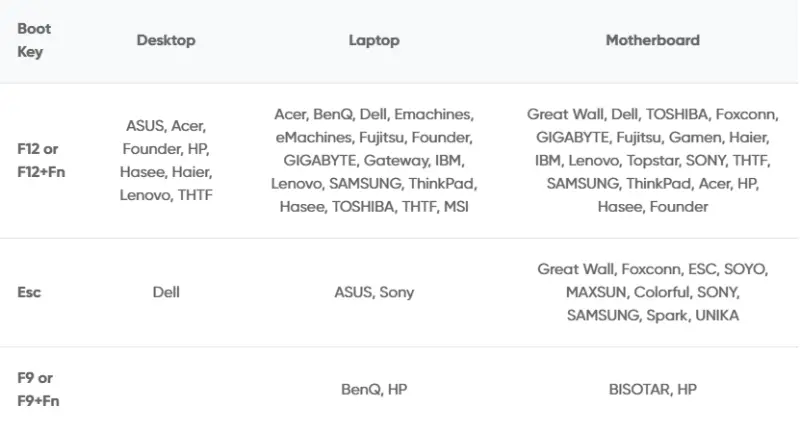
Step 1:Insert the bootable media to the computer that cannot boot. Start the computer and press the Boot Menu hot-key(s) of your device to access the Boot Menu.
Note:
The key to enter Boot Menu might be different depending on the computer brand or motherboard manufacturer. Below is a list of PC brands with their corresponding hot-keys for Boot Menu.
-
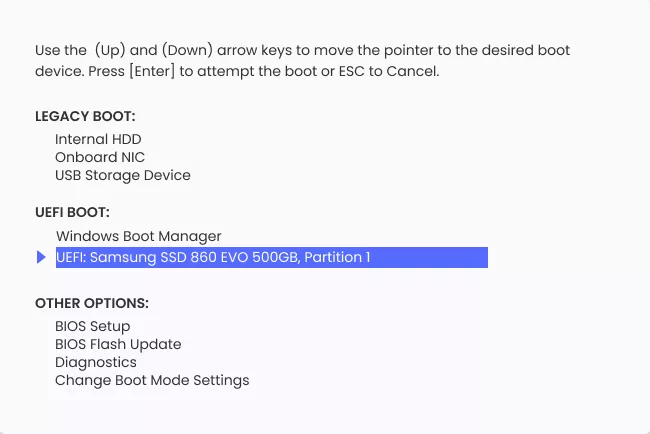
Step 2:When you get into the boot menu, use the arrow keys to navigate the bootable media and simply tap on "Enter" to select it as a boot drive.
Note:
Make sure to back up important data on your USB/CD/DVD first as they will be erased during the process.
-
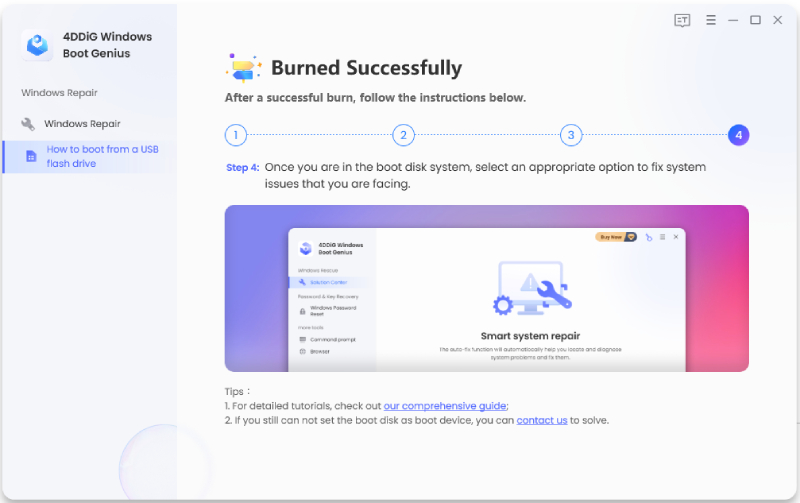
Step 3: Once you are in the boot disk system, you can choose appropriate option to fix system issues that you are facing. Options include: Windows Rescue, Password and Key Recovery, Data Recovery, Disk Backup and Restore, Partition Management, and Data Wipe etc.
Smart System Repair
Smart System Rescue offers the comprehensive and effective solutions helping you to fix all booting issue including blue screen of death, black screen of death, freezes, and crashes, recover missing boot and restore crashed MBR, corrupt registry, virus-infected registry key value and partition table.
Secure Download
-
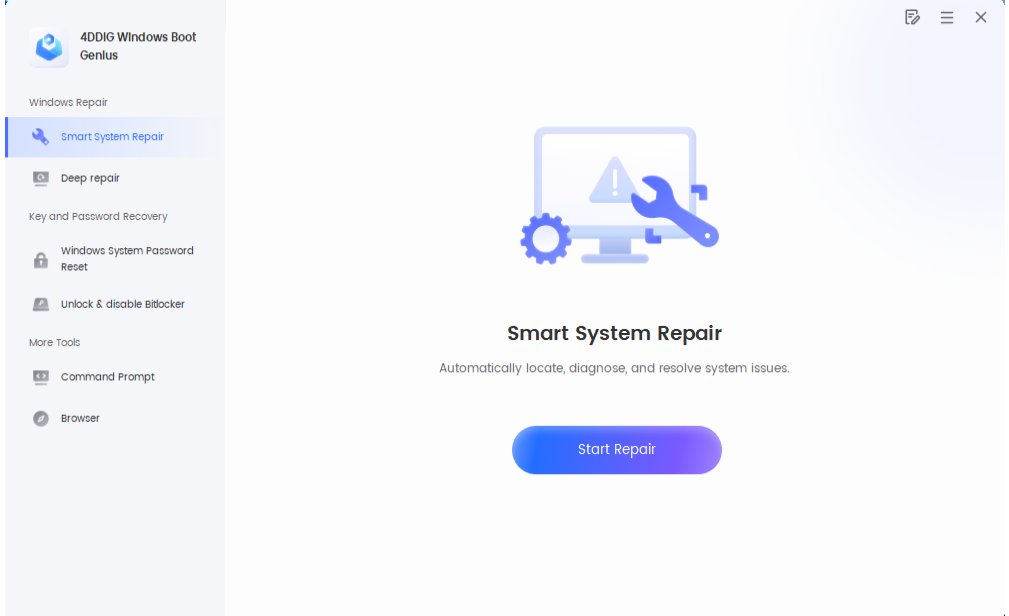
Step 1:When your dead computer is booted successfully, 4DDiG Windows Boot Genius will be launched automatically. Now click "Start Repair" to proceed.
-
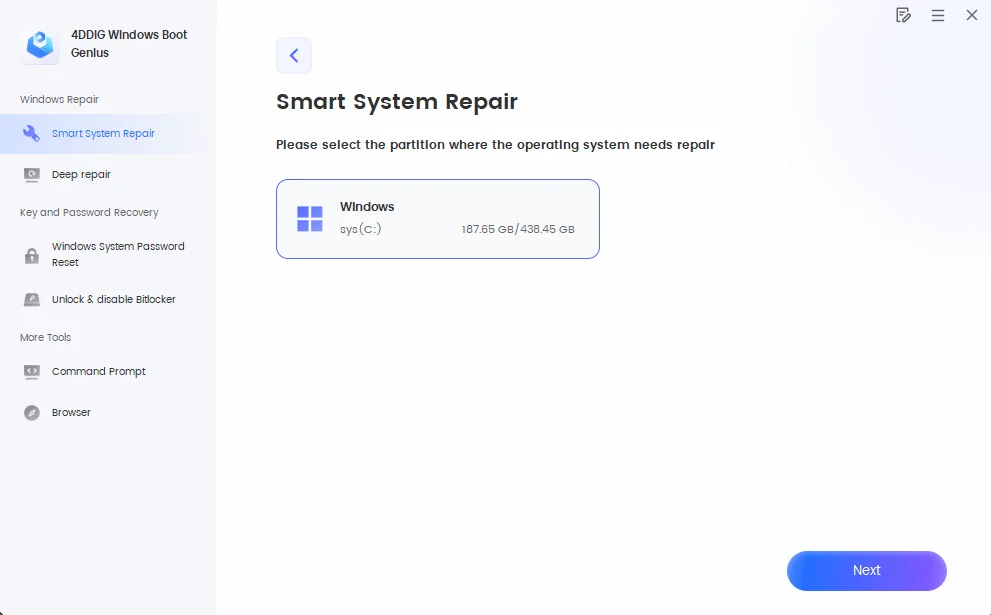
Step 2:Then select the partition which needs to be repaired and then tap on "Next".
-
Step 3:Wait for the automatic repair to be completed and then restart your computer to see the repair results.
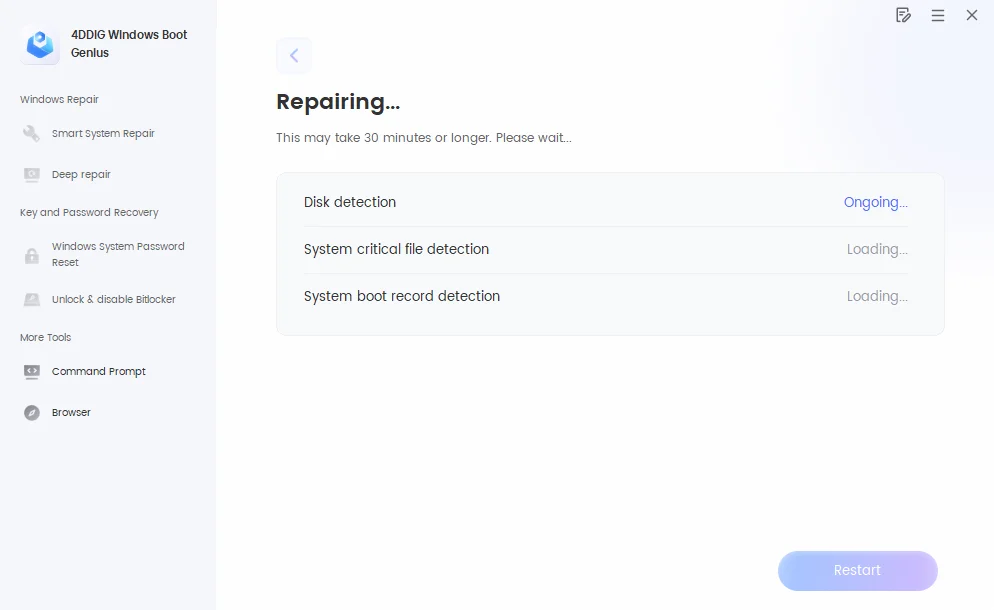
This is all about how to boot the dead computer with Windows Rescue provided by 4DDiG Windows Boot Genius. Why not just download and give it a try?
Deep Repair
Secure Download
-
Step 1:Select “Deep Repair” in the left column and click “Start reinstall”.

-
Step 2:The system performs an environment check, please wait.

-
Step 3:Select the system disk and the system language to be installed.

-
Step 4:Choose whether you need to backup, if not click no to reinstall the system.

-
Step 5:Downloading the operating system image.

-
Step 6:Congratulations! The system reinstallation was successful! Reboot to start the new system.

Windows Password Reset
Secure Download
-
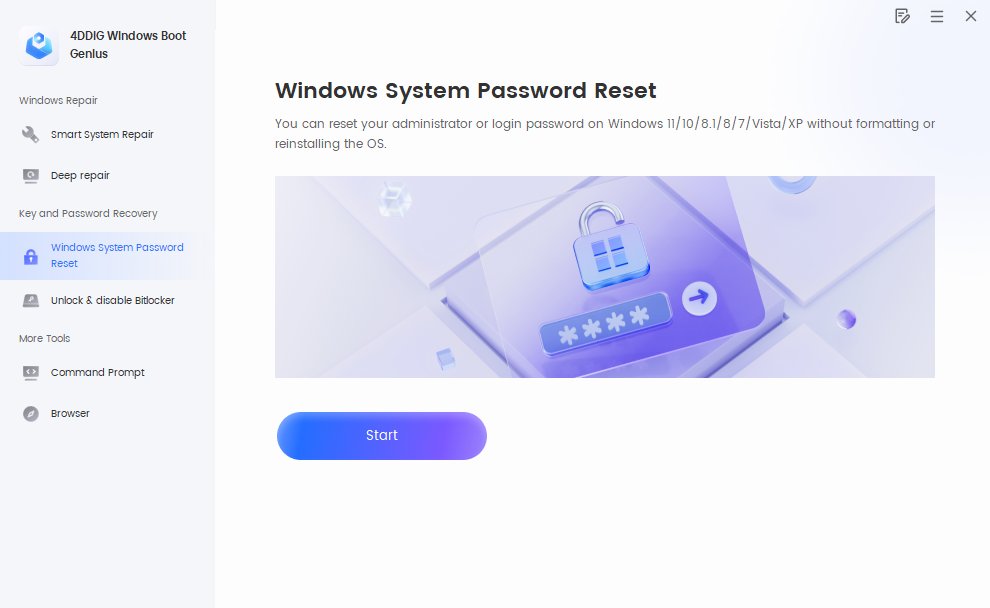
Step 1:After create a bootable disk and boot your computer, click on "Password Reset" and then tap on "Start" to go on.”
-
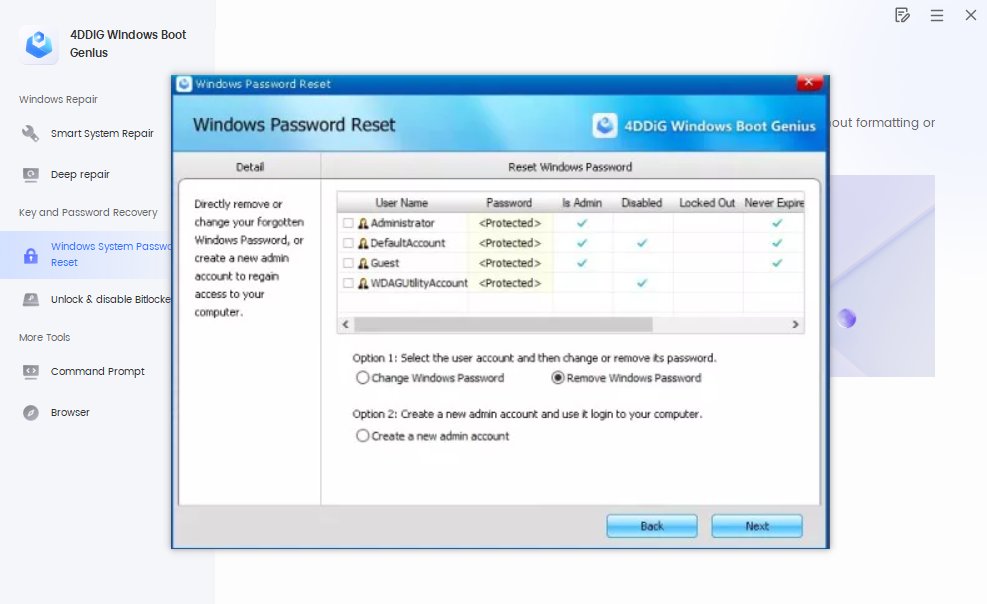
Step 2:Tick the user account you want to reset password from. As the picture showed below, you are allowed to change, remove and create password. Select one mode and click "Next" to perform automatically.
-
Step 3:After that, simply tap on "Restart" to reboot your computer and access it without password.
Unlock & disable BitLocker
Secure Download
-
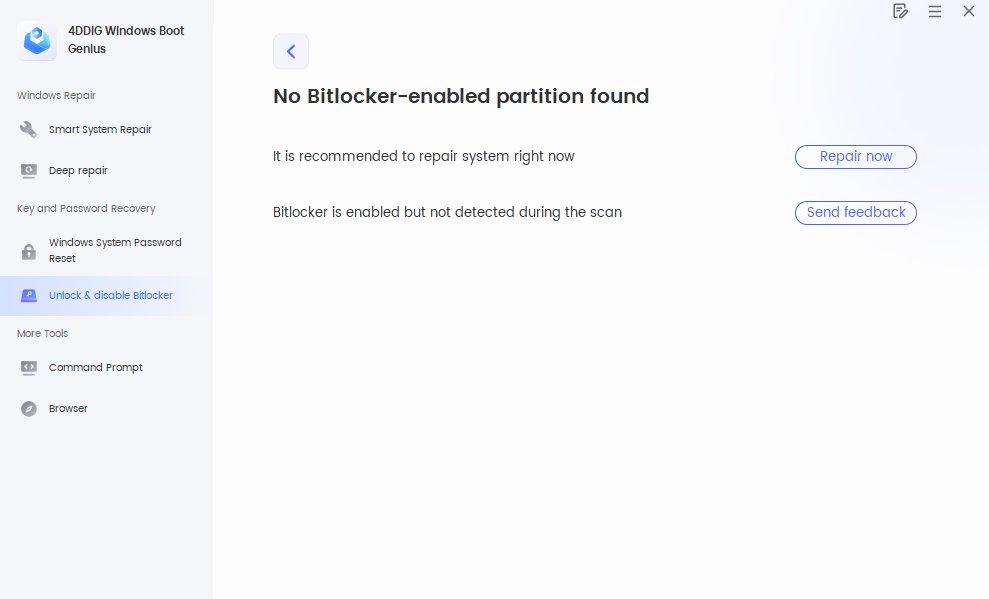
If your system drive is encrypted with BitLocker, it may affect the system repair process. On this feature page, you can remove the BitLocker encryption. Once removed, you can proceed with the boot repair normally.
