How to Use 4DDiG File Repair to Fix Corrupted Files & Enhance Video/Image
Welcome to the official 4DDiG File Repair User Guide. Learn how this AI-powered software can help you repair corrupted files, improve the quality of compromised videos and images, and colorize your black-and-white videos and photos in a couple of clicks.
1.1 Repair Corrupted Videos
4DDiG File Repair enables you to fix corrupted or unplayable video files, making them playable again. If your videos are not playing, won't open, display error codes, or show a black screen, you can use the Corrupted File Repair feature to resolve these issues. Simply download and install the software on your Windows or Mac computer, then follow these easy steps:
Secure Download
Secure Download
-
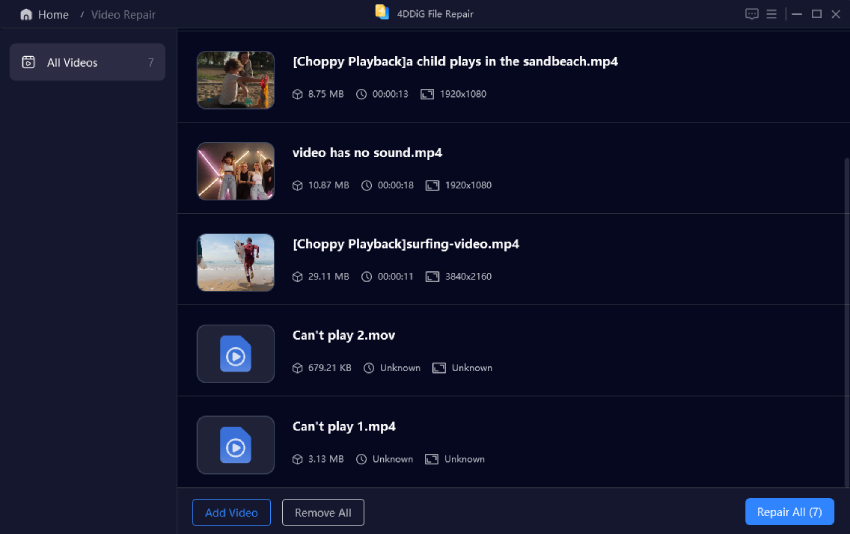
Step 1.Select Video Repair and Add Videos
Launch 4DDiG File Repair and choose "File Repair" from the left menu. Then click "Add Videos" and import one or more corrupted video files from your computer.

-
Step 2.Start Video Repair
Once your videos are added, click the "Repair All" button and let the tool repair them one by one.

-
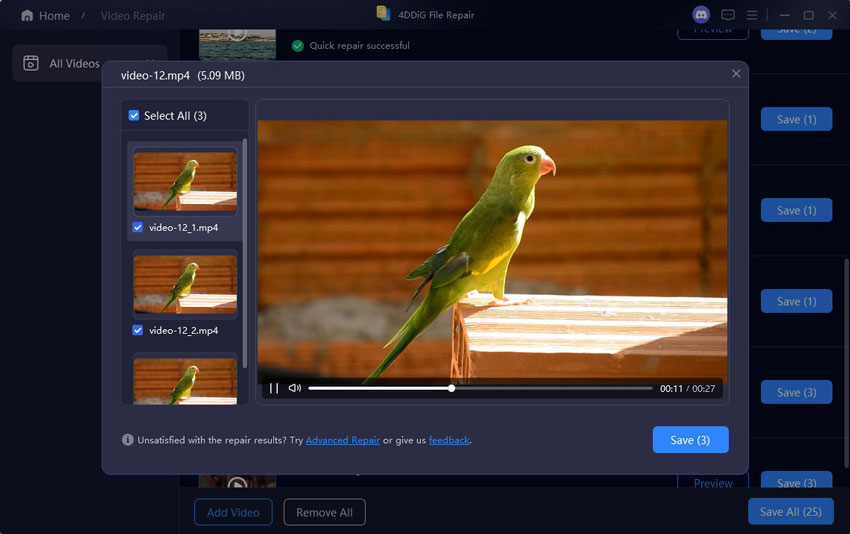
Step 3.Preview Repaired Videos
After the repair completes, you can preview the repaired videos by clicking the "Preview" button.

Play each of the repaired video to make sure they are working properly.

-
Step 4.Save Repaired Videos
Save the repaired files to your desired location on your computer. You may either click the "Save" button for each video individually or click "Save All" to export all the repairted videos at one go.

1.2 Repair Damaged Photos
4DDiG File Repair makes it easy to fix corrupted, damaged or broken photos. Whether your photos won't open properly, display distortion or appear greyed-out, or even if they have corrupt headers, this tool can effectively fix these issues. It supports various image formats like JPG, JPEG, PNG, CR2, and more. To repair your photos, you can install 4DDiG File Repair on your computer and follow these steps.
Secure Download
Secure Download
-
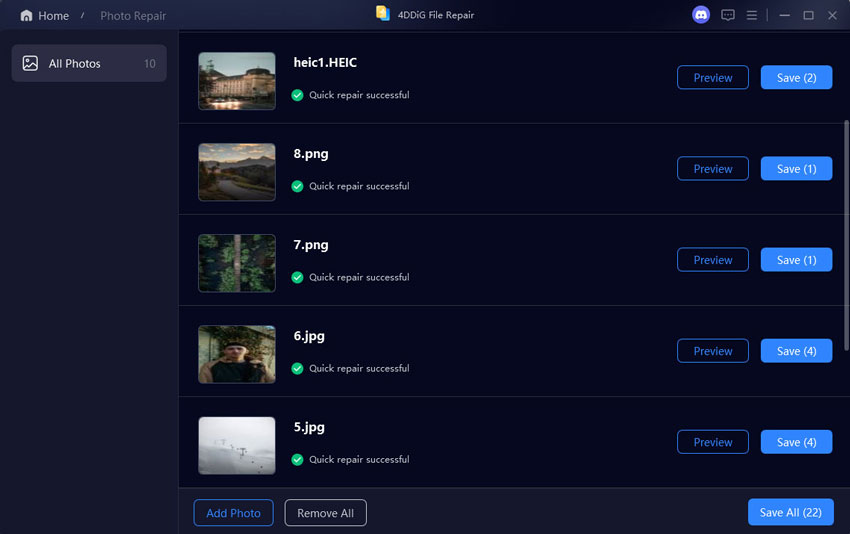
Step 1.Select Photo Repair and Add Photos
Launch 4DDiG File Repair and choose "Photo Repair" from the left menu. Then click "Add photos" or simply drag and drop the damaged photos into the window to start the repair process.

-
Step 2.Start Photo Repair
Once you've added the damaged photos, click "Repair All" and let the tool start processing your repair request.

-
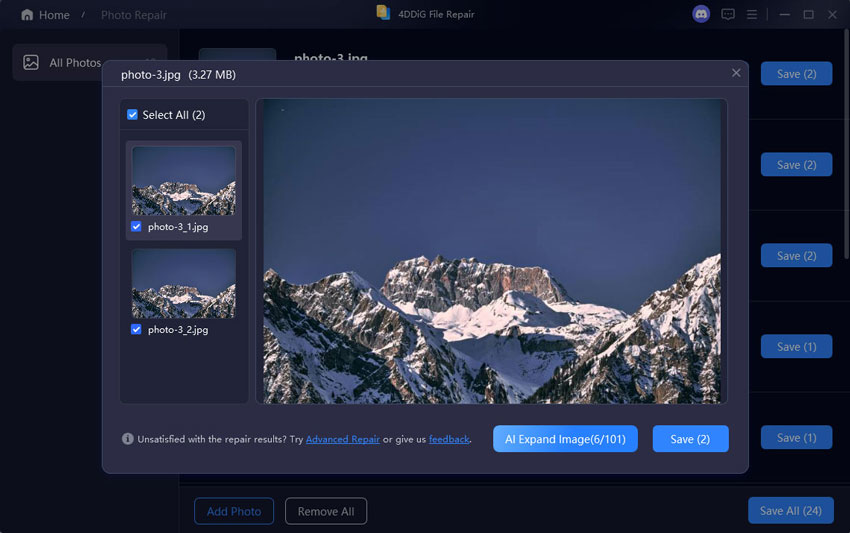
Step 3.Preview the Repaired Photos
Once the repair is complete, you can check the repaired photos by clicking the "Preview" button.

Preview each repaired photo to verify that they no longer appear distorted, blurry, pixelated, or greyed-out.

-
Step 4.Save Repaired Photos
Click the "Save All" button and choose the destination folder where you want to save the repaired images. You can click on "Open Folder" to navigate to the repaired file's location on your computer.

1.3 Repair Corrupted Files
4DDiG File Repair allows you to repair corrupted office documents, Adobe files, ZIP files, and other types of files. Specifically, it supports formats such as DOCX, DOC, XLSX, XLS, PPTX, PPT, PDF, PSD, PSB, AI, AE, EPUB, and more. Follow this guide and learn how to fix files that won't open, show blank pages, or display gibberish in just seconds. To get started, download and install 4DDiG File Repair on your computer.
Secure Download
Secure Download
-
Step 1.Select File Repair and Add Files
Launch 4DDiG File Repair, select "File Repair" from the left menu. Then click "Add Files" to upload one or more corrupted Office, Adobe files or other file types from your computer. Supported formats include DOC, DOCX, XLS, XLSX, PPT, PPTX, RTF, ZIP, PDF, PSB, PSD, AI, AE, and more.

-
Step 2.Start File Repair
After adding your files, click "Repair All" and the tool will begin analyzing and repairing any detected errors or corruption.

-
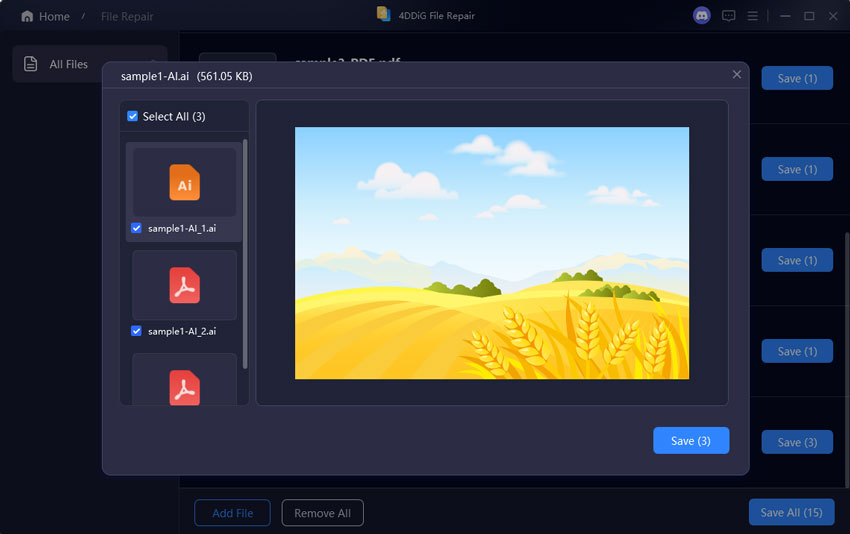
Step 3.Preview Repaired Files
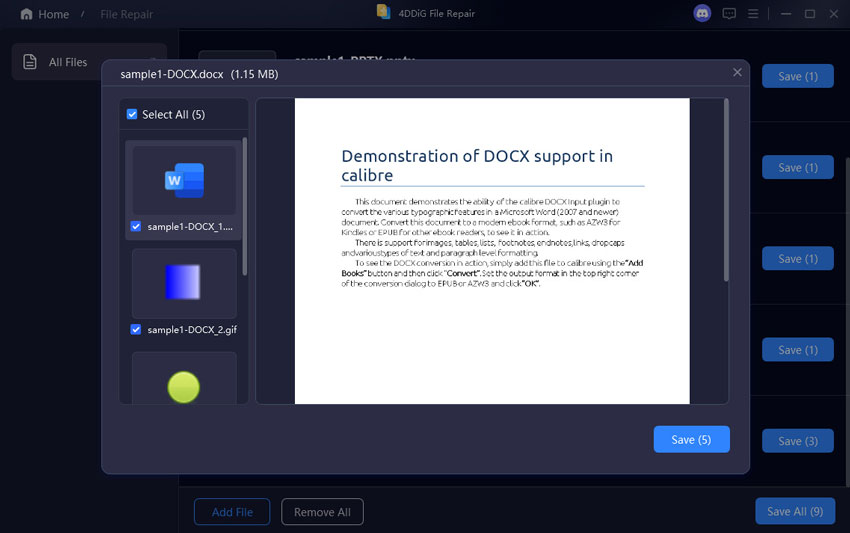
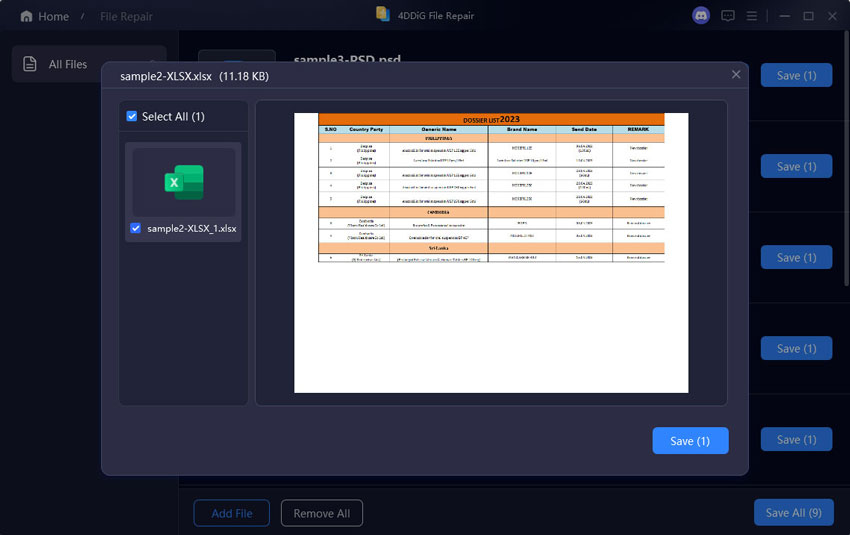
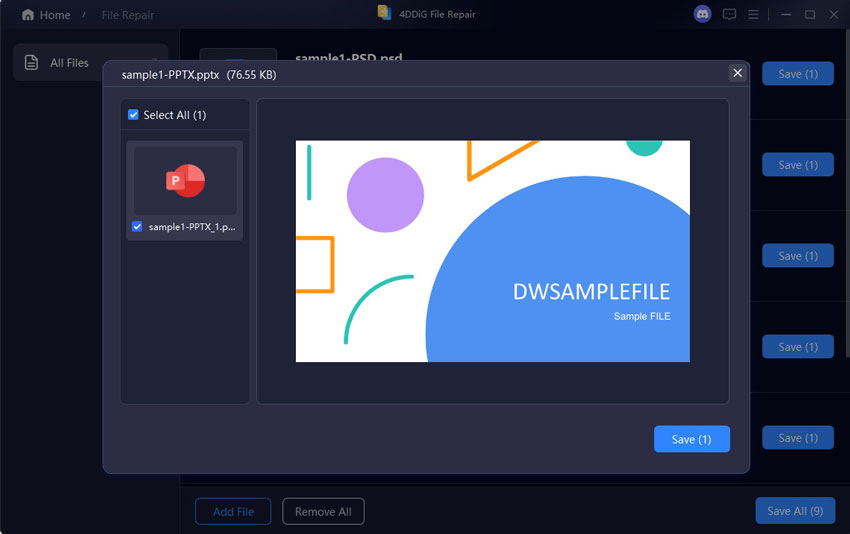
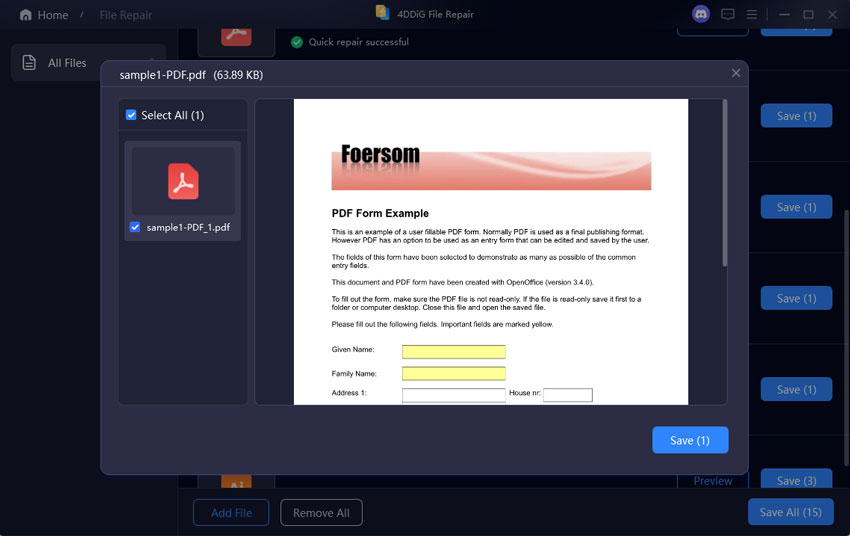
Once the repair is complete, you can check the repaired files by clicking the "Preview" button. Preview each repaired file to ensure they are fully restored and ready for use.

Note:
The preview option will show only the first page of the repaired file. To access the full content, you'll need to save the file locally.
➤ Preview repaired Word file

➤ Preview repaired Excel file

➤ Preview repaired PowerPoint file

➤ Preview repaired PDF files

➤ Preview repaired AI files

-
Step 4.Save Repaired Files
Click the "Save" button next to the file you want to keep, or click "Save All" to store all repaired files at once. Choose a suitable location on your computer for easy access later.

1.4 Repair Unplayable Audio
With 4DDiG File Repair, you can easily fix uplayable or corrupted audio files and address issues such as distortion, static, pops, and clicks. Whether your files are in MP3, WAV, M4A, AAC, or other formats, our audio repair tool has you covered. This guide provides detailed instructions on how to repair auido without losing quality. To get started, download and install 4DDiG File Repair on your computer.
Secure Download
Secure Download
-
Step 1.Select Aduio Repair
Launch 4DDiG File Repair, go to "More Repair Tools", and select "Audio Repair".

-
Step 2.Add Unplayable Audio to Repair
Click "Add Audio" to upload the corrupted audio file you want to repair. Supported formats include MP3, M4A, AAC, and more.

-
Step 3.Start Audio Repair
Click on the "Repair All" button and the tool will analyze and start repairing the audio file to remove any crackling, popping sounds, or other issues.

-
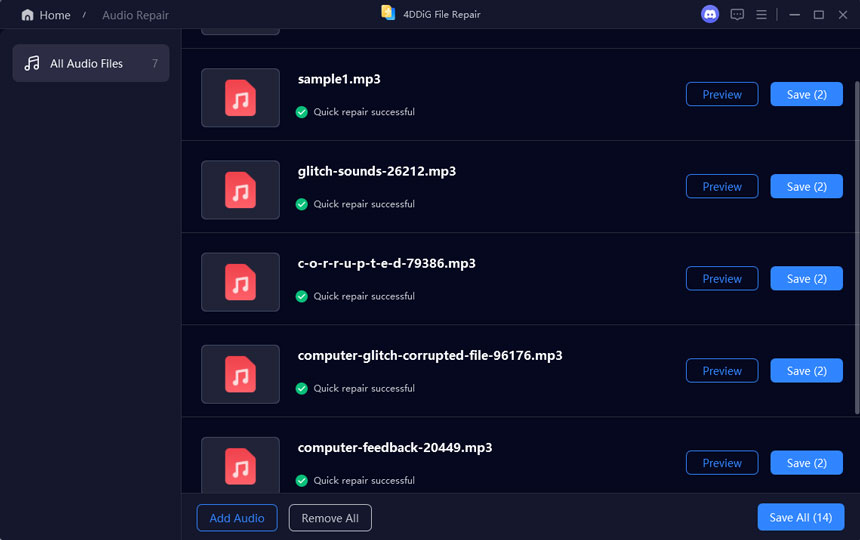
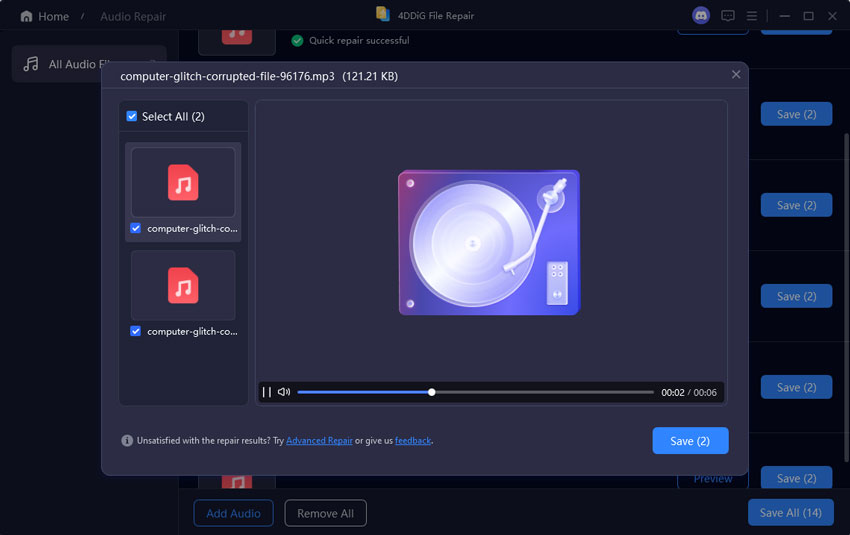
Step 4.Preview Repaired Audio Files
Once the repair process is complete, the tool will display a summary and allow you to listen to a preview of the repaired audio.

Listen to each repaired audio file to ensure that the crackling, popping sounds, or any other issues have been effectively removed.

-
Step 5.Save Repaired Audio Files
Click the "Save" button next to the audio file you want to keep, or click "Save All" to store all the repaired audio at once. Choose a suitable location on your computer for easy access later.

1.5 Batch Convert Images
4DDiG File Repair introduces a powerful Image Format Converter that lets you easily batch convert PNG, BMP, CR2, and HEIC to JPG format in just one click. Whether you’re working with smartphone photos, professional camera files, or files from other devices, 4DDiG ensures high-quality JPG output with no image compression or quality loss.
Besides, all conversions are processed locally on your computer, ensuring 100% privacy protection and no file uploads to the cloud or server. This all-in-one photo converter and repair tool makes it easier than ever to fix and convert images quickly and securely.
Secure Download
Secure Download
-
Step 1.Select Image Format Converter
Launch 4DDiG File Repair, go to "More Repair Tools", and select "Image Format Converter".

-
Step 2.Add One or More Images for Conversion
Click "Add Files" to upload the one or more image files you want to convert to the JPG format. Or, drag and drop those photos to the 4DDiG software directly. Supported image formats include PNG, HEIC, Canon CR2, and BMP.

-
Step 3.Start Batch Converting Images to JPG
Click on the "Convert" button and the tool will analyze and start converting all the added images to the JPG format without losing quality in bulk.

You can view the conversion progress, which will be finished in seconds.

-
Step 4.Preview Converted JPG Images
Once the conversion process is complete, the tool will display the converted results and allow you to check a preview of the converted images.

-
Step 5.Save Converted JPG Images
Click the "Save" button at the bottom right to export all the converted JPG photos at once. Choose a suitable location on your computer for easy access later.

2.1 Enhance Video Quality
4DDiG File Repair goes beyond mere file repair—it doubles as an AI video enhancer, capable of upscaling and improving any blurry, noisy, or low-resolution videos to HD, 4K, and even 8K resolution. Whether you're restoring old family videos or refining recent footage, it ensures every detail is brought to life with stunning clarity and fidelity. Follow this guide to learn how to enhance video quality with AI. To get started, download and install the software on your computer.
Secure Download
Secure Download
-
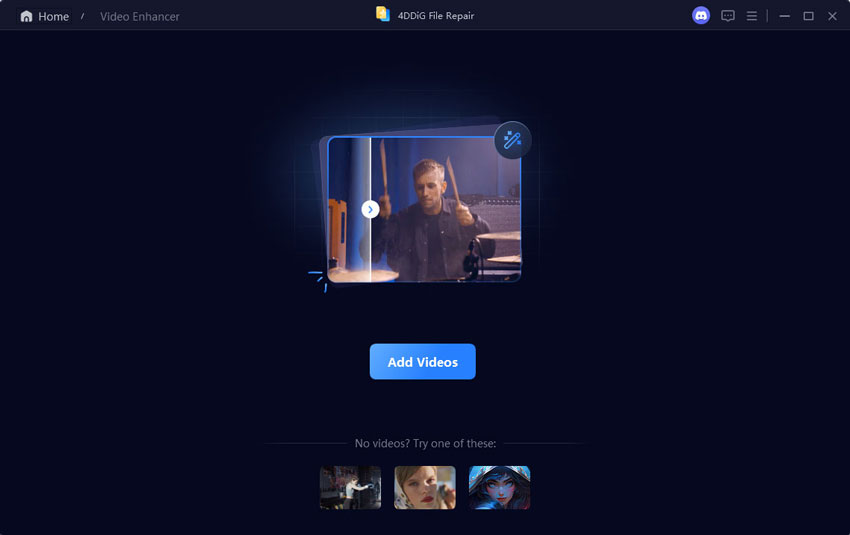
Step 1.Select Video Enhancer
Launch the 4DDiG File Repair software. Navigate to "AI Enhancer" on the left sidebar and then click on the "Video Enhancer" option.

-
Step 2.Add Videos to Enhance
Click "Add Videos" to choose the videos you want to enhance from your computer, or simply drag and drop them into the software window.

-
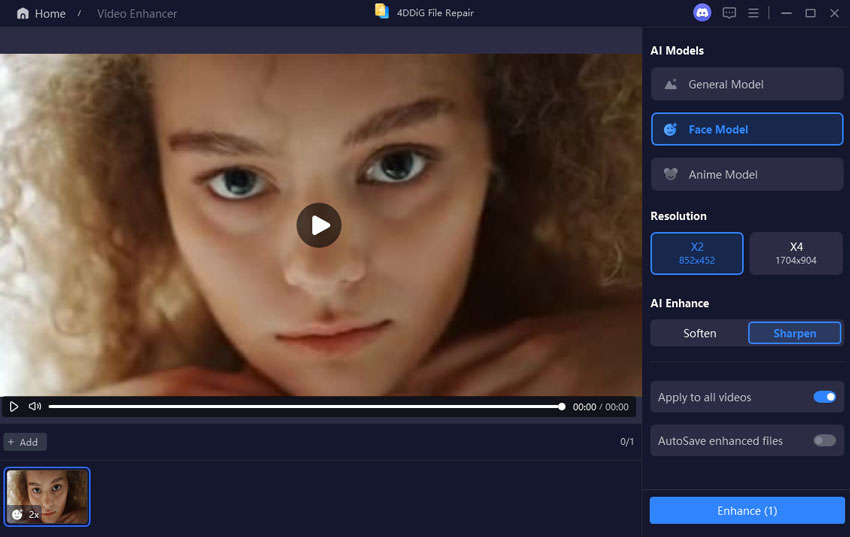
Step 3.Select AI Model & Output Resolution
There are three AI models tailored for various video enhancement needs: General Model, Anime Model, and Face Model. Select your desired model, adjust the output file's resolution if needed, and then click "Enhance".

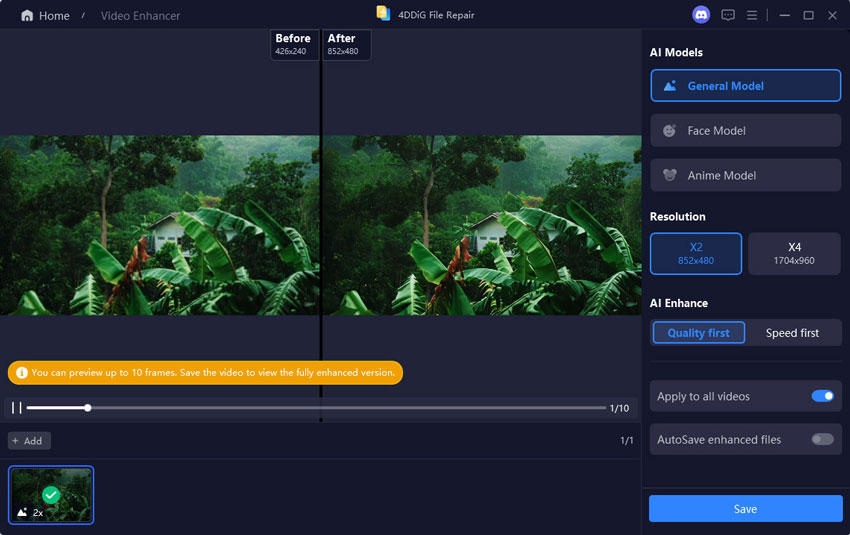
- General Model: Designed for enhancing a wide variety of videos, including landscape, animal, travel, and event footage, this model improves the overall quality by refining details, reducing noise, and enhancing clarity.
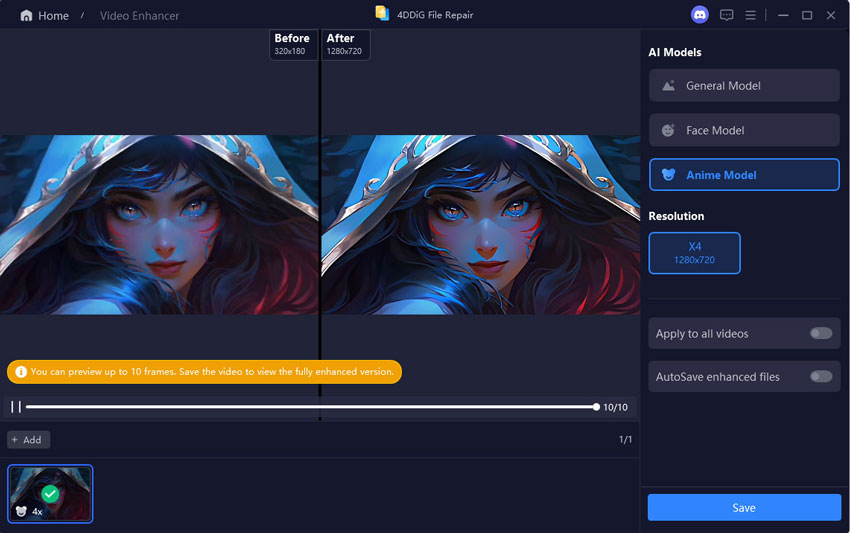
- Anime Model: Tailored for anime or cartoon-style videos, this model sharpens lines, enhances colors, and improves the overall visual quality of anime to make it look more smooth and vibrant.
- Face Model: Ideal for videos focusing on faces, like vlogs or interviews, this model works to enhance facial details, improve skin textures and make faces appear more detailed and clear.
-
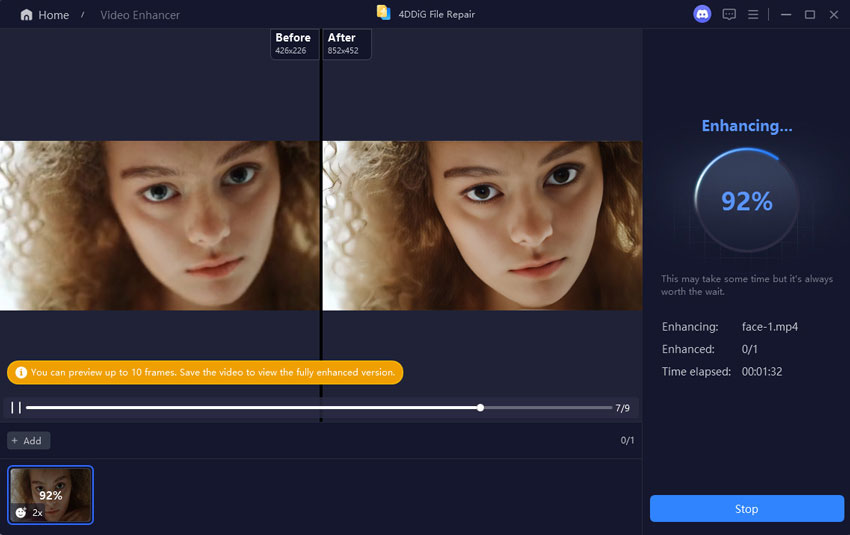
Step 4.Build AI Model and Enhance Videos
The tool will start building the selected AI model and apply it to enhance your video. Wait patiently for it to remove noise, sharpen details, and improve the overall clarity. Once done, you'll be presented with a preview of the initial 10 improved frames.

-
Step 5.Preview & Save Enhanced Videos
Adjust the view and zoom to inspect the results. If the output is not what you expected, try different AI models or adjust the resolution to re-enhance your video. Once satisfied with the settings and preview, click "Save" to save the enhanced footage to your computer.

Enhanced Video with the General Model:

Enhanced Video with the Anime Model:

Each AI model has its own strengths and is suitable for different types of videos. Here's a brief overview of each model:
2.2 Enhance Photo Quality
With 4DDiG File Repair, enhancing photo quality has never been such easier. It can upscale, sharpen and enhance every detail of your low-quality photos. Whether you're looking to make blurry photos clear, improve the clarity of low-resolution images, or refine your recent photos, this AI photo enhancer will meet all your needs. You can follow these steps to enhance photo quality in an instant. To get started, download and install the software on your computer.
Secure Download
Secure Download
-
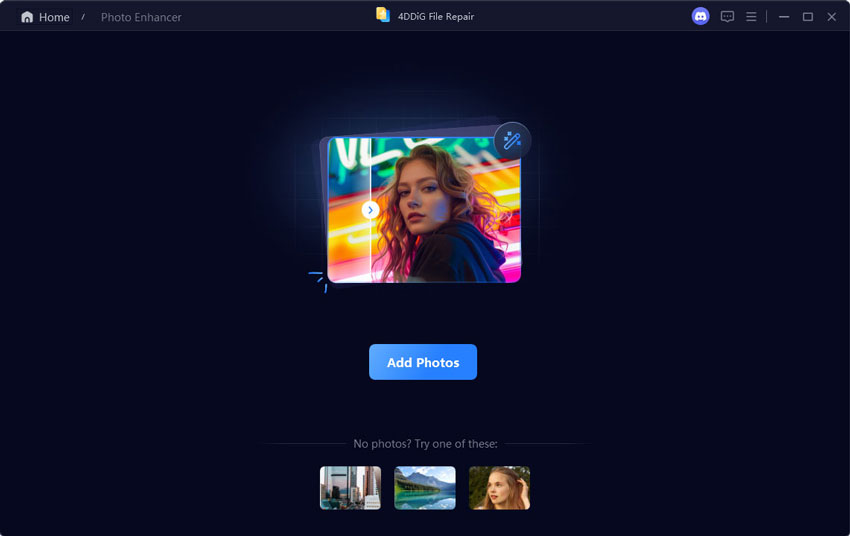
Step 1.Select Photo Enhancer
Launch the 4DDiG File Repair software. Navigate to "AI Enhancer" on the left sidebar and then click on the "Photo Enhancer" option.

-
Step 2.Add Photos to Enhance
Click "Add Photos" to choose the blurry, low-resolution or bad-quality images you want to enhance from your computer, or simply drag and drop them into the software window.

-
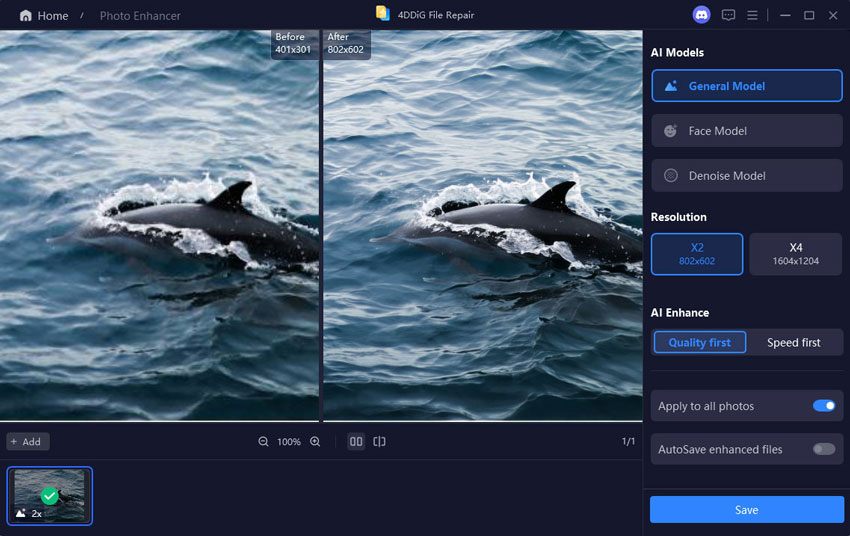
Step 3.Select AI Model & Output Resolution
The tool offers three AI models: General Model, Denoise Model, and Face Model, each designed for specific photo types. Choose the model that best suits your needs, adjust the resolution if necessary, and click "Enhance".

- General Model: Suitable for all types of images, including natural landscapes, buildings, animals, etc. It focuses on improving overall image quality by adjusting brightness, contrast, and color balance, sharpening details, and reducing general imperfections.
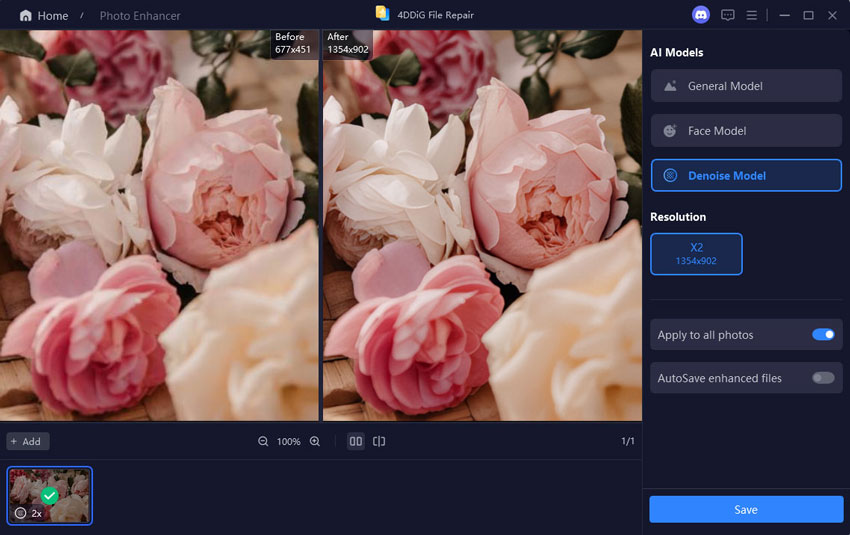
- Denoise Model: Specialized in reducing noise in images, removing unwanted artifacts such as grain and color distortion in low-light conditions or high ISO settings. Suitable for night shots, indoor photos, or images with noise.
- Face Model: Ideal for professional portraits, group photos, and any image where facial clarity and expression are paramount. It can optimize and refine facial features, skin tones, and overall clarity.
-
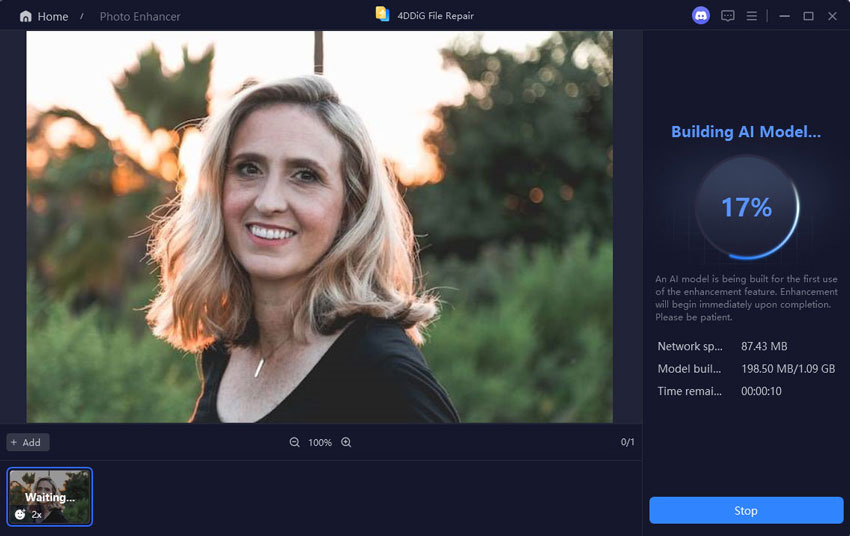
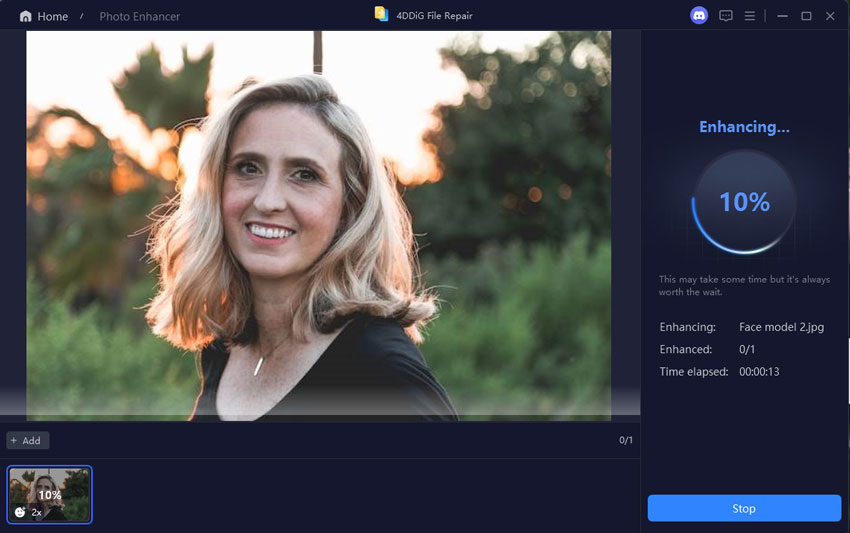
Step 4.Build AI Model and Enhance Photos
The tool will start building the selected AI model and apply it to enhance your blurry, low-resolution or bad-quality image.

Wait patiently for the tool to remove noise, sharpen details, and improve the overall clarity of your photos.

-
Step 5.Preview & Save Enhanced Photos
Adjust the view and zoom to inspect the enhanced image. If the output is not what you expected, try different AI models or adjust the resolution to re-enhance your photo. Once satisfied with the settings and preview, click Save to export the final output.

➤ Enhanced Image with the General Model:

➤ Enhanced Image with the Denoise Model:

Each AI model has its own strengths and is suitable for different types of photos. Here's a brief overview of each model:
2.2.1 Retouch Photos & Remove Blemish
4DDiG File Repair comes with a new feature, which allows you to retouch your images, improving visual quality, correcting imperfections, etc. Most importantly, this AI-driven tool empowers users to remove blemishes (e.g., acne, pimples, papules, zits, scars, freckles, and others) from the face or skin. With its help, users don't need to cover the cost of expensive photo retouching services. Just with one click, you can achieve smooth face and skin on portraits, headshots, and other pictures.
-
Step 1.Select Photo Enhancer
Launch the 4DDiG File Repair software. Navigate to "AI Enhancer" on the left sidebar and then click on the "Photo Enhancer" option.

-
Step 2.Add Photos to Retouch
Click "Add Photos" to choose the blurry, low-resolution or bad-quality images you want to enhance from your computer, or simply drag and drop them into the software window.

-
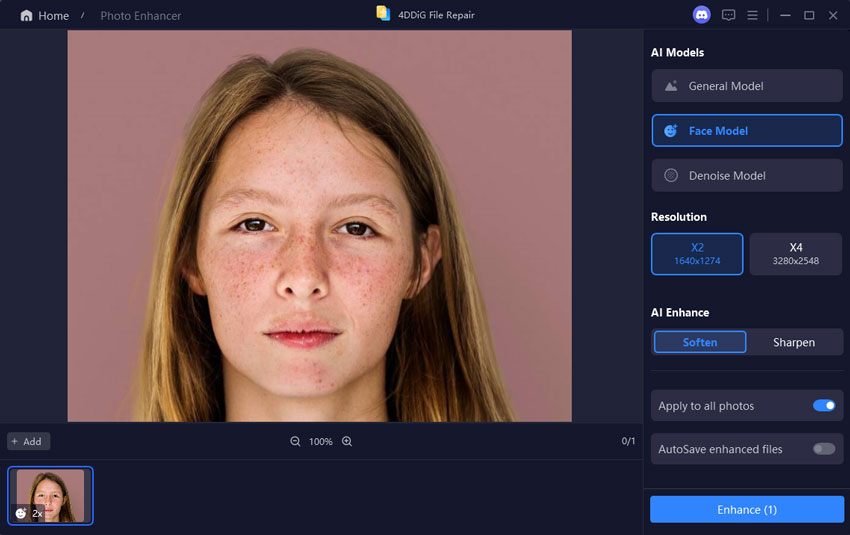
Step 3.Select Face Model, Soften, and Output Resolution
Once added, select "Face Model" from the AI Models section and choose "Soften" under the AI Enhance tab. Select a resolution and then click "Enhance" to kick off the photo retouching and blemish removal process.

-
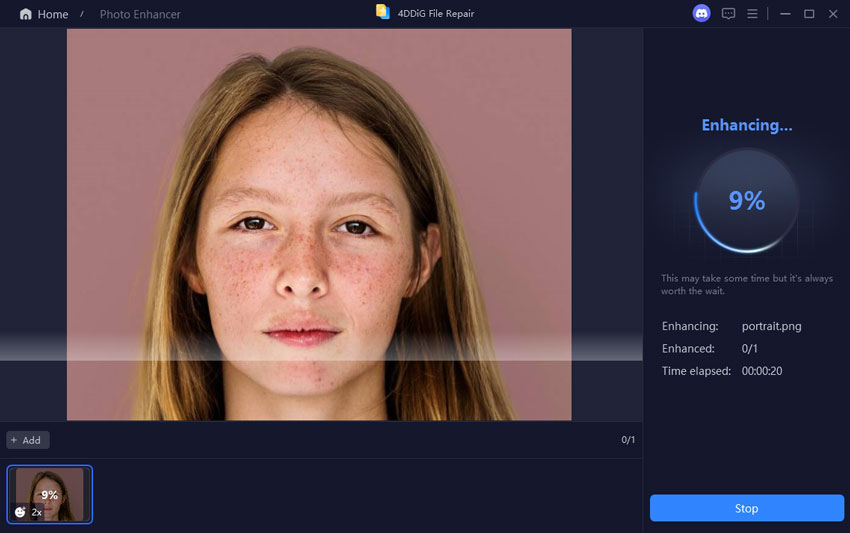
Step 4.Build Face Model and Retouch Photos
After clicking "Enhance", this AI software will start building the selected Face Model, removing blemishes, and retouching the image. Please wait patiently.

-
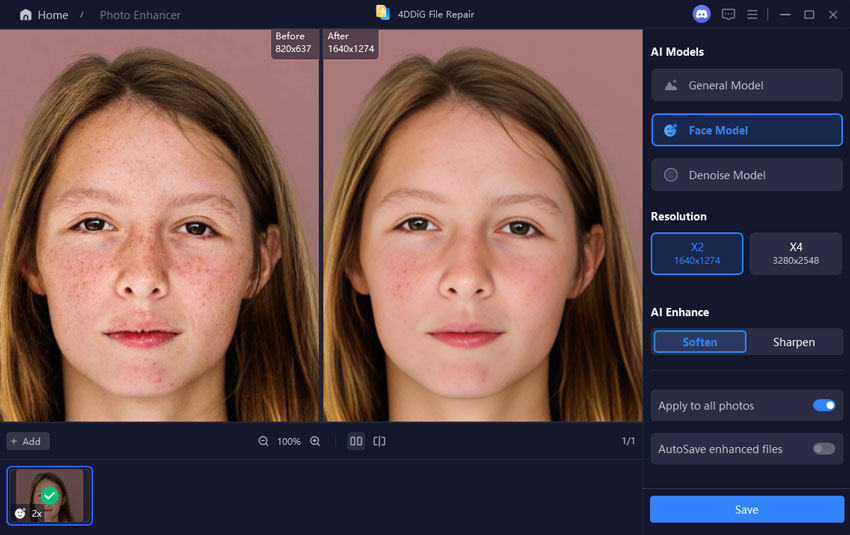
Step 5.Check & Export Retouched Photos
Adjust the view and zoom to inspect the retouched image. Once satisfied with the settings and preview, click "Save" to export the final output.

2.3 AI Image Style Transfer
Discover 4DDiG File Repair's AI Image Style Transfer, powered by the latest Midjourney AI. Unlike traditional tools requiring complex prompts and trial-and-error, it offers ready-made style templates. Simply upload a photo and apply popular styles with one click to instantly create stunning artistic creations.
The feature supports many trending styles (such as K-drama dreamy snow scenes, festive themes, Pixar animation, K-pop vibes, etc.) while preserving facial details and image quality for natural, professional results. No design skills needed, perfect for social media creators, marketers, pet lovers, or personal projects. A “Create Your Own” option is also available for custom creativity.
Secure Download
Secure Download
-
Step 1.Select AI Image Style Transfer
Install and launch the 4DDiG File Repair software. On the home screen, head to AI Enhancer > AI Image Style Transfer option.

-
Step 2.Select a Style & Upload an Photo to Restyle
Browse and select from pre-built trending style templates in Theme Plaza. Then add the image you want to transform and restyle (e.g., portrait, pet, couple photo). No prompts needed.
Notes
Or use the "Create Your Own" option: Simply describe your desired style/concept in plain words to turn your own ideas into stunning images.


-
Step 3.Apply the Style into Uploaded Images
Once done, click Generate to transfer the chosen style (or custom one) to your photo in just one click. The tool will process the uploaded image and apply the selected style into the photo naturally.
New Year Celebration

Dreamy Snowland

Christmas Magic

Pet Christmas Makeover

Avatar Universe

Pixar-Style Pets

AI Body Profile

AI Couple Scenes

AI World Travel

AI K-pop Idol Transformation

Pet Astronaut

AI Meme Generator

-
Step 4.Preview & Save Generated AI Images
When finished, preview the generated AI image. If satisfied with it, click Export to save it. Otherwise, click Regenerate to try again.

2.4 AI Expand Image
With 4DDiG File Repair and its powerful AI Content-Aware and Generative Fill technology, expanding images has never been so simple. It can intelligently generate new areas, but also seamlessly complete half-missing parts of your photos. By entering a prompt, the tool will precisely capture your needs, accurately extending with new content or filling missing parts.
Whether you want to restore cropped edges or extend backgrounds, this AI image expander can meet all your needs. By analyzing colors, textures, and details, it ensures the new content blends naturally with the original photo. You can follow these steps to outpaint or inpaint your images in an instant.
Secure Download
Secure Download
-
Step 1.Select AI Expand Image
Install and launch the 4DDiG File Repair software. Navigate to AI Enhancer on the left sidebar and then click on the AI Expand Image option.

-
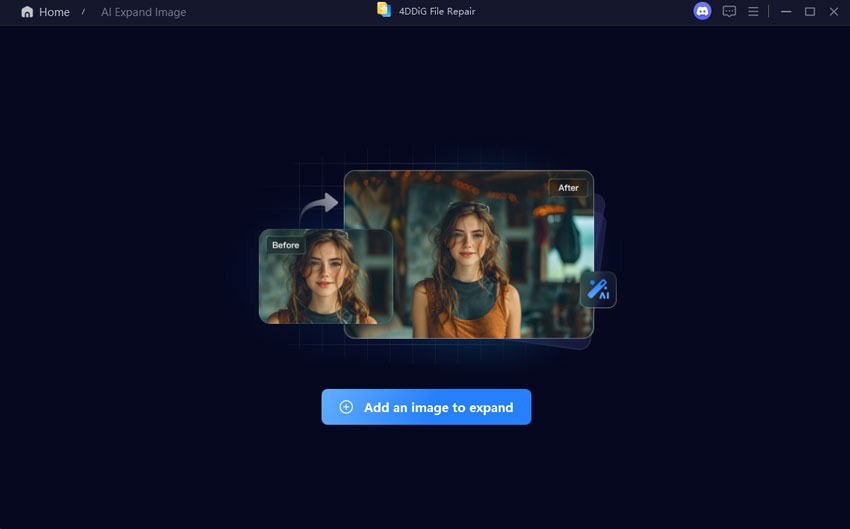
Step 2.Add an Image to Expand
Click Add an image to expand to choose the image (JPG or JPEG) you want to expand from your computer, or simply drag and drop it into the software window.

-
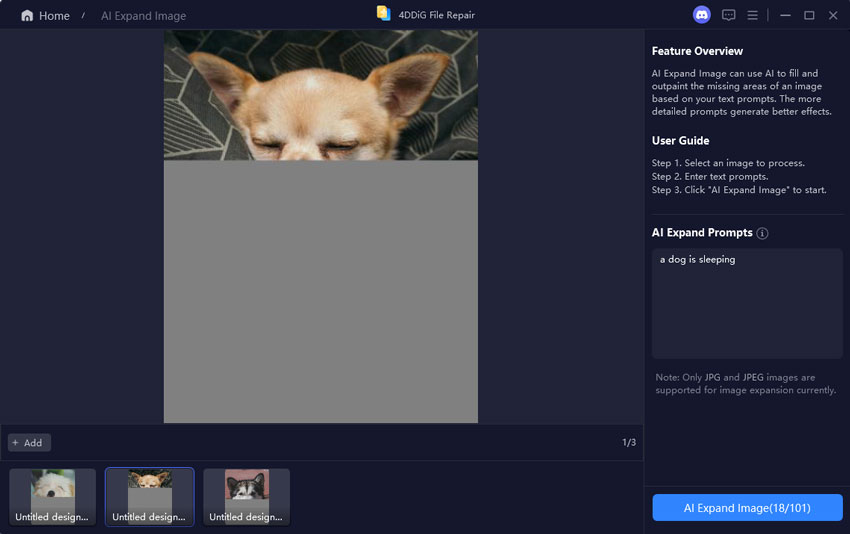
Step 3.Enter AI Expand Prompt in English
Enter a text prompt in English to describe the missing or extended parts you want to generate in the image. A more detailed prompt will deliver better results.

-
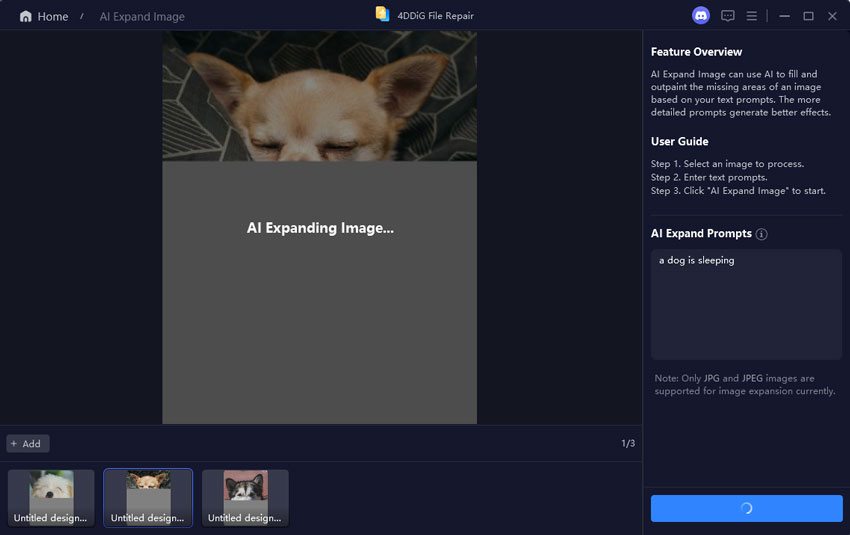
Step 4.Generate Expanded Image with AI
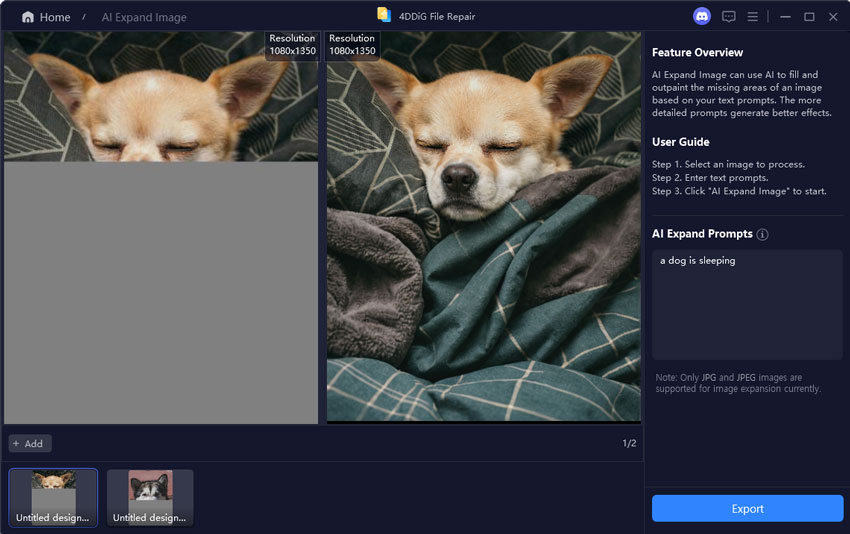
The tool will process your prompt and start generating the expanded image. Please wait while the AI analyzes the photo and fills in the missing parts with natural colors, textures, and details. Once the process is complete, preview the result.

-
Step 5:Preview and Save Expanded Image
Click Export, then select the destination folder where you want to save the expanded image. After confirming with OK, the file will be saved to your selected location. You can also click Open Folder to quickly access the saved image on your computer.

2.5 Colorize B&W Videos
Don't let your precious memories fade away. With 4DDiG File Repair's colorization feature, you can restore your old black and white videos to their former glory. This powerful AI video colorizer can automatically add natural and realistic colors to your video files, bringing back lost details and textures. Whether you're working on historical films or family archives, you can easily colorize your black and white videos. Before you start, download and install the software on your computer.
Secure Download
Secure Download
-
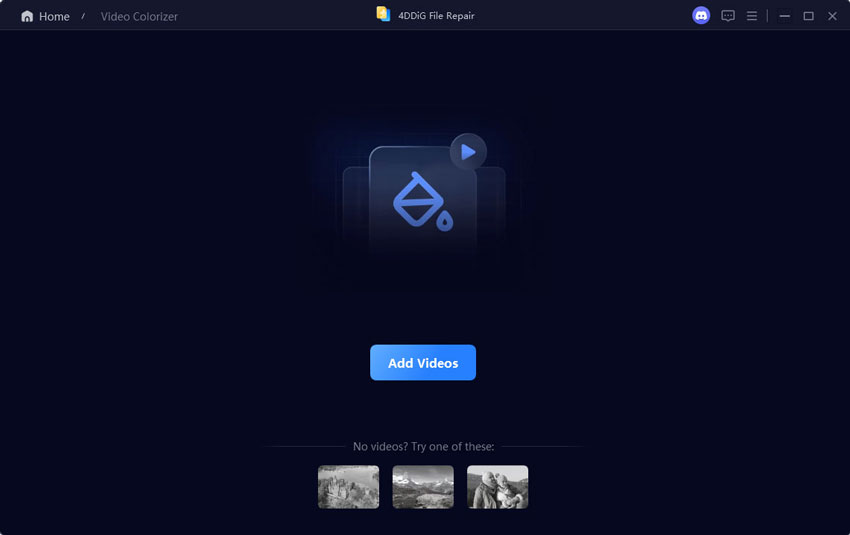
Step 1.Select Video Colorizer
Launch the 4DDiG File Repair software. Navigate to "AI Enhancer" on the left sidebar and then click on the "Video Colorizer" option.

-
Step 2.Add Black and White Videos
Click the "Add Videos" button or drag and drop your black-and-white videos to import them for colorization.

-
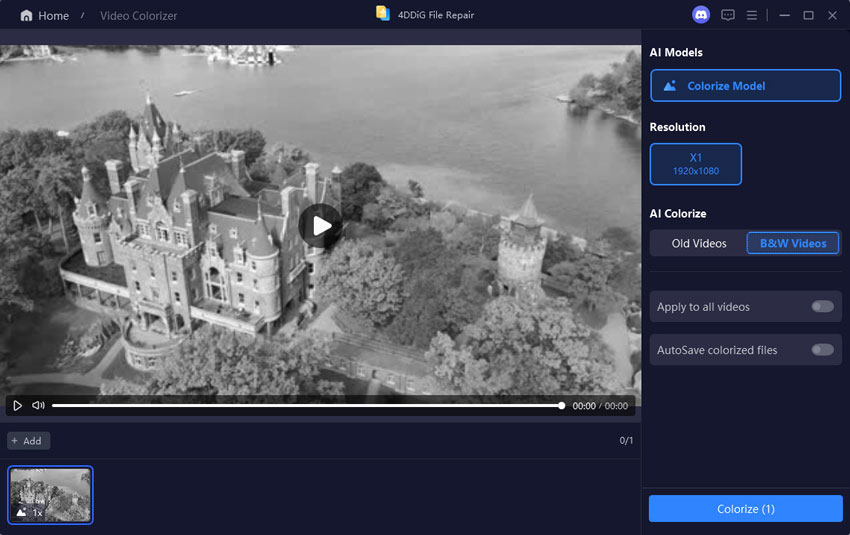
Step 3.Select AI Model & Output Resolution
Select a desired AI model and resolution for your videos to be colorized, and click "Colorize" to begin the process.

-
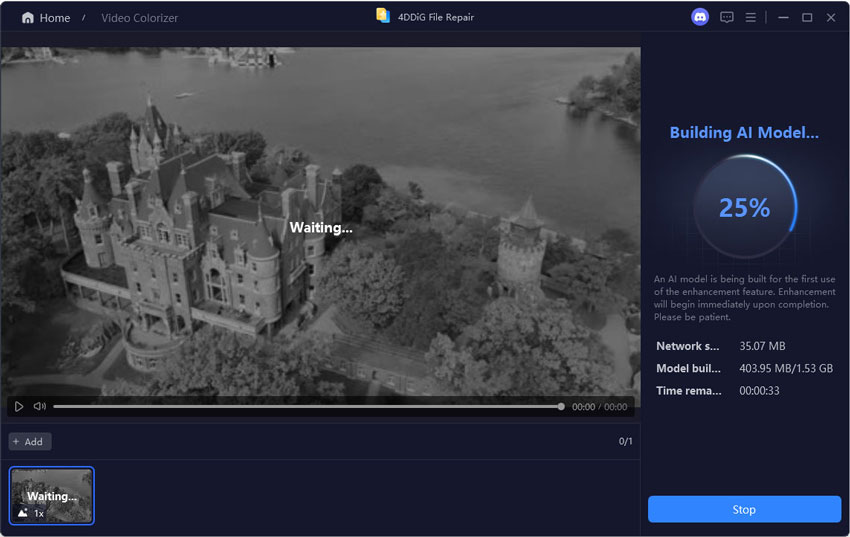
Step 4.Build AI Model & Colorize Videos
The AI tool will automatically analyze and add color to your footage, and generate a preview of the colorized video. Wait patiently as the auto colorization process may take some time, depending on the length and complexity of your video.

-
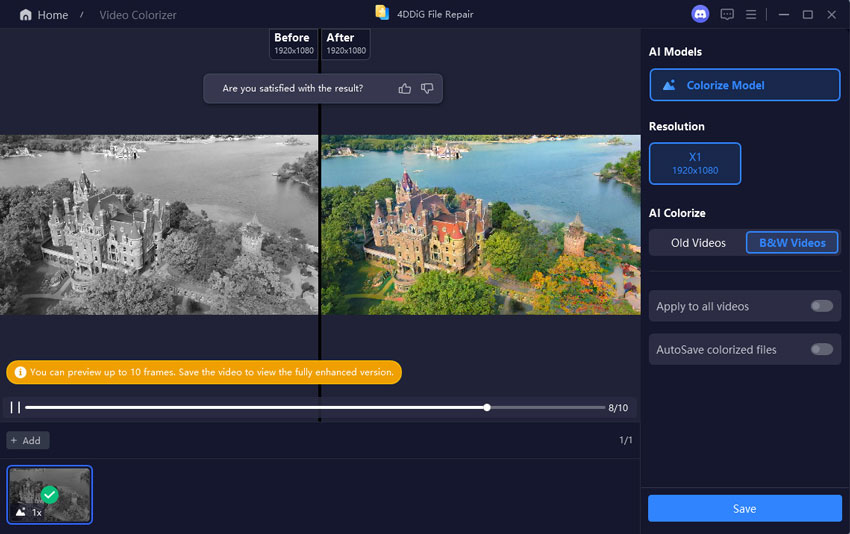
Step 5.Preview & Save Colorized Videos
Inspect the colorization quality and make further adjustments if necessary. When you're done with your video, click "Save" and choose a location for saving the colorized videos. Wait for the AI Colorizer to process the entire video and save them to your computer.

2.6 Colorize B&W Photos
Bring your old black-and-white photos back to life with 4DDiG File Repair! This AI-powered photo colorizer can add vibrant colors to your images in just a few simple steps. Whether it's a family portrait, landscape, or candid snapshot, your photos will look as vivid as the day they were taken. Download and install the software to get started.
Secure Download
Secure Download
-
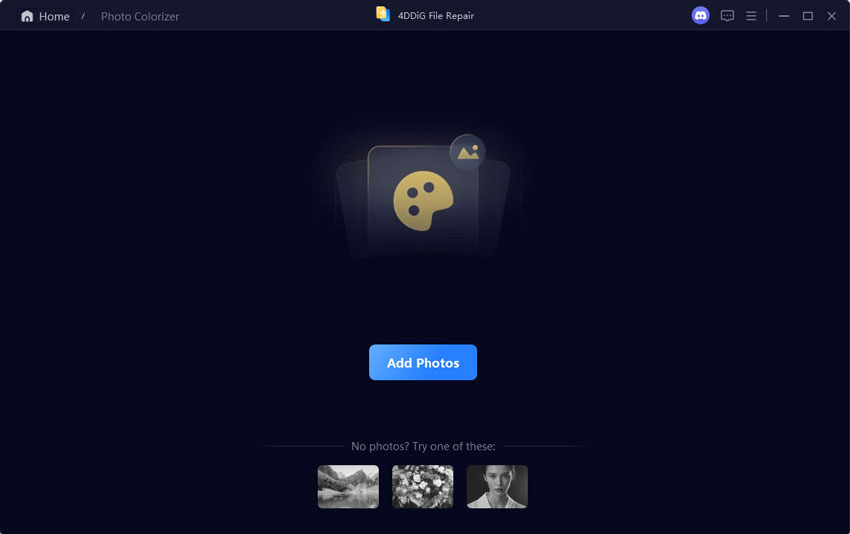
Step 1.Select Photo Colorizer
Launch the 4DDiG File Repair software. Navigate to "AI Enhancer" on the left sidebar and then click on the "Photo Colorizer" option.

-
Step 2.Add Black and White Photos
Click on "Add Photos" to upload your black and white images or drag and drop them directly into the interface.

-
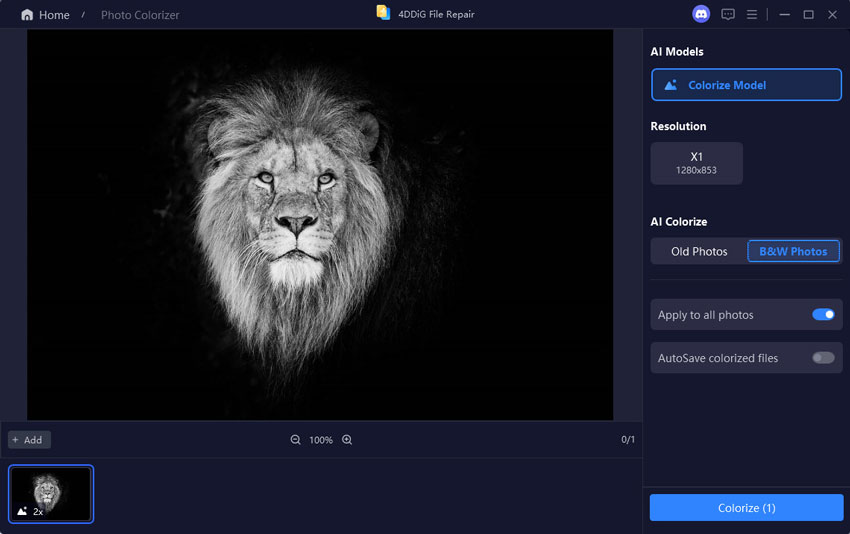
Step 3.Select AI Model & Output Resolution
Select a desired AI model and resolution for your images to be colorized, and click "Colorize" to begin the process.

-
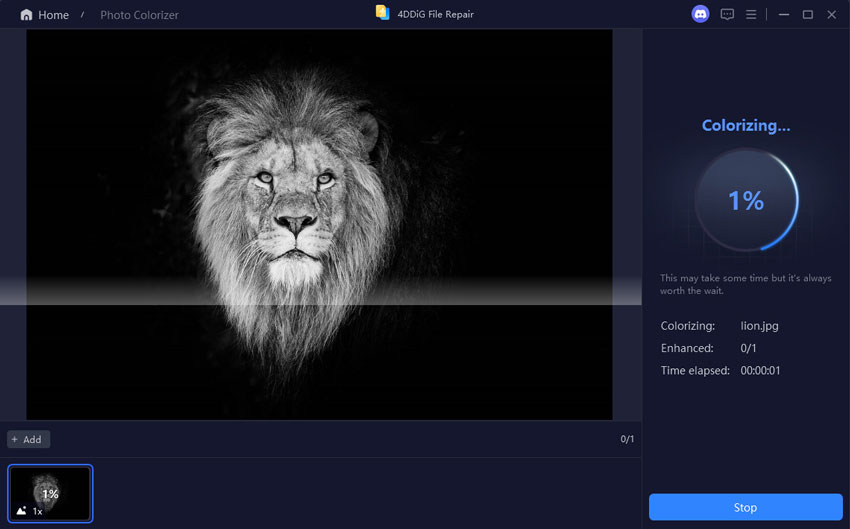
Step 4.Build AI Model & Colorize Photos
Select a desired AI model and resolution for the output colorized image, and click "Colorize" to begin the process.

-
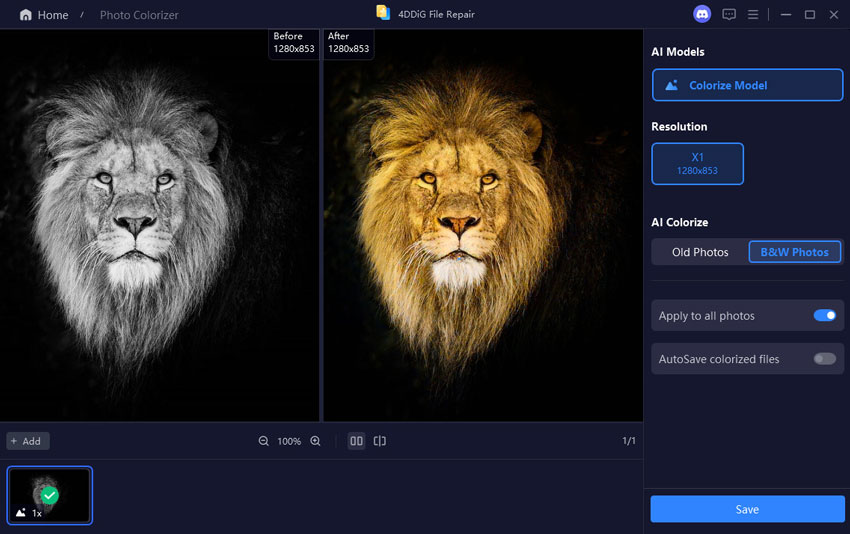
Step 5.Preview & Save Colorized Photos
Inspect the colorization quality and make further adjustments if necessary. When you're done with all your photos, click the "Save" button to export the colorized photos. You can click on "Open Folder" to navigate to the repaired file's location on your computer.


