How to Use 4DDiG DLL Fixer to Fix DLL Errors on Windows at Ease
This is the official guide of 4DDiG DLL Fixer. Here you will find step-by-step tutorials about how to fix dll erros in Windows 10 and 11.
4DDiG DLL Fixer is an all-in-one tool designed to resolve various DLL-related issues that are causing programs to malfunction on Windows systems. Whether you're dealing with DLL missing or corrupt errors, runtime errors, or DirectX issues, this comprehensive guide will walk you through the process of using 4DDiG DLL Fixer to resolve these problems effortlessly.
Ensure you have a stable internet connection during the repair process to download any necessary DLL files.
How to Run a Full Check?
DLL errors can often disrupt the smooth functioning of applications and the overall performance of your computer. If you're experiencing issues like programs not running or games failing to launch, run a full check of your system with 4DDiG DLL Fixer to identify and repair any missing or corrupted DLL files.
Secure Download
-
Step 1:Select “Full Check”
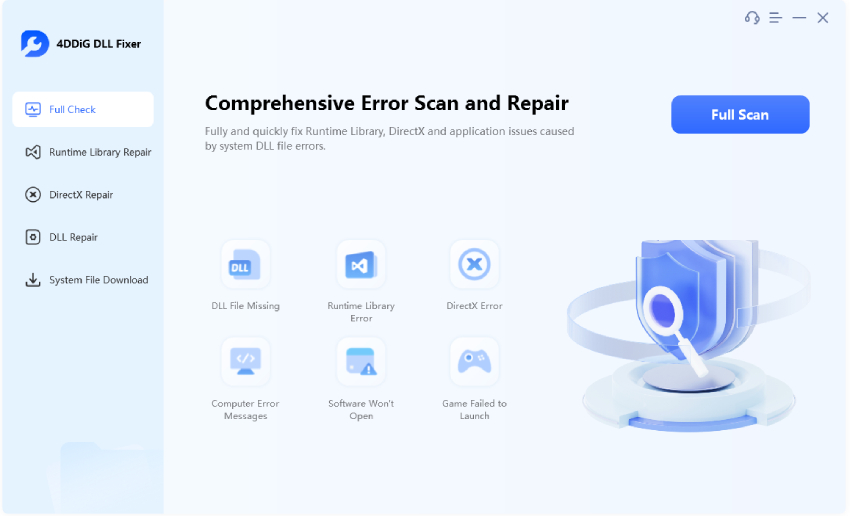
Download and launch 4DDiG DLL Fixer on your Windows system. Navigate to the "Full Check" tab on the main interface and click "Full Scan" to allow the fixer to thoroughly scan your system for errors.
-
Step 2:Start Repairing DLL Errors
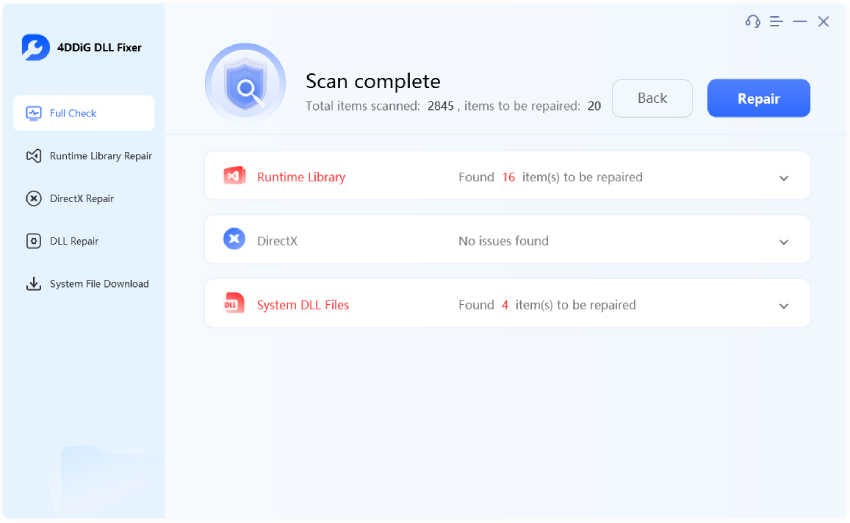
Once the scan is complete and any issues are detected, click on the "Repair" button. The tool will automatically repair and replace missing or corrupted DLL files.
-
Step 3:Repair DLL Errors Successfully
Wait for the repair proess to complete. Upon completion, any missing DLL file should be downloaded and placed in the correct location.
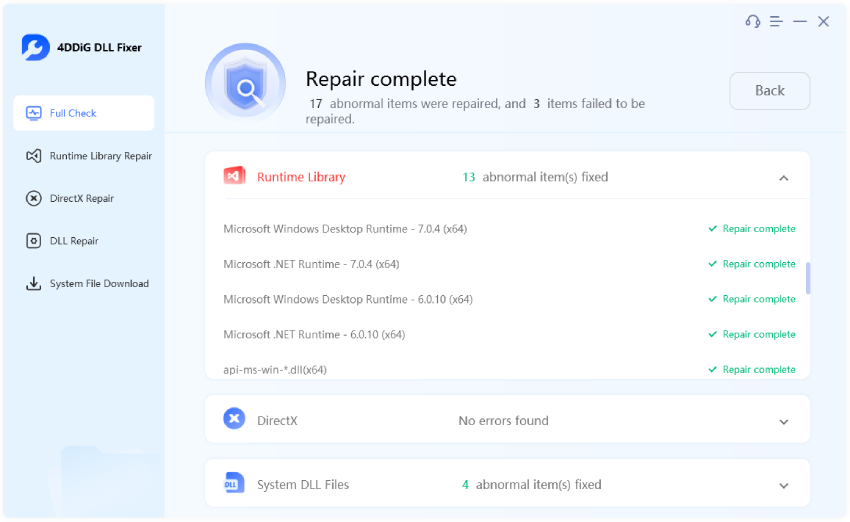
You can now try running your program andit should open and run without issues.
How to Fix Runtime DLL Errors?
Sometimes, you may encounter issues where your program cannot start as the DLL file associated with Microsoft Visual C++ Redistributable like msvcr110.dll, msvcp100.dll, vcomp100.dll or vcruntime140.dll is missing from you computer. 4DDiG DLL Fixer helps you solve these DLL missing errors easily and quickly.
Secure Download
-
Step 1:Select "Runtime Library Repair"
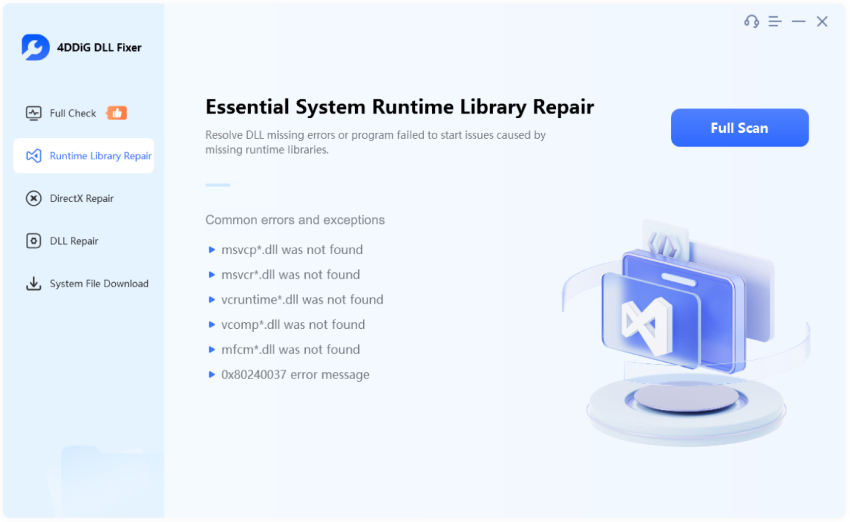
Download and launch 4DDiG DLL Fixer. Go to the Runtime Library Repair tab and click on “Full Scan” for the tool to flag all your missing DLLs.
-
Step 2:Start Repairing Runtime DLL Errors
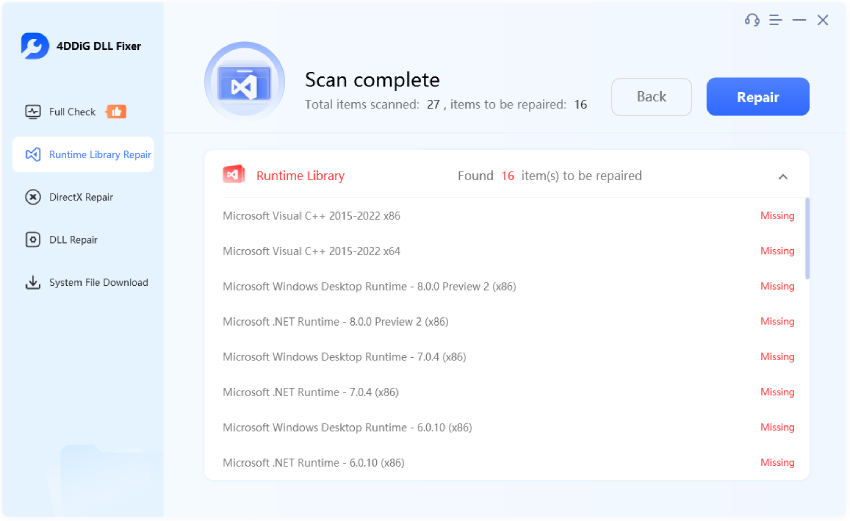
Once the system scan is completed, 4DDiG DLL Fixer will display a list of all the missing runtime DLL files. Click the "Repair" button to start the DLL fixing process.
-
Step 3:Repair Runtime DLL Errors Successfully
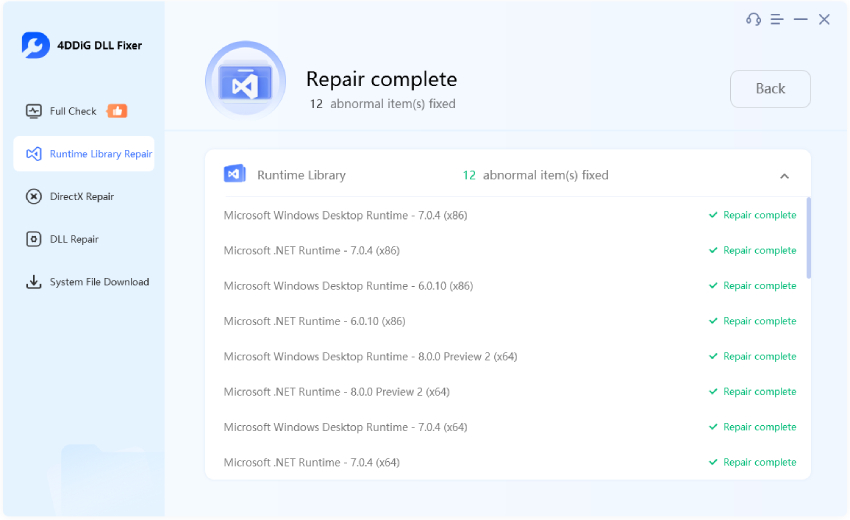
4DDiG DLL Fixer will then download and replace the missing or corrupted DLL files on your computer. Once done, restart the affected program and check if it runs properly.
How to Fix DirectX Errors?
4DDiG DLL Fixer can resolve DLL-related system errors commonly encountered in gaming and graphics applications. If you're experiencing difficulties launching games or graphic tools due to DLL files like xinput1_3.dll, d3dcompiler_43.dll, and others being missing, follow these steps to fix them.
Secure Download
-
Step 1:Select “DirectX Repair”
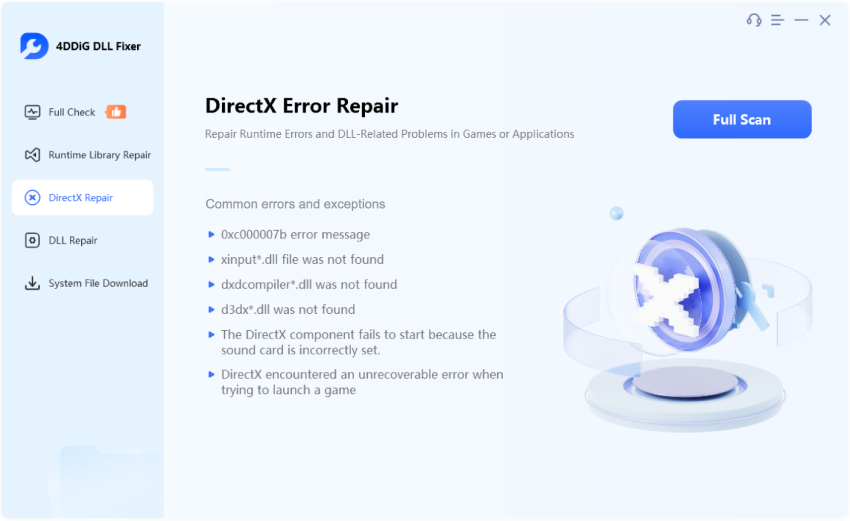
Download and run 4DDiG DLL Fixer on your Windows PC. Choose DirecX Repair from the left sidebar menu and click the "Full Scan" button to identify DirectX-related issues on your system.
-
Step 2:Start Repairing DirectX Issues
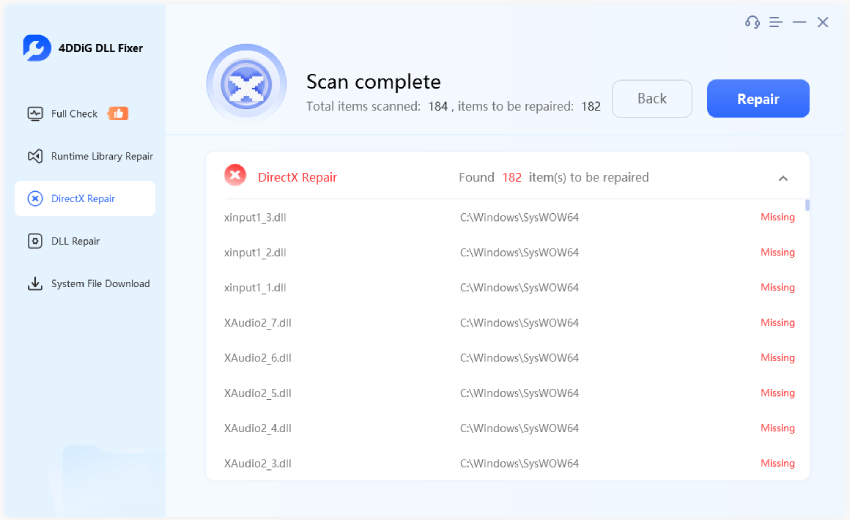
Once the scan is complete, a list of identified issues related to DirectX will be displayed. Review the list and click the "Repair" button to automatically resolve the identified problems.
-
Step 3:Repair DirectX Errors Successfully
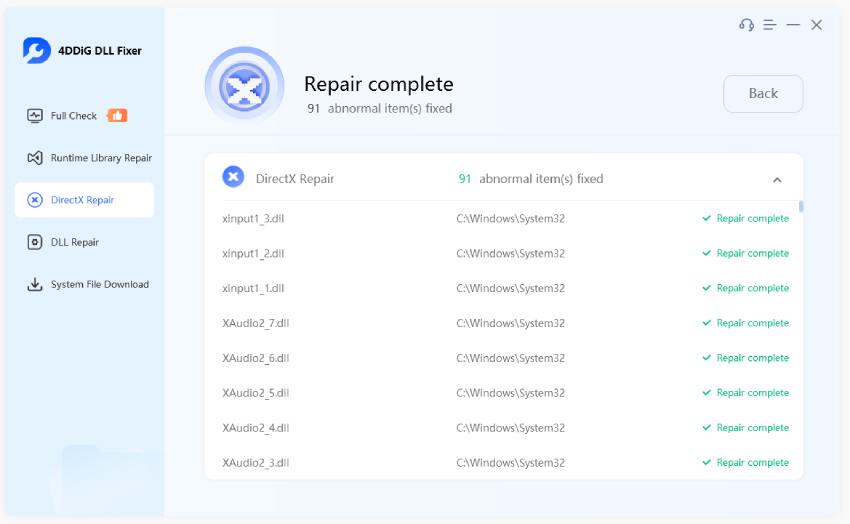
Wait for the tool to fix and restore the missing DLL files associated with DirectX. Once the process is complete, your system will be ready to run games and graphic tools without encountering DirectX-related errors.
How to Fix DLL Missing or Corrupt Errors in Windows?
Your may encounter system errors when running games or applications if the required DLL file like accessibilitycpl.dll or hnetcfg.dll is deleted, missing, or corrupted. 4DDiG DLL Fixer is here to help you repair any missing or corrupred DLLfiles associated with your Windows operating system.
Secure Download
-
Step 1:Select "DLL Repair"
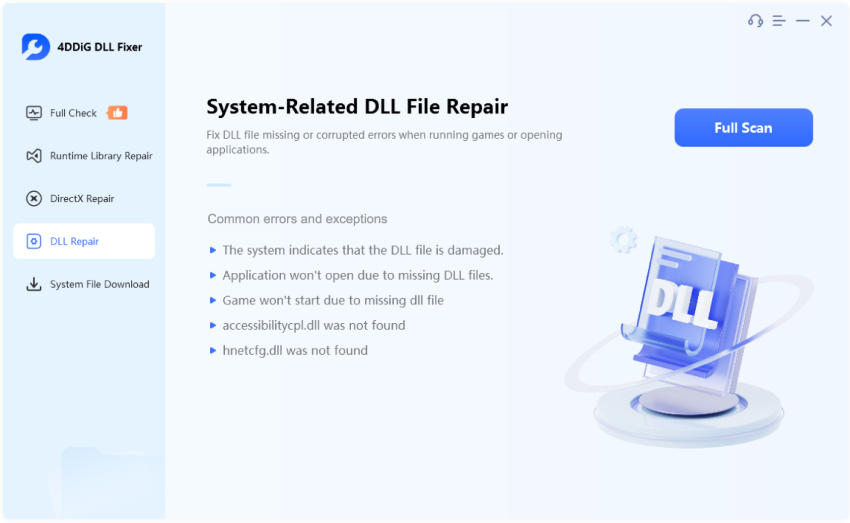
Download and launch 4DDiG DLL Fixer on your Windows PC. Navigate to the DLL Repair tab on the left menu bar and then click on the “Full Scan” button. The Fixer will conduct a thorough scan for system-related issues.
-
Step 2: Start Repairing System DLL Errors
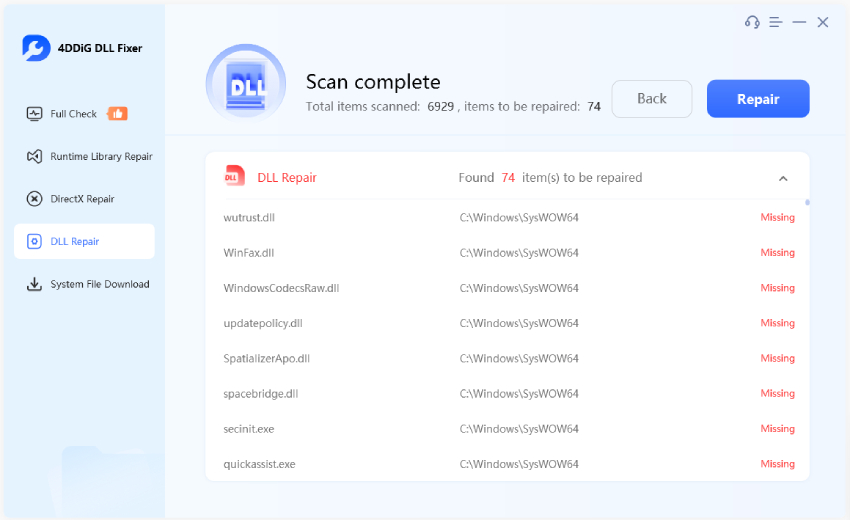
When the scanning process is over, you will be shown a list of missing or corrupted DLL files that need repair. Click on the "Repair" button to start the automatic repair process.
-
Step 3:Repair System DLL Errors Successfully
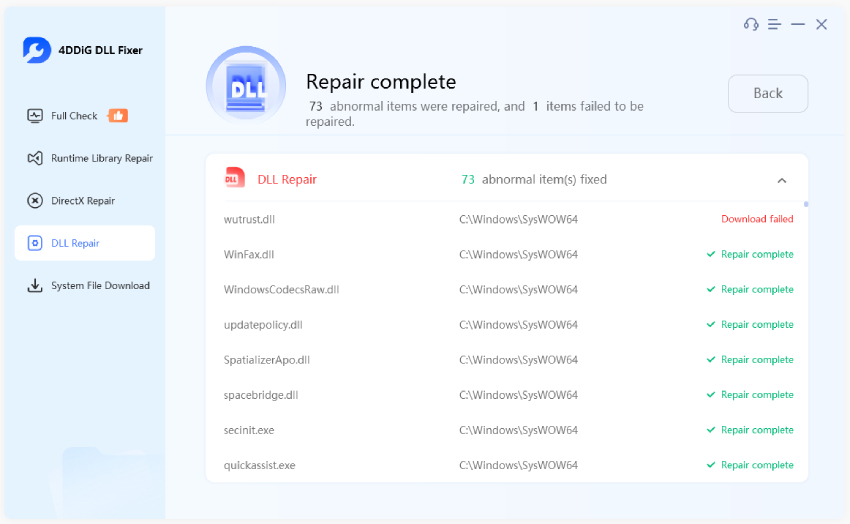
Wait for the tool to complete the repair process. It will replace the missing or damaged DLL files with fresh, clean, and up-to-date versions.
